


 本文分享了一个简洁清爽的博客样式配置方案,通过调整CSS样式实现美观大方的页面布局,包括字体、颜色、间距等细节。
今天下午,在博客园上设置个人的博客的样式,配置了很久,但是效果任然很复杂,后来看到了一个人的博客,页面十分的干净清爽。
这个是他的博客主页:http://www.cnblogs.com/jcomey/
所以就发了信息给他,想问他如何配置,后来他发我一份邮件,里面是他的博客的css样式
而我现在将其抄录下来。
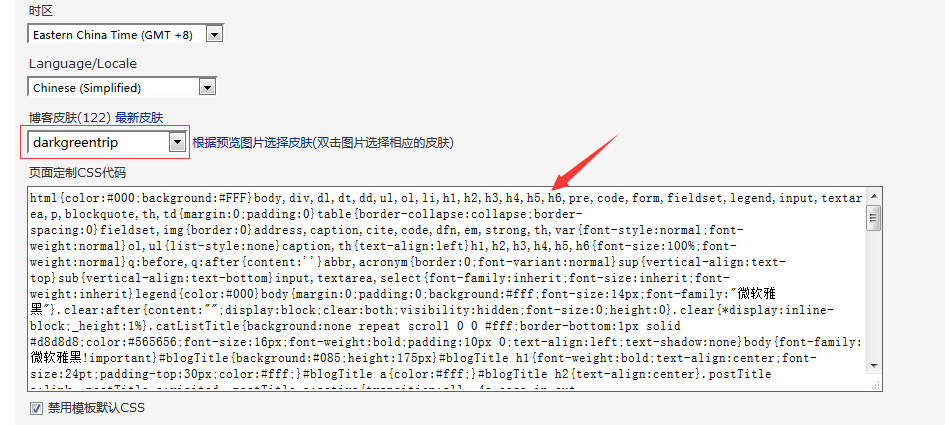
接下来是他发给我的css样式
html{color:#000;background:#FFF}body,div,dl,dt,dd,ul,ol,li,h1,h2,h3,h4,h5,h6,pre,code,form,fieldset,legend,input,textarea,p,blockquote,th,td{margin:0;padding:0}table{border-collapse:collapse;border-spacing:0}fieldset,img{border:0}address,caption,cite,code,dfn,em,strong,th,var{font-style:normal;font-weight:normal}ol,ul{list-style:none}caption,th{text-align:left}h1,h2,h3,h4,h5,h6{font-size:100%;font-weight:normal}q:before,q:after{content:''}abbr,acronym{border:0;font-variant:normal}sup{vertical-align:text-top}sub{vertical-align:text-bottom}input,textarea,select{font-family:inherit;font-size:inherit;font-weight:inherit}legend{color:#000}body{margin:0;padding:0;background:#fff;font-size:14px;font-family:"微软雅黑"}.clear:after{content:"";display:block;clear:both;visibility:hidden;font-size:0;height:0}.clear{*display:inline-block;_height:1%}.catListTitle{background:none repeat scroll 0 0 #fff;border-bottom:1px solid #d8d8d8;color:#565656;font-size:16px;font-weight:bold;padding:10px 0;text-align:left;text-shadow:none}body{font-family:微软雅黑!important}#blogTitle{background:#085;height:175px}#blogTitle h1{font-weight:bold;text-align:center;font-size:24pt;padding-top:30px;color:#fff;}#blogTitle a{color:#fff;}#blogTitle h2{text-align:center}.postTitle a:link,.postTitle a:visited,.postTitle a:active{transition:all .4s ease-in-out 0}.comment_btn{background:#f60;color:#fff;height:auto;width:auto;border:1px solid #f30;font-size:16pt;out-line:none;padding:15px 25px}.comment_btn:hover{background:#f30;transition:all .4s linear 0;cursor:pointer}.dayTitle{border:1px solid #f60;background:#fff;border-radius:50%;font-size:12px;height:70px;line-height:1.5;margin:15px;margin-bottom:-70px;text-align:center;width:70px}.day{position:relative;padding-top:35px 0;background:url("http://files.cnblogs.com/jcomey/dot.gif") repeat-y scroll 50px 0 rgba(0,0,0,0)}textarea{border:1px solid #d8d8d8}#div_digg{float:left}textarea:focus{border-color:#da8;transition:all .3s linear 0;}#green_channel #green_channel_contact{background:#6b9f40}#green_channel #green_channel_digg{margin-left:-70px}#green_channel{border:0}#navList{ background: #f5f5f5 none repeat scroll 0 0; border-radius: 40px; margin: 20px auto; padding: 10px 0; width: 920px;}#navList li{display:inline-block;margin:0 10px;}#navList li a{color:#454545;height:16px;line-height:16px;white-space:nowrap;padding:4px 6px}#navList li a:hover{transition:all .3s linear 0;color:#f60}#main{width:980px;margin:0 auto}a[href^=http]{ text-decoration:none}a[href^=http]:hover{color:#f60;transition:all .3s linear 0;text-decoration:underline}.dayTitle a{display:inline-block;color:#f60;margin-top:15px;width:60px}.postTitle a{font-size:16pt;color:#313131;font-weight:700}.postCon{color:#999;line-height:2;margin-left:100px}.c_b_p_desc{line-height:2;padding-right:15px;text-align:justify}.c_b_p_desc_readmore{display:block;clear:both;border-top:1px dashed #e8e8e8;padding:10px 0}.c_b_p_desc_readmore:after{content:""}#footer,#post_next_prev>br{display:none}#author_profile,#ad_under_post_holder,#site_nav_under,#under_post_news,#google_ad_c,.c_ad_block,#under_post_kb{visibility:hidden;display:none}#leftcontentcontainer{height:300px;position:fixed;right:0;top:300px;background:#f8f8f8;padding:0;width:160px}#EntryTag>a{background:none repeat scroll 0 0 #e6c226;border-radius:3px;font-size:12px;padding:2px 5px}.entrylistTitle{background:none repeat scroll 0 0 #f8f8f8;border:1px solid #d8d8d8;border-radius:5px;font-size:16pt;padding:5px 0;text-align:center}.forFlow{background:#fff}.entrylistPosttitle{font-size:14pt;font-weight:bold}.entrylistItem{margin:30px 0}.desc_img{float:right;margin:0 0 20px 20px;width:150px}.postTitle{ border: 1px dashed #d3d4d6; margin-left: 100px; padding: 15px 0; text-align: center;}.postDesc{display:none;}.post{padding: 0 30px 30px;background:url(http://files.cnblogs.com/jcomey/post-bg.gif) 0 bottom repeat-x;}.post .postDesc,.post .postTitle{margin-left:0}.entrylist{padding:30px}#comment_nav{text-align:center;padding:10px;}#comment_nav a{background:none repeat scroll 0 0 #def;border-radius:5px;color:#249;margin:10px;padding:2px 8px;text-decoration:none}
.postBody{line-height:1.5;}
#cnblogs_post_body p {
margin: 10px auto;
text-indent: 0;
}
.feedbackItem {
background: none repeat scroll 0 0 #f2f3f4;
padding: 5px 15px;
}
.feedback_area_title{padding:5px 15px;font-weight:bold;}
blockquote {
background: none repeat scroll 0 0 rgba(0, 0, 0, 0);
border: 2px solid #efefef;
color: #333;
margin-bottom: 10px;
margin-left: 25px;
margin-top: 10px;
padding: 5px 10px;
}
如果有人想要设置,可以按照这个来


 4万+
4万+

 被折叠的 条评论
为什么被折叠?
被折叠的 条评论
为什么被折叠?
 到【灌水乐园】发言


