


 本文介绍了如何使用Spring框架的注解配置方式实现依赖注入,包括创建服务接口及其实现类,并通过@Component注解注册Bean,最后展示了如何通过测试类验证IOC容器的功能。
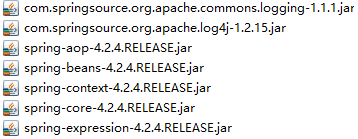
1.导入jar包
2.创建对应的类
public interface HelloService {

    public void sayHello();
}
/**
 * @Component(value="helloService") 相当于 <bean id="helloService" class="com.spring.demo1.HelloSeviceImpl"/>
 * @author NEWHOM
 *
 */
@Component(value="helloService")
public class HelloSeviceImpl implements HelloService {

    @Override
    public void sayHello() {
        // TODO Auto-generated method stub
        System.out.println("Hello Spring !!");
    }

}
3.在applicationContext.xml中引入约束
        <beans xmlns="http://www.springframework.org/schema/beans"
            xmlns:xsi="http://www.w3.org/2001/XMLSchema-instance"
            xmlns:context="http://www.springframework.org/schema/context"
       xsi:schemaLocation="
                http://www.springframework.org/schema/beans http://www.springframework.org/schema/beans/spring-beans.xsd
                http://www.springframework.org/schema/context http://www.springframework.org/schema/context/spring-context.xsd">

        </beans>
4.在applicationContext.xml中开启组件扫描
<context:component-scan base-package="com.spring.demo1" />
5.在HelloServiceImpl上添加注解
@Component(value="helloService") 相当于 <bean id="helloService" class="com.spring.demo1.HelloSeviceImpl"/>
6.编写测试类
public class Demo1 {

    /**
     * 测试注解方式的IOC
     */
    @Test
    public void m01(){
        ApplicationContext ac = new ClassPathXmlApplicationContext("applicationContext.xml");
        HelloService helloService = (HelloService) ac.getBean("helloService");

        helloService.sayHello();
    }

}

注意:
Spring中提供@Component的三个衍生注解:(功能目前来讲是一致的)
    * @Controller       -- 作用在WEB层
    * @Service          -- 作用在业务层
    * @Repository       -- 作用在持久层


 被折叠的 条评论
为什么被折叠?
被折叠的 条评论
为什么被折叠?
 到【灌水乐园】发言


