


 本文详细介绍了如何在CentOS 6.5环境下从源码编译OpenJDK 7的过程,包括所需软件环境配置、依赖安装及编译步骤,并通过测试验证编译成果。

# 软件环境丨Software Environment
- OS:CentOS 6.5
- JDK: OpenJDK-7u40
# 准备工作丨Preparation
- 下载源码包 | Download source code package
OpenJDK Source Releases -
解压源码包 | Decompress the package
# unzip openjdk-7u40-fcs-src-b43-26_aug_2013.zip- hotspot 虚拟机实现,大部分是C/C++代码
- jdk Java核心类库目录,位于 jdk/src/share/classes
- langtools 一些编译工具
安装依赖 | Install dependence
# yum -y install gcc gcc-c++ alsa-lib alsa-lib-devel libXrender libXrender-devel libXi-devel libXt-devel libXtst-devel cups cups-devel - 安装freetype | install freetype
-
# ./configure && make && make install - 安装ant | install ant
-
# ln -s /usr/local/apache-ant-1.9.4/bin/ant /usr/bin/ant - 安装JDK(如果已有则不必重新安装) | install JDK(optional if already installed)
Sun JDK或Open JDK均可,过程略.
# 环境配置丨Environment Configuration
编辑文件vim ~/.bash_profile加入以下变量 | Modify the .bash_profile and set the variables below
export LANG="C"
export ALT_BOOTDIR="/usr/java/jdk1.7.0_67/"
export ANT_HOME="/usr/local/apache-ant-1.9.4"
export ALT_FREETYPE_HEADERS_PATH="/usr/local/include/freetype2"
export ALT_FREETYPE_LIB_PATH="/usr/local/lib"
export ALLOW_DOWNLOADS=true
export SKIP_DEBUG_BUILD=false
export SKIP_FASTDEBUG_BUILD=true
export DEBUG_NAME=debug
unset JAVA_HOME
unset CLASSPATH
使变量生效 | make the variables take effect
# source ~/.bash_profile# 编译源码丨Compile Source Code
测试环境是否健全 | Check environment if sane.
# make sanity如果输出以下内容则表示通过,可以进行编译。| if the environment is OK, it can be compiled.
Sanity check passed.
开始编译 | start to compile use 'make' command
# make ARCH_DATA_MODEL=64看到如下输出则为编译成功 | It indicates that OpenJDK has been compiled successfully
>>>Finished making images @ Sat Nov  8 00:45:16 EST 2014 ...
make[2]: Leaving directory `/usr/local/openjdk/jdk/make'
########################################################################
##### Leaving jdk for target(s) sanity all docs images             #####
########################################################################
##### Build time 00:10:15 jdk for target(s) sanity all docs images #####
########################################################################

#-- Build times ----------
Target debug_build
Start 2014-11-08 00:26:41
End   2014-11-08 00:45:16
00:02:11 corba
00:04:36 hotspot
00:00:24 jaxp
00:00:30 jaxws
00:10:15 jdk
00:00:39 langtools
00:18:35 TOTAL
-------------------------
make[1]: Leaving directory `/usr/local/openjdk'
[root@BobServerStation openjdk]#
# 测试验证丨Testing & Verification
- 一个测试类Test.java
使用刚生成的JDK编译:/** * Author: Bob.Z * Date: 2014-11-08 */ public class Test{ public static void main(String[] args){ System.out.println("Hello OpenJDK~"); } } -
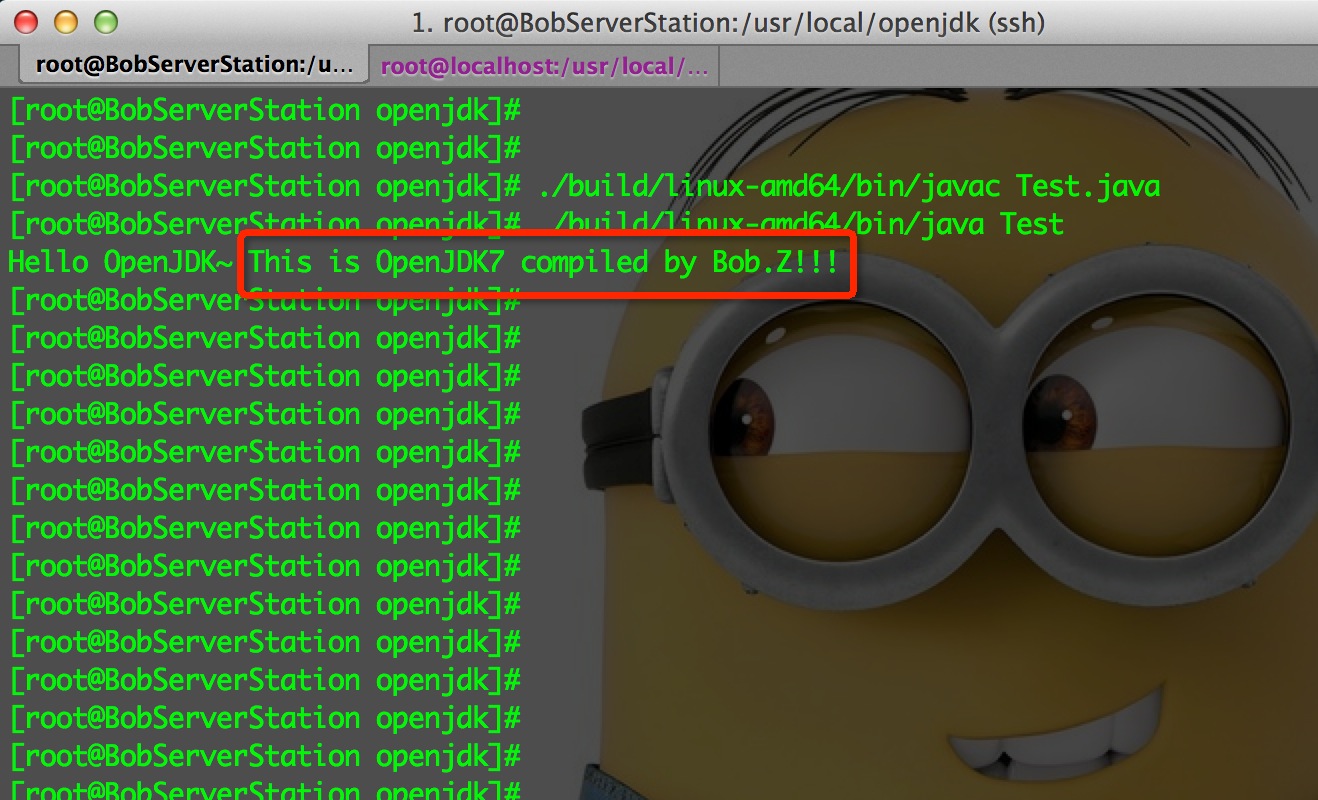
在当前目录下会生成Test.class文件,然后运行便会看到输出。# ./build/linux-amd64/bin/javac Test.java# ./build/linux-amd64/bin/java Test Hello OpenJDK~ - 另一个测试修改JDK源码
进入目录jdk/src/share/classes/java/io,然后修改PrintStream.java
接下来重新编译JDK,重新编译刚才的Test.java文件并运行会看到如下输出:/** * Prints a string. If the argument is <code>null</code> then the string * <code>"null"</code> is printed. Otherwise, the string's characters are * converted into bytes according to the platform's default character * encoding, and these bytes are written in exactly the manner of the * <code>{@link #write(int)}</code> method. * * @param s The <code>String</code> to be printed */ public void print(String s) { if (s == null) { s = "null"; } s = s + " This is OpenJdk7 compiled by Bob.Z!!!"; // 重新赋值 write(s); }
enjoy them:D
# 参考资料丨Reference
- OpenJDK: https://jdk7.java.net/
- freetype: http://download.savannah.gnu.org/releases/freetype/
- Ant: http://archive.apache.org/dist/ant/binaries/
-EOF-


 447
447

 被折叠的 条评论
为什么被折叠?
被折叠的 条评论
为什么被折叠?
 到【灌水乐园】发言


