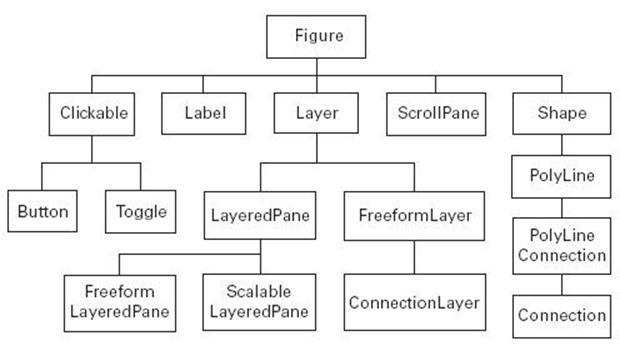
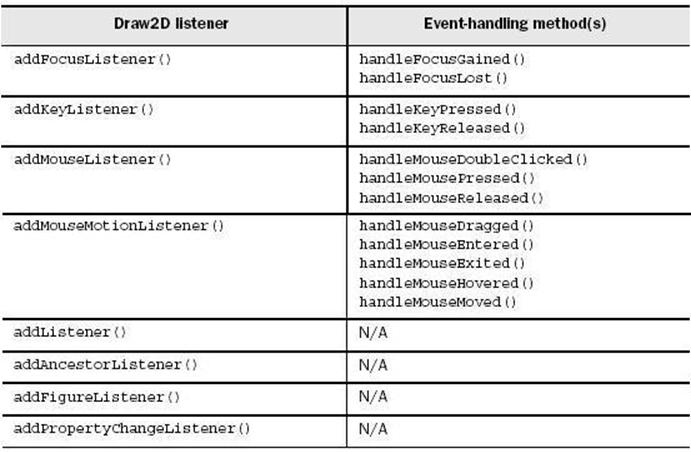
在GEF(Graphical Editing Framework)介绍中已经对Draw2D进行了一些概要介绍,本篇从一个流程图的编写来学习Draw2D的是GEF的基础。
练习要求
做一个图下图所示流程图,流程图中的各个图例可以移动,每个不同类型的图例也不一样。 源码下载:flowchart-Draw2D.zip

基础概念


图例Figure
这里支持三种图例,图例从ActivityFigure继承下来。主要就是画图还有定义连接点FixedAnchor,下面先看看代码,代码都比较简单
- 开始、结束图例
01publicclassTerminatorFigureextendsActivityFigure {02FixedAnchor inAnchor, outAnchor;0304publicTerminatorFigure() {05inAnchor =newFixedAnchor(this);06inAnchor.place =newPoint(1,0);07targetAnchors.put("in_term", inAnchor);08outAnchor =newFixedAnchor(this);09outAnchor.place =newPoint(1,2);10sourceAnchors.put("out_term", outAnchor);11}1213publicvoidpaintFigure(Graphics g) {14Rectangle r = bounds;15g.drawArc(r.x + r.width /8, r.y, r.width /4, r.height -1,90,180);16g.drawLine(r.x + r.width /4, r.y, r.x +3* r.width /4, r.y);17g.drawLine(r.x + r.width /4, r.y + r.height -1,18r.x +3* r.width /4, r.y + r.height -1);19g.drawArc(r.x +5* r.width /8, r.y, r.width /4, r.height -1,270,20180);21g.drawText(message, r.x +3* r.width /8, r.y + r.height /8);22}23} - 分支图例
01publicclassDecisionFigureextendsActivityFigure {02FixedAnchor inAnchor, yesAnchor, noAnchor;0304publicDecisionFigure() {05inAnchor =newFixedAnchor(this);06inAnchor.place =newPoint(1,0);07targetAnchors.put("in_dec", inAnchor);08noAnchor =newFixedAnchor(this);09noAnchor.place =newPoint(2,1);10sourceAnchors.put("no", noAnchor);11yesAnchor =newFixedAnchor(this);12yesAnchor.place =newPoint(1,2);13sourceAnchors.put("yes", yesAnchor);14}1516publicvoidpaintFigure(Graphics g) {17Rectangle r = bounds;18PointList pl =newPointList(4);19pl.addPoint(r.x + r.width /2, r.y);20pl.addPoint(r.x, r.y + r.height /2);21pl.addPoint(r.x + r.width /2, r.y + r.height -1);22pl.addPoint(r.x + r.width, r.y + r.height /2);23g.drawPolygon(pl);24g.drawText(message, r.x + r.width /4+5, r.y +3* r.height /8);25g.drawText("N", r.x +7* r.width /8, r.y +3* r.height /8);26g.drawText("Y", r.x + r.width /2-2, r.y +3* r.height /4);27}28}
- 流程图例
01publicclassProcessFigureextendsActivityFigure {02FixedAnchor inAnchor, outAnchor;0304publicProcessFigure() {05inAnchor =newFixedAnchor(this);06inAnchor.place =newPoint(1,0);07targetAnchors.put("in_proc", inAnchor);08outAnchor =newFixedAnchor(this);09outAnchor.place =newPoint(1,2);10sourceAnchors.put("out_proc", outAnchor);11}1213publicvoidpaintFigure(Graphics g) {14Rectangle r = bounds;15g.drawText(message, r.x + r.width /4, r.y + r.height /4);16g.drawRectangle(r.x, r.y, r.width -1, r.height -1);17}18} - FixedAnchor:连接画线时会根据place来调用getLocation确定连接终点的位置
01publicclassFixedAnchorextendsAbstractConnectionAnchor02{03Point place;04publicFixedAnchor(IFigure owner)05{06super(owner);07}0809publicPoint getLocation(Point loc)10{11Rectangle r = getOwner().getBounds();12intx = r.x + place.x * r.width/2;13inty = r.y + place.y * r.height/2;14Point p =newPrecisionPoint(x,y);15getOwner().translateToAbsolute(p);16returnp;17}18} - ActivityFigure:主要处理连接点的代码


 本文介绍使用Draw2D库创建流程图的方法,包括不同类型的流程图元素如开始、结束和分支图例的设计与实现。文章通过具体示例展示了如何自定义图例的外观和连接点。


 401
401

 被折叠的 条评论
为什么被折叠?


