


 本文详细介绍了如何创建一个Spring Boot Starter模块,包括Maven工程搭建、自动配置实现、依赖注入等核心步骤,并演示了如何在Spring Boot项目中使用自定义Starter。

Spring Boot Starter 理解
可以认为starter是一种服务(和JS的插件类似)——使得使用某个功能的开发者不需要关注各种依赖库的处理,不需要具体的配置信息,由Spring Boot自动通过classpath路径下的类发现需要的Bean,并织入bean
开始创建自定义Starter
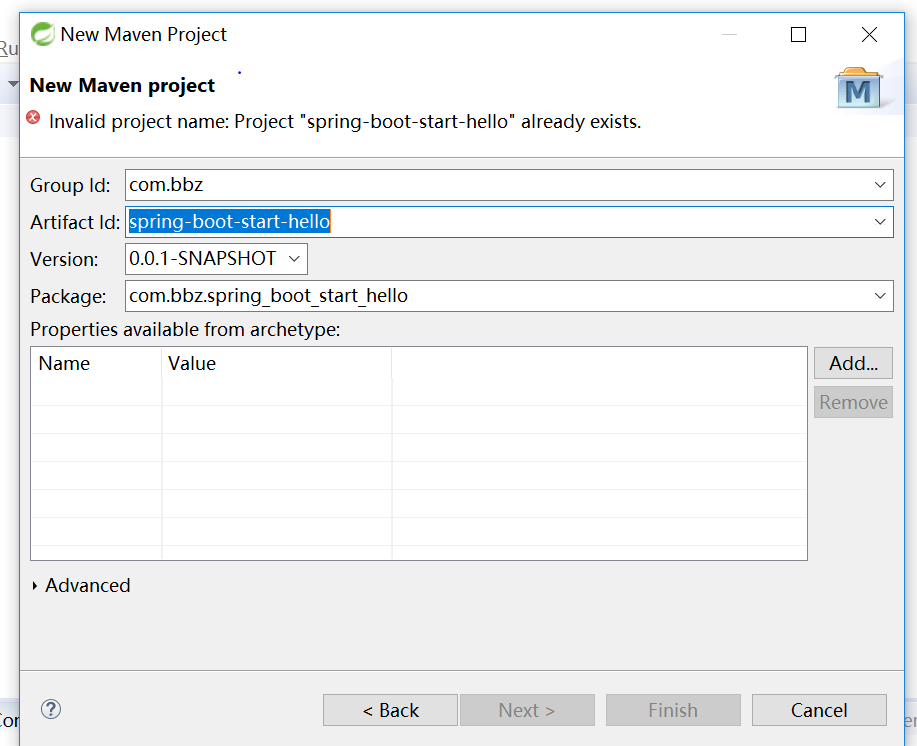
1:新建Maven工程
2:pom.xml
<project xmlns="http://maven.apache.org/POM/4.0.0"
	xmlns:xsi="http://www.w3.org/2001/XMLSchema-instance"
	xsi:schemaLocation="http://maven.apache.org/POM/4.0.0 http://maven.apache.org/xsd/maven-4.0.0.xsd">
	<modelVersion>4.0.0</modelVersion>

	<groupId>com.bbz</groupId>
	<artifactId>spring-boot-start-hello</artifactId>
	<version>0.0.1-SNAPSHOT</version>
	<packaging>jar</packaging>

	<name>spring-boot-start-hello</name>
	<url>http://maven.apache.org</url>

	<properties>
		<project.build.sourceEncoding>UTF-8</project.build.sourceEncoding>
	</properties>

	<dependencies>
		<dependency>
			<groupId>org.springframework.boot</groupId>
			<artifactId>spring-boot-autoconfigure</artifactId>
			<version>2.0.1.RELEASE</version>
		</dependency>
		<dependency>
			<groupId>junit</groupId>
			<artifactId>junit</artifactId>
			<version>3.8.1</version>
			<scope>test</scope>
		</dependency>
	</dependencies>
</project>
需要引入Spring-boot-autoconfigure 自动配置,Spring-boot-autoconfigure自动配置详解地址(未完待续)
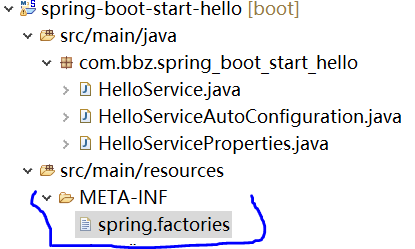
3:新建HelloServiceProperties.Class
@ConfigurationProperties(prefix = "hello")
public class HelloServiceProperties {

	private static final String MSG = "world";

	private String msg = MSG;

	public String getMsg() {
		return msg;
	}

	public void setMsg(String msg) {
		this.msg = msg;
	}

}
代码解释:@ConfigurationProperties(prefix = "hello"),读取配置文件中的hello.msg注入到属性msg中,如果配置文件中没有配置,msg默认为world
4:新建HelloService.Class
public class HelloService {
	private String msg;

	public String sayHello() {
		return "Hello" + msg;
	}

	public String getMsg() {
		return msg;
	}

	public void setMsg(String msg) {
		this.msg = msg;
	}

}
5:新建HelloServiceAutoConfiguration.class
@Configuration
@EnableConfigurationProperties(HelloServiceProperties.class)
@ConditionalOnClass(HelloService.class)
@ConditionalOnProperty(prefix = "hello", value = "enabled", matchIfMissing = true)
public class HelloServiceAutoConfiguration {

	@Autowired
	private HelloServiceProperties helloServiceProperties;

	@Bean
	@ConditionalOnMissingBean(HelloService.class)
	public HelloService helloService() {
		HelloService helloService = new HelloService();
		helloService.setMsg(helloServiceProperties.getMsg());
		return helloService;
	}
}
代码解释:
@Configuration用于定义配置类,可替换xml配置文件,配置spring并启动spring容器
@EnableConfigurationProperties(HelloServiceProperties.class) 将带有@ConfigurationProperties注解的类HelloServiceProperties注入为Spring容器的Bean
@ConditionalOnClass(HelloService.class) 当类路径下有指定的类的条件下
@ConditionalOnProperty(prefix = "hello", value = "enabled", matchIfMissing = true) 当设置hello=enabled时,如果没有设置,默认为
6:新建spring.factories,在resources/META-INF/下,文件中写入
org.springframework.boot.autoconfigure.EnableAutoConfiguration=\com.bbz.spring_boot_start_hello.HelloServiceAutoConfiguration
7:新建spring-boot项目,选择web Starter
8:spring-boot项目pom.xml 中引入
<dependency>
<groupId>com.bbz</groupId>
<artifactId>spring-boot-start-hello</artifactId>
<version>0.0.1-SNAPSHOT</version>
</dependency>
9:spring-boot项目中新建controller
@RestController
public class HelloController {
	@Autowired
	HelloService helloService;

	@RequestMapping("/")
	public String hello() {
		return helloService.sayHello();
	}

}
10:启动spring-boot项目,访问http://localhost:8080/
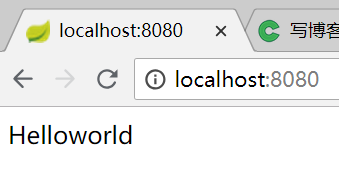
展示如图,可以看出spring-boot项目中已经成功引入hello-starter,可以自己试试在spring-boot项目中配置hello.msg,然后访问项目。


 406
406

 被折叠的 条评论
为什么被折叠?
被折叠的 条评论
为什么被折叠?
 到【灌水乐园】发言


