由于MyBatis属于一种半自动的ORM框架,所以主要的工作将是书写Mapping映射文件,但是由于手写映射文件很容易出错,所以查资料发现有现成的工具可以自动生成底层模型类、Dao接口类甚至Mapping映射文件。 一、建立表结构,这里就不把表结构写出来了,这大家肯定都是会的了。 二、下载mybatis-generator-core 进入:http://code.google.com/p/mybatis/ 选择Downloads,再选择
MyBatis Generator Tool下载即可。 三、生成配置文件 新建一个空的XML配置文件,名称可以随便取,这里以generatorConfig.xml为名。最好将这个文件放在下载后的lib目录中,如图:
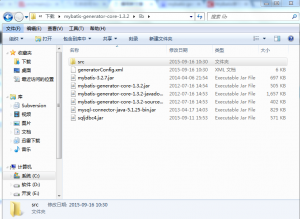
其中mysql的驱动可以随便放在非中文路径的地方,这里为了方便就放在lib目录下。 自动生成最重要的就是配置文件的书写,现在就开始介绍generatorConfig.xml这个文件的具体内容:
- <?xml version="1.0" encoding="UTF-8"?>
- <!DOCTYPE generatorConfiguration
- PUBLIC "-//mybatis.org//DTD MyBatis Generator Configuration 1.0//EN"
- "http://mybatis.org/dtd/mybatis-generator-config_1_0.dtd">
- <generatorConfiguration>
- <!-- 数据库驱动-->
- <classPathEntry location="mysql-connector-java-5.0.6-bin.jar"/>
- <context id="DB2Tables" targetRuntime="MyBatis3">
- <commentGenerator>
- <property name="suppressDate" value="true"/>
- <!-- 是否去除自动生成的注释 true:是 : false:否 -->
- <property name="suppressAllComments" value="true"/>
- </commentGenerator>
- <!--数据库链接URL,用户名、密码 -->
- <jdbcConnection driverClass="com.mysql.jdbc.Driver" connectionURL="jdbc:mysql://localhost/test" userId="test" password="test">
- </jdbcConnection>
- <javaTypeResolver>
- <property name="forceBigDecimals" value="false"/>
- </javaTypeResolver>
- <!-- 生成模型的包名和位置-->
- <javaModelGenerator targetPackage="test.model" targetProject="src">
- <property name="enableSubPackages" value="true"/>
- <property name="trimStrings" value="true"/>
- </javaModelGenerator>
- <!-- 生成映射文件的包名和位置-->
- <sqlMapGenerator targetPackage="test.mapping" targetProject="src">
- <property name="enableSubPackages" value="true"/>
- </sqlMapGenerator>
- <!-- 生成DAO的包名和位置-->
- <javaClientGenerator type="XMLMAPPER" targetPackage="test.dao" targetProject="src">
- <property name="enableSubPackages" value="true"/>
- </javaClientGenerator>
- <!-- 要生成哪些表-->
- <table tableName="about" domainObjectName="AboutDto" enableCountByExample="false" enableUpdateByExample="false" enableDeleteByExample="false" enableSelectByExample="false" selectByExampleQueryId="false"></table>
- <table tableName="user" domainObjectName="UserDto" enableCountByExample="false" enableUpdateByExample="false" enableDeleteByExample="false" enableSelectByExample="false" selectByExampleQueryId="false"></table>
- <table tableName="syslogs" domainObjectName="SyslogsDto" enableCountByExample="false" enableUpdateByExample="false" enableDeleteByExample="false" enableSelectByExample="false" selectByExampleQueryId="false"></table>
- </context>
- </generatorConfiguration>
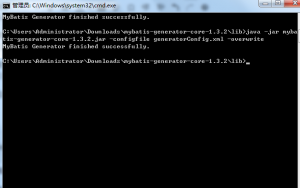
1、其中需要注意的有数据库驱动、数据库URL、用户名、密码、生成模型的包名和位置、生成映射文件的包名和位置、生成DAO的包名和位置以及最后需要生成的表名和对应的类名。 四、运行 需要通过CMD命令行方式来运行,首先可以先准备一个运行的脚本,这里使用的脚本是:java -jar mybatis-generator-core-1.3.2.jar -configfile generatorConfig.xml -overwrite 需要注意的是:mybatis-generator-core-1.3.2.jar为下载的对应版本的jar,generatorConfig.xml 为配置文件名,如果不为这个可以在这里进行修改。 启动cmd进入到“C:\Users\Administrator\Downloads\mybatis-generator-core-1.3.2\lib”这个目录下,如图:
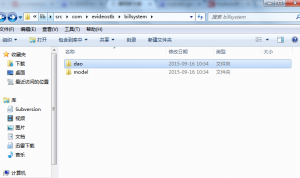
生成成功后进到src目录下,可以看到已经生成了对应的model、dao、mapping,如图:
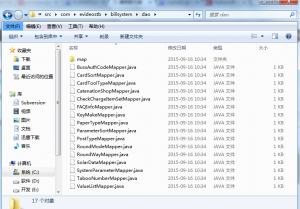
接下来就可以将这三个目录拷贝到对应项目的目录中,如果需要新增自己的方法可以修改dao类。


 本文详细介绍如何使用MyBatis Generator工具自动生成模型类、DAO接口及映射文件。包括配置文件的设置、命令行运行步骤及生成结果的使用。

 其中mysql的驱动可以随便放在非中文路径的地方,这里为了方便就放在lib目录下。 自动生成最重要的就是配置文件的书写,现在就开始介绍generatorConfig.xml这个文件的具体内容:
 生成成功后进到src目录下,可以看到已经生成了对应的model、dao、mapping,如图:

 接下来就可以将这三个目录拷贝到对应项目的目录中,如果需要新增自己的方法可以修改dao类。


 5449
5449

 被折叠的 条评论
为什么被折叠?
被折叠的 条评论
为什么被折叠?
 到【灌水乐园】发言


