近期为项目组在Azure上的VM启用了一个FTP服务,启用FTP后通过正常的配置后,FTP Client无法连接到FTP以致上传数据,经过查找资料后,因为Azure上的VM是在防火墙之后,所以需要选择为动态协议才可以,以致需要开发一段动态地址才可以访问,因为我按照网上文档的操作方法进行配置的,暂时开放了50个端口,如果在Azure的Portal上添加50个端口的话至少需要5-10分钟,所以相对效率比较地下,最终使用powershell 进行批量添加终结点,成功添加后,还不错,所以在此分享给有需要的朋友,所以今天主要介绍的是如果使用Azure Powershell来批量添加VM的终结点。在此我们需要注意一个问题,在Azure上目前最大只支持添加150个终结点,具体见下:
我们前面也介绍过,如果使用Azure powershell来管理Azure的功能我们是需要下载Azure订阅文件(证书文件),然后导入到本地的Azure powershell中才可以对Azure平台的服务进行管理。所以我们需要首先下载Azure powershell并且连接到China Azure,具体操作步骤见下:
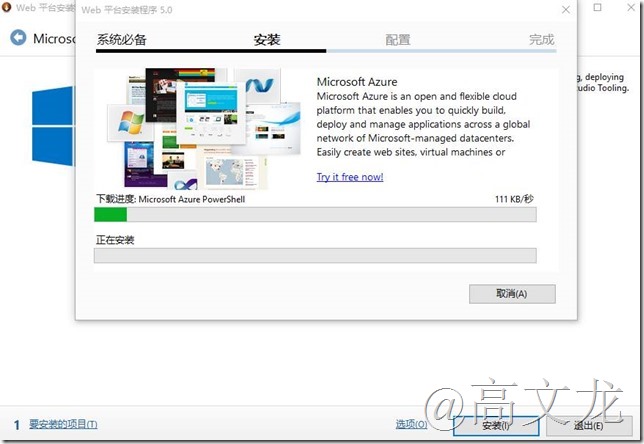
1.从官网下载页面,下载并安装Windows Azure PowerShell: http://www.windowsazure.cn/zh-cn/downloads/#cmd-line-tools
2. 安装完毕后以管理员身份运行,右键点击PowerShell图标然后选择以管理员身份运行;
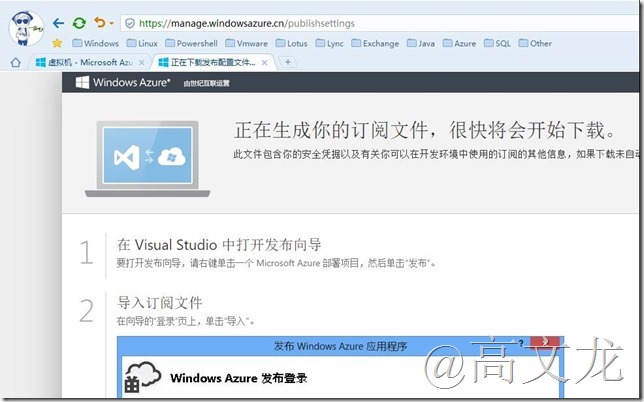
3. 执行命令Get-AzurePublishSettingsFile -Environment "AzureChinaCloud",通过打开的页面下载您的Windows Azure Subscription的发布配置文件;或者访问https://manage.windowsazure.cn/publishsettings进行提示下载
开始下载订阅文件
开始下载安装Azure Powershell程序
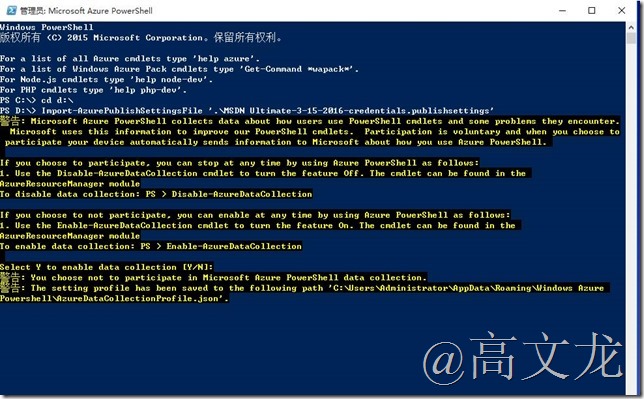
下载后开始使用命令将订阅文件导入Azure powershell中
|
1
|
Import-AzurePublishSettingsFile ‘.\MSDN Ultimate-3-24-…….path’
|
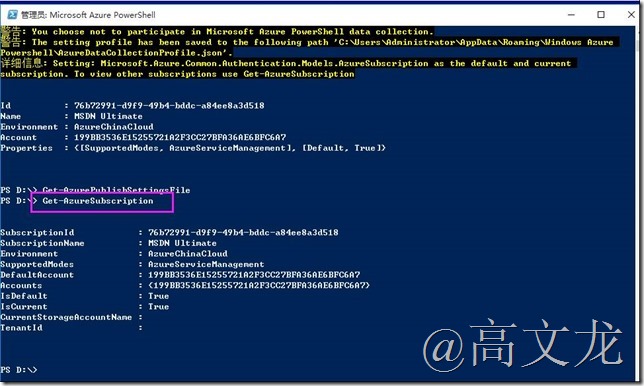
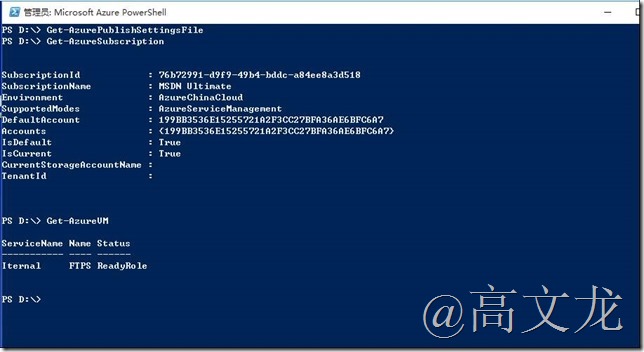
导入后,我们可以查看当前已导入到本地的所有订阅文件;
|
1
|
Get-azureSubscription
|
查看当前环境中所有运行的vm信息
|
1
|
Get-azurevm
|
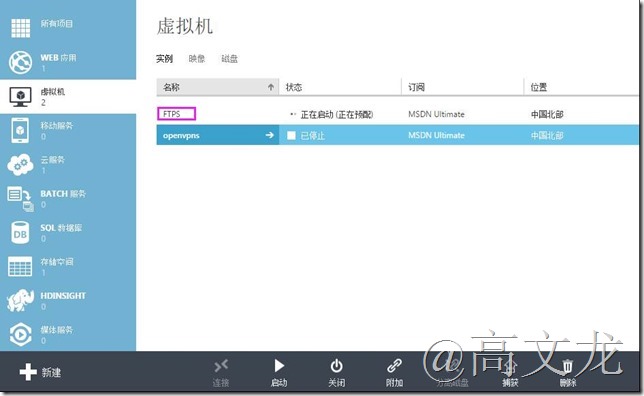
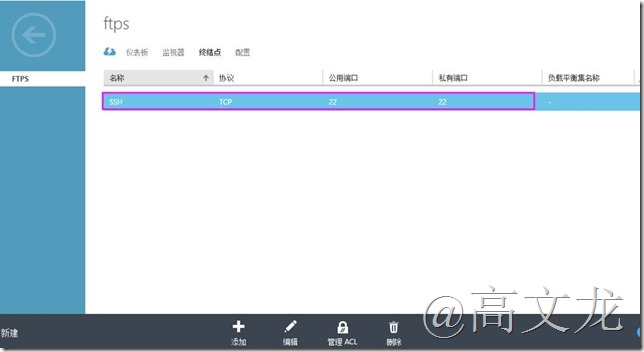
现在开始,我们首先通过portal页面进行查看该vm的终结点信息
我们此次使用的一台linux机器,计算机名FTPS
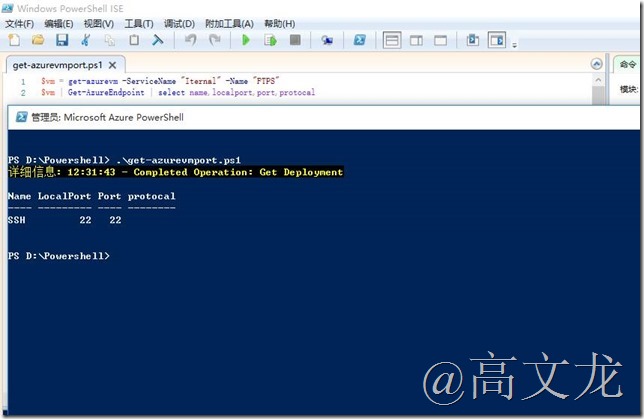
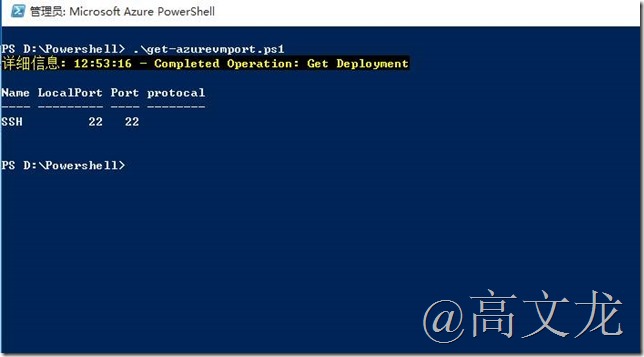
接着我们使用powershell脚本查看当前环境的终结点信息
|
1
2
|
$vm = get-azurevm -ServiceName
"Iternal"
-Name
"FTPS"
$vm | Get-AzureEndpoint |
select
name,localport,port,protocal
|
接下来就是批量添加终结点了,但是我们需要注意的是批量添加终结点的方式有两种;
1. 添加连续终结点(比如1000-2000)
2. 添加不连续终结点(比如1000,1002,1005,1007……)
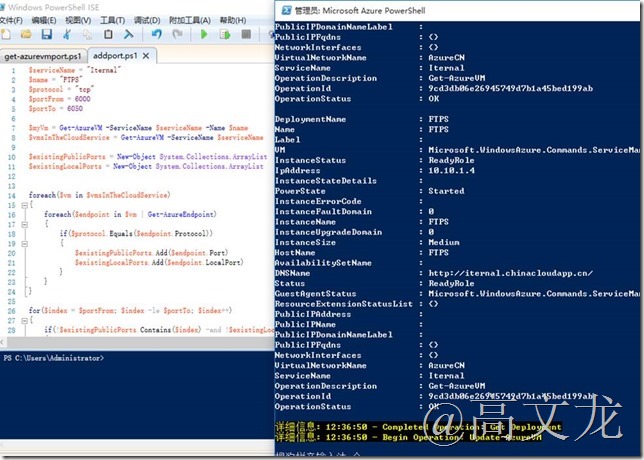
我们首先是添加连续终结点,我们先添加50个连续终结点
我们是在Azure powershell中执行的是脚本
|
1
2
3
4
5
6
7
8
9
10
11
12
13
14
15
16
17
18
19
20
21
22
23
24
25
26
27
28
29
30
31
32
33
34
35
36
|
$serviceName =
"Iternal"
$name =
"FTPS"
$protocol =
"tcp"
$portFrom = 6100
$portTo = 6200
$myVm = Get-AzureVM -ServiceName $serviceName -Name $name
$vmsInTheCloudService = Get-AzureVM -ServiceName $serviceName
$existingPublicPorts = New-Object System.Collections.ArrayList
$existingLocalPorts = New-Object System.Collections.ArrayList
foreach($vm
in
$vmsInTheCloudService)
{
foreach($endpoint
in
$vm | Get-AzureEndpoint)
{
if
($protocol.Equals($endpoint.Protocol))
{
$existingPublicPorts.Add($endpoint.Port)
$existingLocalPorts.Add($endpoint.LocalPort)
}
}
}
for
($index = $portFrom; $index -
le
$portTo; $index++)
{
if
(!$existingPublicPorts.Contains($index) -and !$existingLocalPorts.Contains($index))
{
$portName = $protocol + $index
$myVm | Add-AzureEndpoint -Name $portName -Protocol $protocol -PublicPort $index -LocalPort $index
}
}
$myVm | Update-AzureVM
|
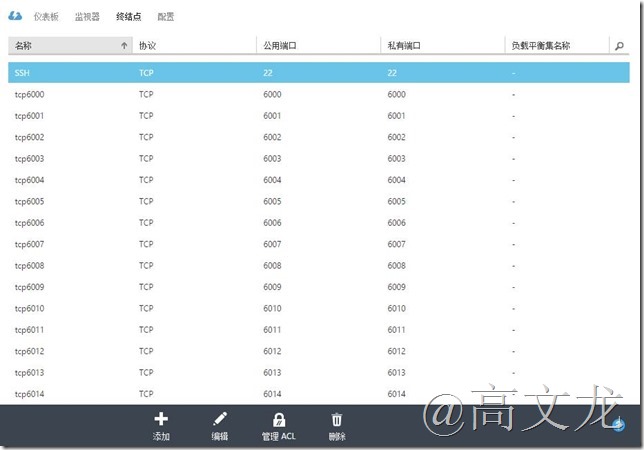
添加后,我们通过portal查看添加后的效果
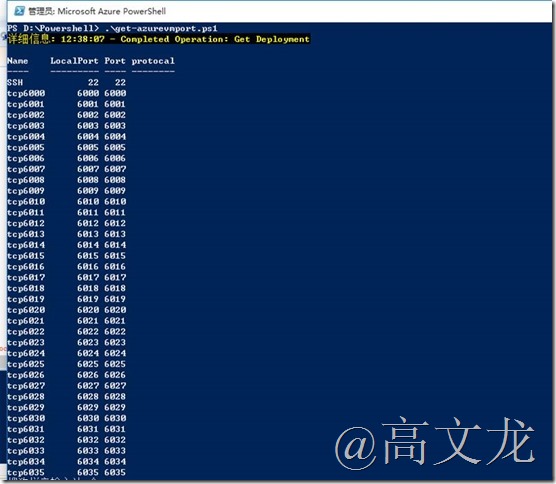
我们在通过powershell查看添加后的效果
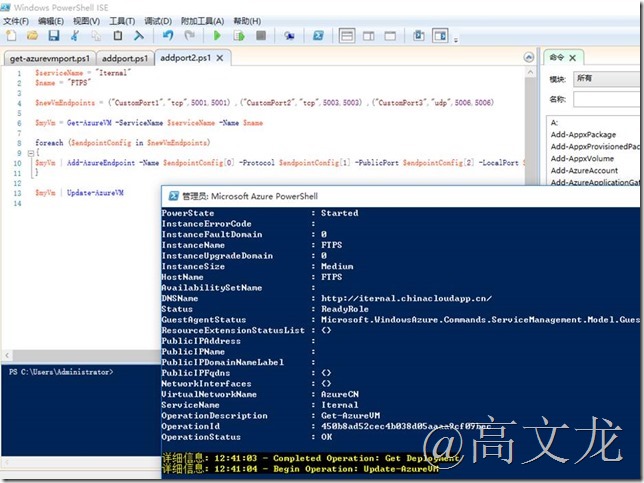
接下来我们添加不连续端口5001,5003,5006
|
1
2
3
4
5
6
7
8
9
10
11
12
13
|
$serviceName =
"Iternal"
$name =
"FTPS"
$newVmEndpoints = (
"CustomPort1"
,
"tcp"
,5001,5001) ,(
"CustomPort2"
,
"tcp"
,5003,5003) ,(
"CustomPort3"
,
"udp"
,5006,5006)
$myVm = Get-AzureVM -ServiceName $serviceName -Name $name
foreach ($endpointConfig
in
$newVmEndpoints)
{
$myVm | Add-AzureEndpoint -Name $endpointConfig[0] -Protocol $endpointConfig[1] -PublicPort $endpointConfig[2] -LocalPort $endpointConfig[3]
}
$myVm | Update-AzureVM
|
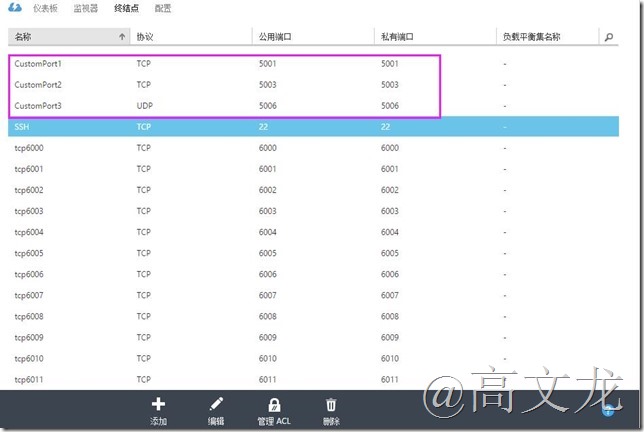
我们继续使用portal查看自定义端口信息
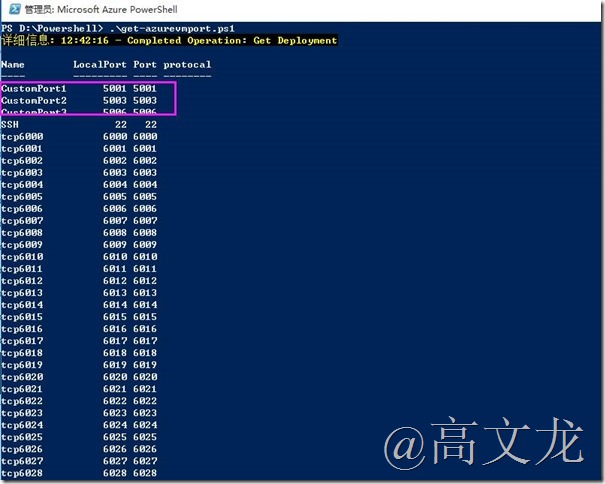
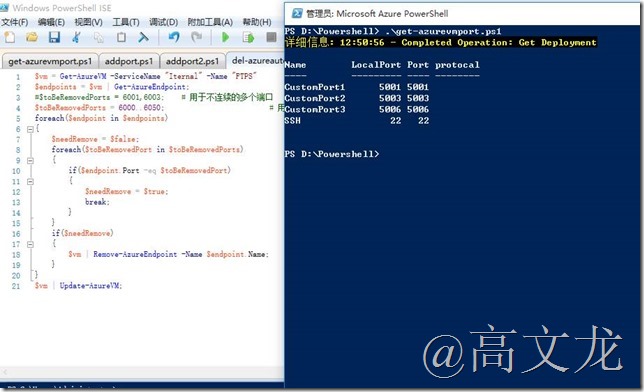
同样我们使用powershell进行查看
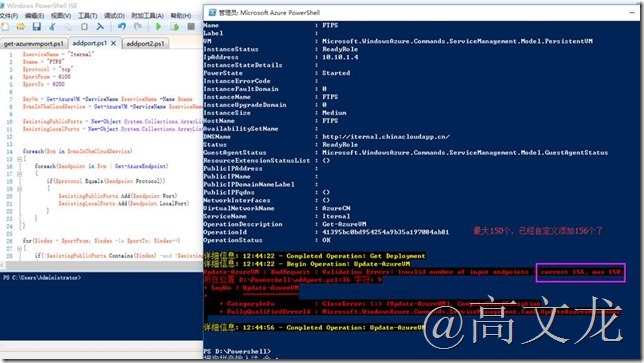
添加完成后,我们就是测试添加端口的最大数量,官网信息提到,目前Azure添加终结点的最大数为150个,我们已经添加了56个了,所以我们在添加100个看是否会有什么提示信息;当然是报错了,在此其实不是报错,虽然有报错信息,但是微软会将报错的跳过,所以对此我们不用担心
我们还使用批量脚本添加
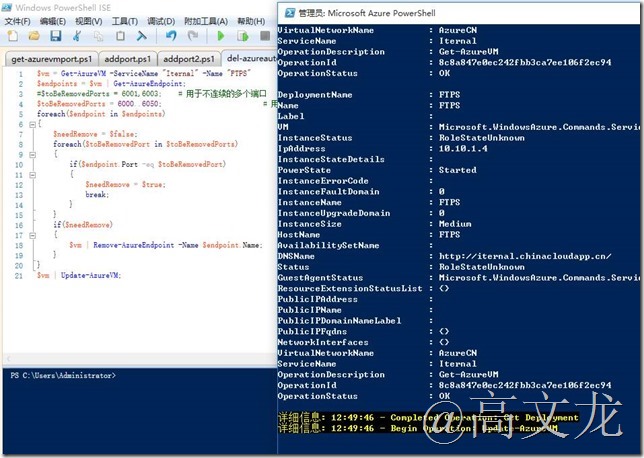
上面我们提到了添加,那怎么删除呢,其实是一样的,首先是批量删除连续
|
1
2
3
4
5
6
7
8
9
10
11
12
13
14
15
16
17
18
19
20
21
|
$vm = Get-AzureVM -ServiceName
"Iternal"
-Name
"FTPS"
$endpoints = $vm | Get-AzureEndpoint;
#$toBeRemovedPorts = 6001,6003; # 用于不连续的多个端口
$toBeRemovedPorts = 6000..6050;
# 用于连续的多个端口
foreach($endpoint
in
$endpoints)
{
$needRemove = $
false
;
foreach($toBeRemovedPort
in
$toBeRemovedPorts)
{
if
($endpoint.Port -
eq
$toBeRemovedPort)
{
$needRemove = $
true
;
break
;
}
}
if
($needRemove)
{
$vm | Remove-AzureEndpoint -Name $endpoint.Name;
}
}
$vm | Update-AzureVM;
|
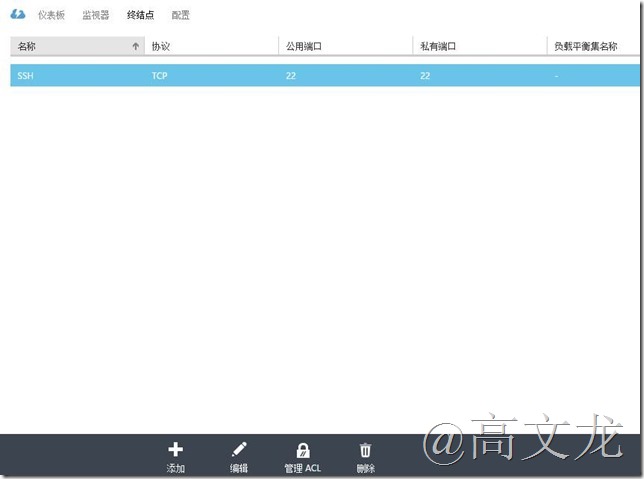
删除后,我们通过portal查看
再次使用powershell查看
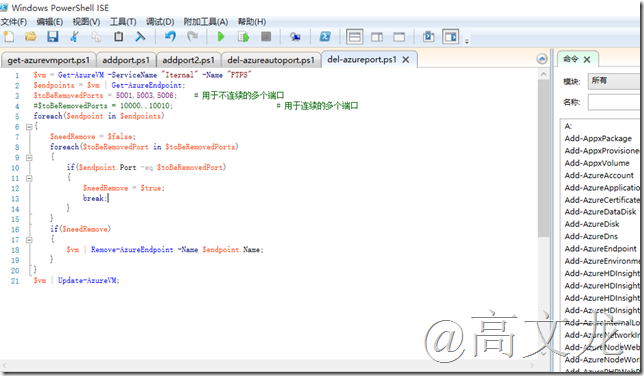
接下来是删除不连续终结点
|
1
2
3
4
5
6
7
8
9
10
11
12
13
14
15
16
17
18
19
20
21
|
$vm = Get-AzureVM -ServiceName
"Iternal"
-Name
"FTPS"
$endpoints = $vm | Get-AzureEndpoint;
$toBeRemovedPorts = 5001,5003,5006;
# 用于不连续的多个端口
#$toBeRemovedPorts = 10000..10010; # 用于连续的多个端口
foreach($endpoint
in
$endpoints)
{
$needRemove = $
false
;
foreach($toBeRemovedPort
in
$toBeRemovedPorts)
{
if
($endpoint.Port -
eq
$toBeRemovedPort)
{
$needRemove = $
true
;
break
;
}
}
if
($needRemove)
{
$vm | Remove-AzureEndpoint -Name $endpoint.Name;
}
}
$vm | Update-AzureVM;
|
通过powershell查看
本文转自 高文龙 51CTO博客,原文链接:http://blog.51cto.com/gaowenlong/1751722,如需转载请自行联系原作者


 本文介绍如何使用 Azure PowerShell 对 Azure 虚拟机 (VM) 批量添加和删除端口,包括连续及非连续端口,并提供具体脚本示例。



 被折叠的 条评论
为什么被折叠?


