


 本文详细介绍OpenCV的安装步骤及环境配置,并提供了一个简单的示例程序,展示如何使用OpenCV进行图像处理。

OpenCV is the most popular and advanced code library for Computer Vision related applications today, spanning from many very basic tasks (capture and pre-processing of image data) to high-level algorithms (feature extraction, motion tracking, machine learning). It is free software and provides a rich API in C, C++, Java and Python. Other wrappers are available. The library itself is platform-independent and often used for real-time image processing and computer vision.
What’s new in 2.4.9
- new 3D visualization module ‘viz’
- performance fixes in ‘ocl’ module
- fixes in Android Camera
- improved CUDA support for mobile platforms
- bugfixes from community
- 55 reported bugs have been closed
- 156 pull requests have been merged
See the full ChangeLog for more information
Install OpenCV
Step 1: Make Directory
mkdir opencv

cd /opencv/
Step 2: Remove any pre-installed ffmpeg and x264
sudo apt-get -qq remove ffmpeg x264 libx264-dev
Step 3: Install Dependenices
As reported by kumaranbus, installing ‘libopencv-dev‘ on non nvidia graphics card messes up the drivers. As a workaround for non nvidia cards like AMD/ATI, Radeon, replace libopencv-dev below with ‘ocl-icd-libopencl1‘ which is a generic driver. Please note that I have not tried this out yet as I have no ATI/Radeon cards to test with
sudo apt-get -qq install libopencv-dev build-essential checkinstall cmake pkg-config yasm libjpeg-dev libjasper-dev libavcodec-dev libavformat-dev libswscale-dev libdc1394-22-dev libxine-dev libgstreamer0.10-dev libgstreamer-plugins-base0.10-dev libv4l-dev python-dev python-numpy libtbb-dev libqt4-dev libgtk2.0-dev libfaac-dev libmp3lame-dev libopencore-amrnb-dev libopencore-amrwb-dev libtheora-dev libvorbis-dev libxvidcore-dev x264 v4l-utils

- Install ffmpeg
sudo add-apt-repository ppa:mc3man/trusty-media

sudo apt-get update

sudo apt-get install ffmpeg gstreamer0.10-ffmpeg
Step 4: Download and extract OpenCV
wget -O OpenCV-2.4.9.zip http://fossies.org/linux/misc/opencv-2.4.9.zip

unzip OpenCV-2.4.9.zip

cd opencv-2.4.9
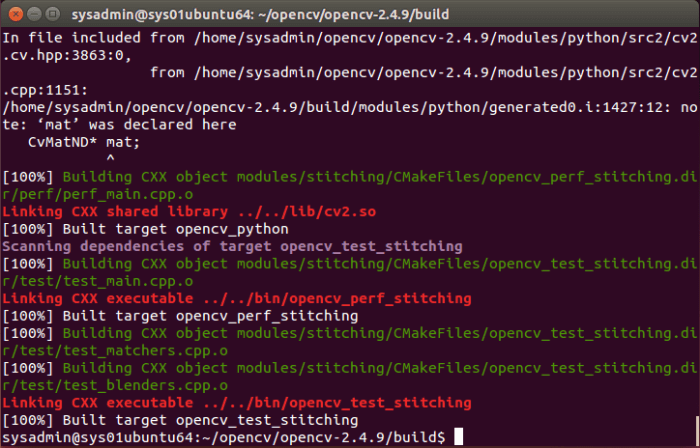
Step 5: Begin Build Process
Note that this bit would take some time to complete
mkdir build

cd build

cmake -D CMAKE_BUILD_TYPE=RELEASE -D CMAKE_INSTALL_PREFIX=/usr/local -D WITH_TBB=ON -D BUILD_NEW_PYTHON_SUPPORT=ON -D WITH_V4L=ON -D INSTALL_C_EXAMPLES=ON -D INSTALL_PYTHON_EXAMPLES=ON -D BUILD_EXAMPLES=ON -D WITH_QT=ON -D WITH_OPENGL=ON ..

make -j2

sudo make install

sudo sh -c 'echo "/usr/local/lib" > /etc/ld.so.conf.d/opencv.conf'

sudo ldconfig
- Reboot your machine
Step 6: Example using OpenCV
- Change directory to following location
cd /usr/local/share/OpenCV/samples/c
- Execute following commands
sudo chmod +x build_all.sh

sudo ./build_all.sh

./facedetect "/usr/share/opencv/haarcascades/haarcascade_frontalface_alt.xml" lena.jpg
or
./facedetect --cascade="/usr/share/opencv/haarcascades/haarcascade_frontalface_alt.xml" lena.jpg

2.4.13以及3.2.0
cmake  -D CMAKE_BUILD_TYPE=Releases WITH_TBB=ON -D BUILD_NEW_PYTHON_SUPPORT=ON -D OPENCV_BUILD_3RDPARTY_LIBS=ON WITH_V4L=ON -D INSTALL_C_EXAMPLES=ON -D INSTALL_PYTHON_EXAMPLES=ON -D BUILD_EXAMPLES=ON -D WITH_QT=ON -D WITH_OPENGL=ON  -D WITH_QT=ON -D CMAKE_INSTALL_PREFIX=/opt/local/opencv2.4.13 ..

cmake  -D CMAKE_BUILD_TYPE=Releases -D WITH_TBB=ON -D BUILD_NEW_PYTHON_SUPPORT=ON OPENCV_BUILD_3RDPARTY_LIBS=ON -D WITH_V4L=ON -D INSTALL_C_EXAMPLES=ON -D INSTALL_PYTHON_EXAMPLES=ON -D BUILD_EXAMPLES=ON -D WITH_QT=ON -D WITH_OPENGL=ON  -D WITH_QT=ON -D CMAKE_INSTALL_PREFIX=/opt/local/opencv3.2.0 ..
编译过程中出现下载ippicv_linux_20151201.tgz失败的解决:
 cd opencv-3.2.0/3rdparty/ippicv/downloads/linux-808b791a6eac9ed78d32a7666804320e/
wget https://raw.githubusercontent.com/Itseez/opencv_3rdparty/81a676001ca8075ada498583e4166079e5744668/ippicv/ippicv_linux_20151201.tgz
环境变量:
#opencv environment
#export OPENCV=/opt/local/opencv2.4.13
export OPENCV=/opt/local/opencv3.2.0
export PATH=$PATH:$OPEVCV/bin
export LD_LIBRARY_PATH=$OPENCV/lib:$LD_LIBRARY_PATH
export PKG_CONFIG_PATH=$OPENCV/lib/pkgconfig:$PKG_CONFIG_PATH
多版本(默认3.2下使用2.4):
sudo cp /opt/local/opencv2.4.13/lib/pkgconfig/opencv.pc /opt/local/opencv3.2.0/lib/pkgconfig/opencv2.4.pc vi /opt/local/opencv3.2.0/lib/pkgconfig/opencv2.4.pc
在libs:最后面追加 -Wl,-rpath=/opt/local/opencv2.4.13/lib
修改后的opencv2.4.pc内容如下:
# Package Information for pkg-config

prefix=/opt/local/opencv2.4.13
exec_prefix=${prefix}
libdir=${exec_prefix}/lib
includedir_old=${prefix}/include/opencv
includedir_new=${prefix}/include

Name: OpenCV
Description: Open Source Computer Vision Library
Version: 2.4.13
Libs: -L${exec_prefix}/lib -lopencv_calib3d -lopencv_contrib -lopencv_core -lopencv_features2d -lopencv_flann -lopencv_gpu -lopencv_highgui -lopencv_imgproc -lopencv_legacy -lopencv_ml -lopencv_nonfree -lopencv_objdetect -lopencv_ocl -lopencv_photo -lopencv_stitching -lopencv_superres -lopencv_ts -lopencv_video -lopencv_videostab -L/usr/lib/x86_64-linux-gnu -lGL -lGLU -lrt -lpthread -lm -ldl -Wl,-rpath=/opt/local/opencv2.4.13/lib
Cflags: -I${includedir_old} -I${includedir_new}
使用:g++ first.cpp -o first `pkg-config --cflags --libs opencv2.4`
// g++ first.cpp -o first `pkg-config --cflags --libs opencv2.4`
//显示图像文件
#include <opencv2/opencv.hpp>
using namespace std;
int main()
{
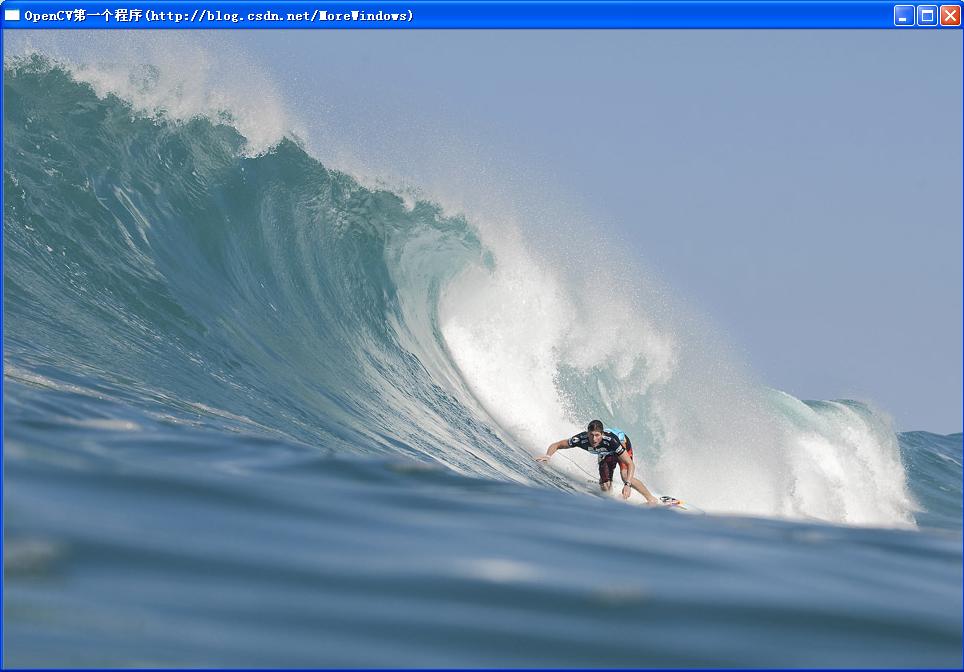
const char *pstrImageName = "冲浪大师赛001.jpg";
const char *pstrWindowsTitle = "OpenCV第一个程序(http://blog.youkuaiyun.com/MoreWindows)";
//从文件中读取图像
IplImage *pImage = cvLoadImage(pstrImageName, CV_LOAD_IMAGE_UNCHANGED);
//创建窗口
cvNamedWindow(pstrWindowsTitle, CV_WINDOW_AUTOSIZE);
//在指定窗口中显示图像
cvShowImage(pstrWindowsTitle, pImage);
//等待按键事件
cvWaitKey();
cvDestroyWindow(pstrWindowsTitle);
cvReleaseImage(&pImage);
return 0;
}
该程序在2.4.13下正常运行


 被折叠的 条评论
为什么被折叠?
被折叠的 条评论
为什么被折叠?
 到【灌水乐园】发言


