


本文实例为大家分享了springmvc+jersey实现跨服务器文件上传的具体代码,供大家参考,具体内容如下
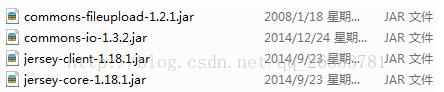
1.首先添加所需要的jar包
2.在springmvc的配置文件中添加文件上传解析器
3.jsp页面
请上传头像:
4.文件上传的 js
function fileupload(){
var option = {
type:"post",
url:"${pagecontext.request.contextpath }/user/fileupload.do",
data:{
filename:"imgfile"
},
success:function(redata){
alert(redata.reletivepath);
$("#imgsrc").attr("height",100);
$("#imgsrc").attr("width",100);
$("#imgsrc").attr("src",redata.fullpath);
$("#reletivepath").val(redata.reletivepath);
},
datatype:"json"
};
$("#fm").ajaxsubmit(option);
}
5. controller
/*
* 文件上传
*/
@requestmapping("fileupload")
public @responsebody map fileupload(httpservletrequest request,string filename){
system.out.println(111);
//1.将普通请求转换为多部件请求
multiparthttpservletrequest mr = (multiparthttpservletrequest)request;
//2.根据文件名获取文件对象
commonsmultipartfile mf = (commonsmultipartfile)mr.getfile(filename);
//3.获取文件全名称
string originalfilename = mf.getoriginalfilename();
system.out.println("文件全名称"+originalfilename);
//4.获取后缀
string suffix = originalfilename.substring(originalfilename.lastindexof("."));
system.out.println("后缀"+suffix);
//5.将文件对象转换为字节
byte[] filebytes = mf.getbytes();
//6.获取新的随机文件名
string newfilename="";
simpledateformat sdf = new simpledateformat("yyyymmddhhmmsssss");
int num = (int)(math.random()*899)+100;
newfilename = sdf.format(new date())+num;
system.out.println("新的随机文件名"+newfilename);
//开始上传
//1.创建jesy服务器
client client = client.create();
string fullpath = "http://localhost:8088/fileserviceproject/upload/"+newfilename+suffix;
//把文件关联到远程服务器
webresource wr = client.resource(fullpath);
//2.相对路径
string reletivepath = "/upload/"+newfilename+suffix;
//3.上传
wr.put(string.class, filebytes);
map map = new hashmap();
map.put("fullpath", fullpath);
map.put("reletivepath", reletivepath);
return map;
}
以上就是本文的全部内容,希望对大家的学习有所帮助,也希望大家多多支持萬仟网。


 6072
6072

 被折叠的 条评论
为什么被折叠?
被折叠的 条评论
为什么被折叠?
 到【灌水乐园】发言


