ISCSI:
(iSCSI:InternetSmallComputerSystemInterface) Internet小型计算机系统接口
iscsi 是一个供硬件设备使用的可以在IP协议的上层运行的SCSI指令集,这种指令集合可以实现在IP网络上运行SCSI协议,使其能够在诸如高速千兆以太网上进行路由选择。iSCSI技术是一种新储存技术,该技术是将现有SCSI接口与以太网络(Ethernet)技术结合,使服务器可与使用IP网络的储存装置互相交换资料。
配置iscsi
[root@server ~]# yum install targetcli -y

[root@server ~]# systemctl start target
[root@server ~]# fdisk /dev/vdb
[root@server ~]# partprobe
[root@server ~]# targetcli
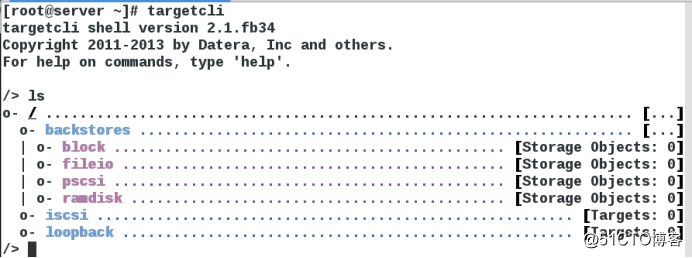
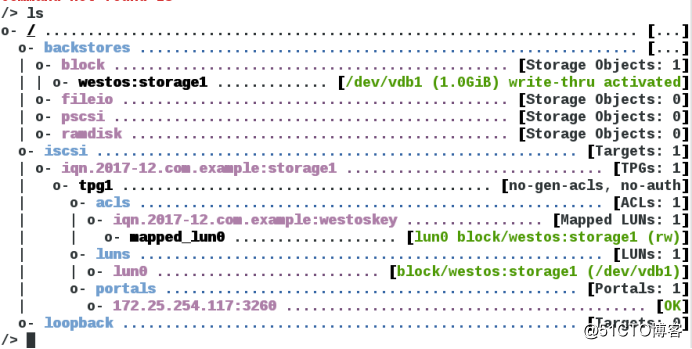
/> /backstores/block create westos:storage1 /dev/vdb1 给设备一个新的名字

/> /iscsi create iqn.2017-12.com.example:storage1 创建共享名称

/> /iscsi/iqn.2017-12.com.example:storage1/tpg1/acls create iqn.2017-12.com.example:westoskey 创建key

/> /iscsi/iqn.2017-12.com.example:storage1/tpg1/luns create /backstores/block/westos:storage1 关联访问(/dev/vdb1)

/> /iscsi/iqn.2017-12.com.example:storage1/tpg1/portals create 172.25.254.117 端口指定提供服务其的IP

设定完成后应为此
/> exit 退出
[root@server ~]# firewall-cmd --permanent --add-port=3260/tcp 火墙中加入此端口

[root@server ~]# systemctl restart target.service
(服务端)
[root@client ~]# yum install iscsi-initiator-utils.x86_64 -y

[root@client ~]# systemctl start iscsi
[root@client ~]# vim /etc/iscsi/initiatorname.iscsi 写入钥匙

[root@client ~]# systemctl restart iscsi

登陆(-m (mode)执行动作 node连接 -T目标 -p(IP) -l登陆)

[root@client ~]# fdisk -l 查看硬盘添加成功

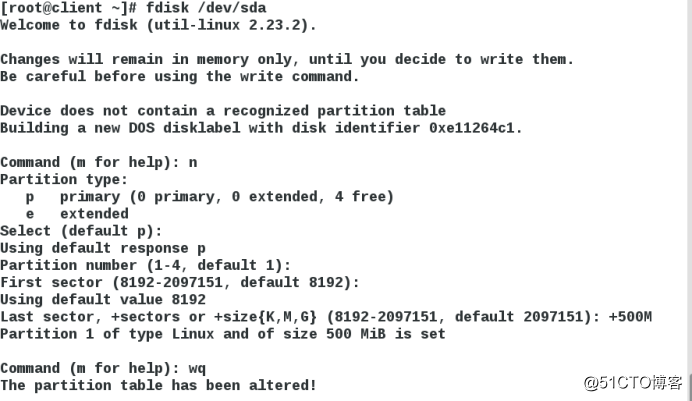
[root@client ~]# fdisk /dev/sda 新建分区

[root@client~]#mount /dev/sda 1 /mnt

[root@client ~]# touch /mnt/file
此文件建立建立在主机server的/dev/vdb1中
(服务器)
[root@server ~]# mount /dev/vdb1 /mnt/
mount:/dev/vdb1 is already mounted or /mnt busy 已经挂载
*永久挂载
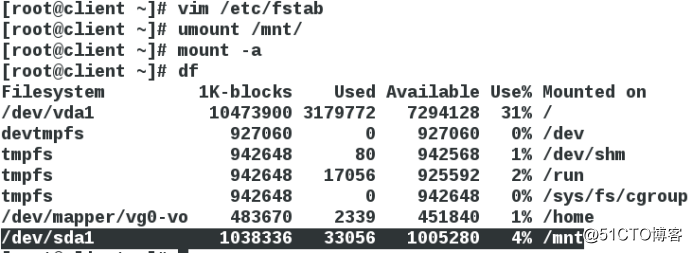
[root@client ~]# vim /etc/fstab

为了避免名称漂移,可将/dev/sda1改为绝对路径
[root@client ~]# blkid

[root@client ~]# vim /etc/fstab

*删除
[root@client ~]# yum install tree -y
用来查看结构的工具
[root@client ~]# umount /mnt/
[root@client ~]# iscsiadm -m node -T iqn.2017-12.com.example:storagel -p 172.25.254.117 -u 退出登陆

[root@client ~]# iscsiadm -m node -T iqn.2017-12.com.example:storagel -p 172.25.254.117 -p delete 删除用户

[root@client ~]# systemctl restart iscsi
[root@client ~]# fdisk -l 设备消失
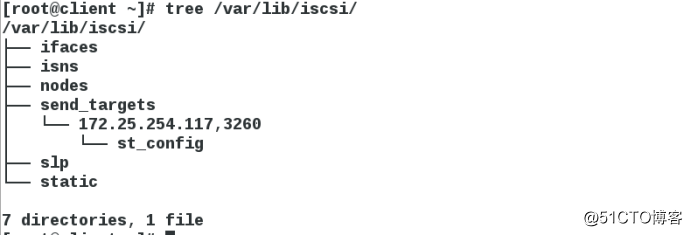
[root@client ~]# tree /var/lib/iscsi
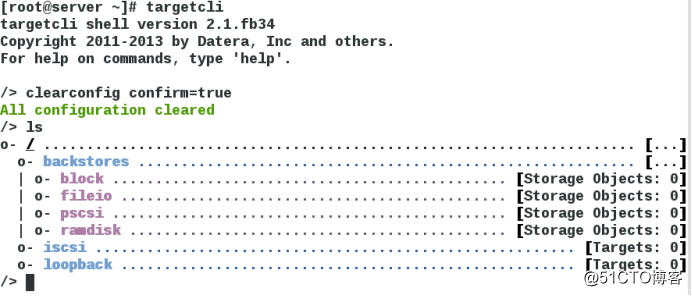
清除服务端的策略
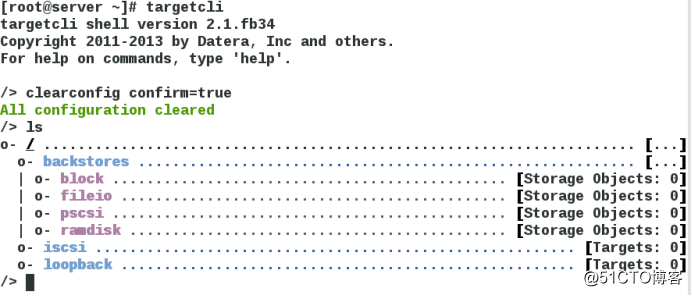
/>clearconfig confirm=ture
LVM
lvm的建立
[root@server ~]# pvcreate /dev/vdb1
[root@server ~]# vgcreate iscsi_vg /dev/vdb1创建iscsi_vg
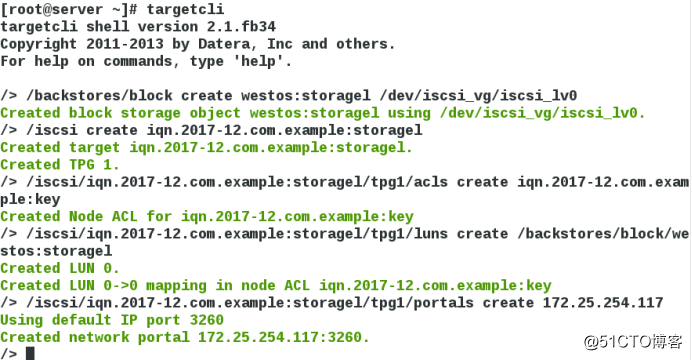
[root@server ~]# lvcreate -l 255 -n iscsi_lv0 iscsi_vg 创建iscsi_lv0

[root@server ~]# targetcli (和之前的相似)
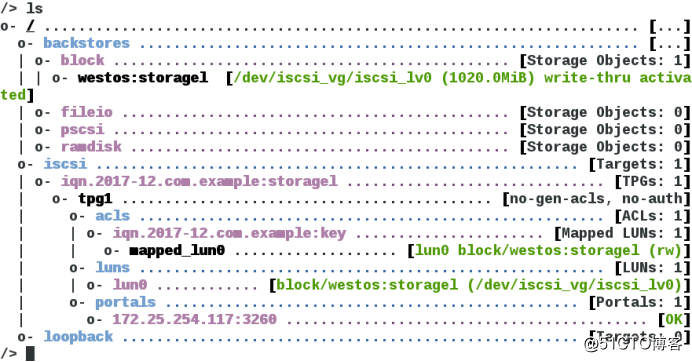
(客户端)
[root@client ~]# vim /etc/iscsi/initiatorname.iscsi 写入钥匙

[root@client ~]# systemctl restart iscsi
[root@client ~]# iscsi -m discovery -t st -p 172.25.254.117

[root@client ~]# iscsiadm -m node -T iqn.2017-12.com.example:storagel -p 172.25.254.117 -l (登陆失败)

[root@client ~]# tree /var/lib/iscsi/ 查看是否完全删除
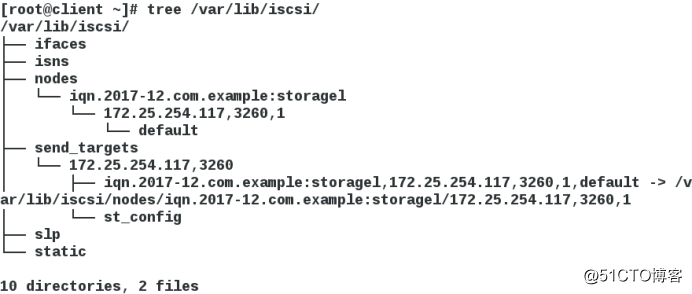

[root@client ~]# systemctl restart iscsid
[root@client ~]# systemctl restart iscsi
再次登陆

Lvm的扩展
(服务端)
[root@server ~]# fdisk /dev/vdb 新建lvm分区
[root@server ~]# partprobe
[root@server ~]# pvcreate /dev/vdb2
[root@server ~]# vgextend iscsi_vg /dev/vdb2
[root@server ~]# lvextend -L 1500M /dev/iscsi_vg/iscsi_lv0
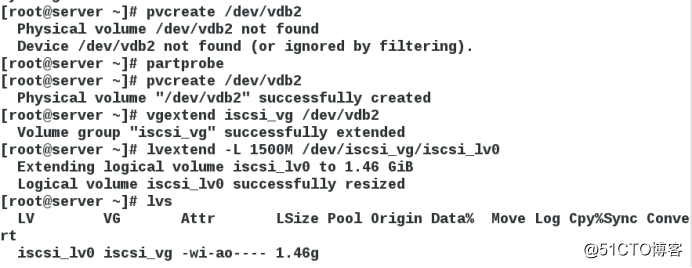
(客户端)
[root@client ~]# fdisk -l

(先退出再登陆)
[root@client ~]# iscsiadm -m node -T iqn.2017-12.com.example:storagel -p 172.25.254.117 -u
[root@client ~]# iscsiadm -m node -T iqn.2017-12.com.example:storagel -p 172.25.254.117 -l

[root@client ~]# fdisk -l

本文转自 無緣 51CTO博客,原文链接:http://blog.51cto.com/13352594/2051149


 本文介绍如何配置iSCSI服务实现远程磁盘共享,并通过LVM进行存储资源的扩展。涵盖iSCSI服务端及客户端配置步骤,包括安装软件包、设置防火墙、创建共享存储以及登录和管理iSCSI目标。


 1678
1678

 被折叠的 条评论
为什么被折叠?


