


SpringMVC与Struts2对比
| 对比项目 | SrpingMVC | Struts2 | 优势 |
| 国内市场情况 | 有大量用户,一般新项目启动都会选用springmvc | 有部分老用户,老项目组,由于习惯了,一直在使用。 | 国内情况,springmvc的使用率已经超过Struts2 |
| 框架入口 | 基于servlet | 基于filter | 本质上没太大优势之分,只是配置方式不一样 |
| 框架设计思想 | 控制器基于方法级别的拦截,处理器设计为单实例 | 控制器基于类级别的拦截, 处理器设计为多实例 | 由于设计本身原因,造成了Struts2,通常来讲只能设计为多实例模式,相比于springmvc设计为单实例模式,Struts2会消耗更多的服务器内存。 |
| 参数传递 | 参数通过方法入参传递 | 参数通过类的成员变量传递 | Struts2通过成员变量传递参数,导致了参数线程不安全,有可能引发并发的问题。 |
| 与spring整合 | 与spring同一家公司,可以与spring无缝整合 | 需要整合包 | Springmvc可以更轻松与spring整合 |
SpringMVC入门
创建Dynamic web项目
TestController类
@Controller
public class HelloController {

	@RequestMapping("hello")
	public ModelAndView hello(){
		System.out.println("hello springmvc....");
		//创建ModelAndView对象
		ModelAndView mav = new ModelAndView();
		//设置模型数据
		mav.addObject("msg", "hello springmvc...");
		//设置视图名字
		mav.setViewName("/WEB-INF/jsp/hello.jsp");
		return mav;
	}
}
JSP页面
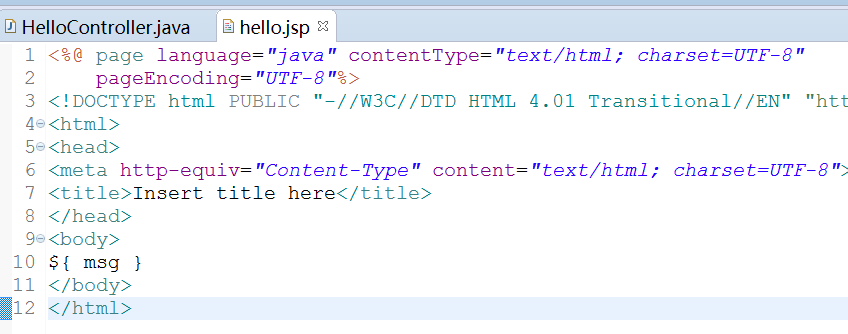
配置springmvc.xml核心配置文件
<?xml version="1.0" encoding="UTF-8"?>
<beans xmlns="http://www.springframework.org/schema/beans"
	xmlns:xsi="http://www.w3.org/2001/XMLSchema-instance" xmlns:p="http://www.springframework.org/schema/p"
	xmlns:context="http://www.springframework.org/schema/context"
	xmlns:mvc="http://www.springframework.org/schema/mvc"
	xsi:schemaLocation="http://www.springframework.org/schema/beans http://www.springframework.org/schema/beans/spring-beans-4.0.xsd
        http://www.springframework.org/schema/mvc http://www.springframework.org/schema/mvc/spring-mvc-4.0.xsd
        http://www.springframework.org/schema/context http://www.springframework.org/schema/context/spring-context-4.0.xsd">

	<!-- 配置@Controller处理器,包扫描器 -->
	<context:component-scan base-package="com.itpx.springmvc.controller" />
</beans>
在web.xml中配置前端控制器
<!-- 配置前端控制器 -->
  <servlet>
    <servlet-name>springmvc</servlet-name>
    <servlet-class>org.springframework.web.servlet.DispatcherServlet</servlet-class>
    <!-- 加载springmvc核心配置文件 -->
    <init-param>
      <param-name>contextConfigLocation</param-name>
      <param-value>classpath:springmvc.xml</param-value>
    </init-param>
  </servlet>
  <!-- 配置拦截路径 -->
  <servlet-mapping>
    <servlet-name>springmvc</servlet-name>
    <url-pattern>*.action</url-pattern>
  </servlet-mapping>
启动项目通过浏览器测试
http://localhost:8080/项目名/hello.action
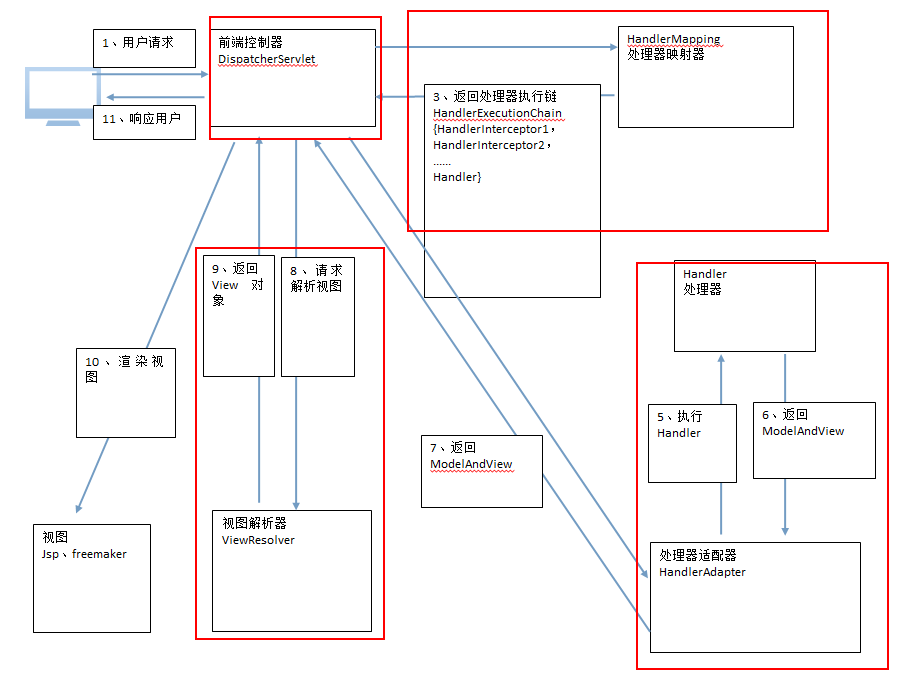
SpringMVC架构
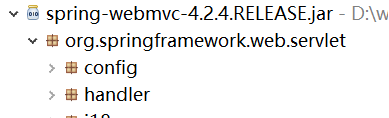
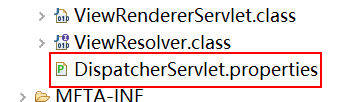
框架默认加载组件
处理器映射器与处理器适配器
从spring3.1版本开始,废除了DefaultAnnotationHandlerMapping的使用,推荐使用RequestMappingHandlerMapping完成注解式处理器映射。
<!-- 配置处理器映射器 -->
	<bean class="org.springframework.web.servlet.mvc.method.annotation.RequestMappingHandlerMapping"/>
从spring3.1版本开始,废除了AnnotationMethodHandlerAdapter的使用,推荐使用RequestMappingHandlerAdapter完成注解式处理器适配。
<!-- 处理器适配器 -->
	<bean class="org.springframework.web.servlet.mvc.method.annotation.RequestMappingHandlerAdapter" />
映射器与适配器必需配套使用,如果映射器使用了推荐的RequestMappingHandlerMapping,适配器也必需使用推荐的RequestMappingHandlerAdapter。
注解驱动
<!-- 注解驱动配置,代替映射器与适配器的单独配置,同时支持json响应(推荐使用) -->
	<mvc:annotation-driven />
视图解析器
<!-- 配置视图解析器 -->
	<bean class="org.springframework.web.servlet.view.InternalResourceViewResolver">
		<!-- 配置视图响应的前缀 -->
		<property name="prefix" value="/WEB-INF/jsp/" />
		<!-- 配置视图响应的后缀 -->
		<property name="suffix" value=".jsp" />
	</bean>
springMVC架构
SpringMVC与Mybatis整合
思路
Dao层:
1、SqlMapConfig.xml,空文件即可。需要文件头。
2、applicationContext-dao.xml。
a) 数据库连接池
b) SqlSessionFactory对象,需要spring和mybatis整合包下的。
c) 配置mapper文件扫描器。
Service层:
1、applicationContext-service.xml包扫描器,扫描@service注解的类。
2、applicationContext-trans.xml配置事务。
Controller层:
Springmvc.xml
1、包扫描器,扫描@Controller注解的类。
2、配置注解驱动。
3、视图解析器
Web.xml
1. 配置spring容量监听器
2. 配置前端控制器
参数绑定
/**
	 * 演示springmvc默认参数的传递
	 * 跳转修改商品信息页面
	 * @return
	 */
	@RequestMapping("itemEdit")
	public ModelAndView itemEdit(HttpServletRequest request,HttpServletResponse response,HttpSession session){
		ModelAndView mav = new ModelAndView();

		//request获取参数
		String id = request.getParameter("id");
		System.out.println("id为:" + id);
		//其它对象输出
		System.out.println("response对象:" + response);
		System.out.println("session对象:" + session);

		//查询商品信息
		Item item = itemServices.getItemById(new Integer(id));
		//设置商品数据返回页面
		mav.addObject("item", item);
		//设置视图名称
		mav.setViewName("itemEdit");
		return mav;
	}
简单参数绑定
/**
	 * 演示简单参数传递
	 * 跳转修改商品信息页面
	 * @RequestParam用法:入参名字与方法名参数名不一致时使用{
	 * 	value:传入的参数名,required:是否必填,defaultValue:默认值
	 * }
	 *
	 */
	@RequestMapping("itemEdit")
	public ModelAndView itemEdit(@RequestParam(value="id",required=true,defaultValue="1")Integer ids){
		ModelAndView mav = new ModelAndView();

		//查询商品信息
		Item item = itemServices.getItemById(ids);
		//设置商品数据返回页面
		mav.addObject("item", item);
		//设置视图名称
		mav.setViewName("itemEdit");
		return mav;
	}
Model/ModelMap
/**
	 * 演示返回String,通过Model/ModelMap返回数据模型
	 * 跳转修改商品信息页面
	 * @param id
	 * @return
	 */
	@RequestMapping("itemEdit")
	public String itemEdit(@RequestParam("id")Integer ids,Model m,ModelMap model){

		//查询商品信息
		Item item = itemServices.getItemById(ids);
		//通过Model把商品数据返回页面
		model.addAttribute("item", item);
		//返回String视图名字
		return "itemEdit";
	}
绑定pojo对象
要点:表单提交的name属性必需与pojo的属性名称一致。
/**
	 * 演示传递pojo参数
	 * 更新商品信息
	 * @return
	 */
	@RequestMapping("updateItem")
	public String updateItem(Item item,Model model){
		//更新商品
		itemServices.update(item);
		//返回商品模型
		model.addAttribute("item", item);
		//返回担任提示
		model.addAttribute("msg", "修改商品成功");
		//返回修改商品页面
		return "itemEdit";
	}
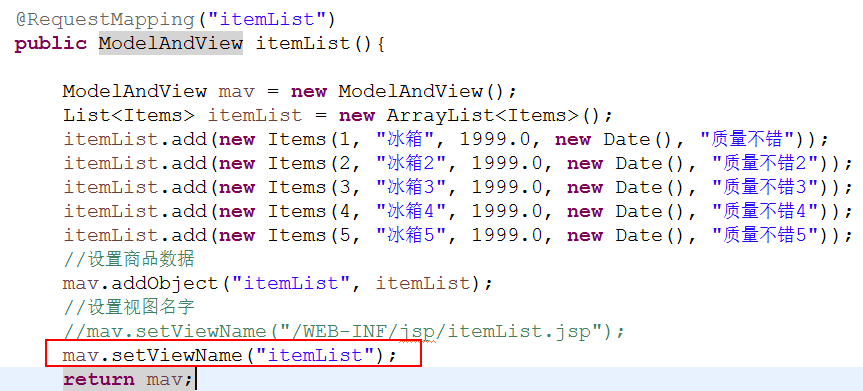
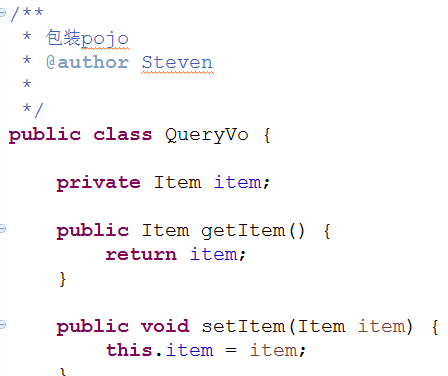
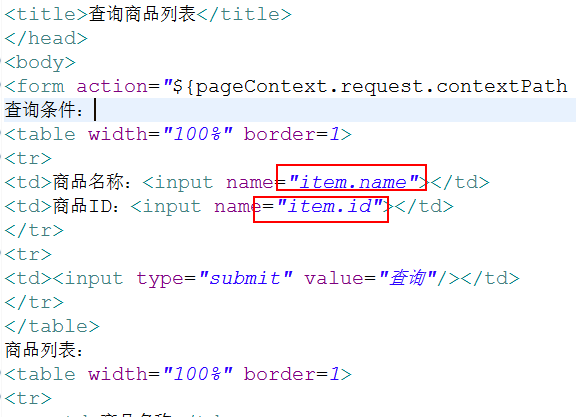
绑定包装的pojo
要点:通过点(.)传递属性。
/**
	 * 演示包装pojo传递
	 * @param vo
	 * @return
	 */
	@RequestMapping("queryItem")
	public String queryItem(QueryVo vo){
		//打印传入参数
		System.out.println(vo);
		//返回视图
		return "itemList";
	}
自定义转换器
/**
 * 日期转换器
 * S:source 要转换的源类型
 * T:目标,要转换成的数据类型
 * @author Steven
 *
 */
public class DateConvert implements Converter<String, Date> {

	@Override
	public Date convert(String source) {
		Date result = null;
		try {
			SimpleDateFormat sdf = new SimpleDateFormat("yyyy-MM-dd HH:mm:ss");
			result = sdf.parse(source);
		} catch (ParseException e) {
			e.printStackTrace();
		}
		return result;
	}

}
配置日期转换器
<!-- 配置注解驱动,相当于同时使用最新处理器映射跟处理器适配器,对json数据响应提供支持 -->
	<!-- 使用自定义转换器 -->
	<mvc:annotation-driven conversion-service="MyConvert" />

	<!-- 定义转换器 -->
	<bean id="MyConvert" class="org.springframework.format.support.FormattingConversionServiceFactoryBean">
		<property name="converters">
			<set>
				<bean class="com.itpx.springmvc.utils.DateConvert" />
			</set>
		</property>
	</bean>


 1591
1591

 被折叠的 条评论
为什么被折叠?
被折叠的 条评论
为什么被折叠?
 到【灌水乐园】发言


