


 本文详细介绍了帧中继配置实验的目的、环境搭建、步骤及关键配置,包括接口配置、映射关系设置等,帮助读者理解帧中继的基本配置。
简单的帧中继实验:<?xml:namespace prefix = o ns = "urn:schemas-microsoft-com:office:office" />
实验目的:了解帧中继的配置问题
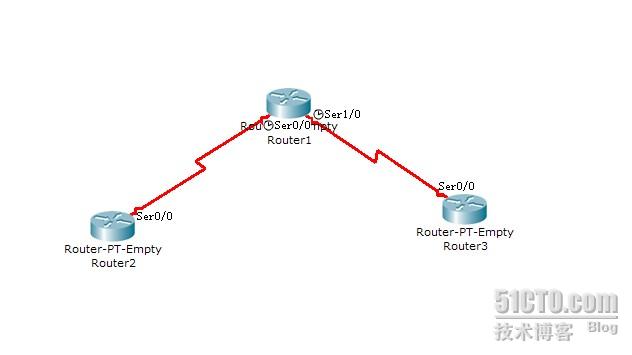
实验环境:如下图所示的拓扑结构、我们用R1模拟帧中继的交换机
<?xml:namespace prefix = v ns = "urn:schemas-microsoft-com:vml" />
实验步骤:
1:进入第一台路由器进行如下的配置
Router>en
Router#config t
Router(config)#hostname R1 !命名主机名
R1(config)#frame-relay switching !启用帧中继交换功能
R1 (config)#interface S0/0
R1 (config-if)# no ip address
R1 (config-if)# no shutdown
R1 (config-if)# encapsulation frame-relay //为接口封装帧中继
R1 (config-if)# clock rate 64000
R1 (config-if)# frame-relay intf-type dce //声明帧中继接口电缆类型。
R1 (config-if)#frame-reply interface-dlci 102 //定义它的dlci号为102
R1 (config-if)# frame-relay route 102 interface s1/0 201 //配置帧中继路由,102为进入接口的DLCI号,从S1/0的DLCI 201发出去
R1 (config-if)# frame-relay lmi-type ansi
R1 (config-if)#exit
R1 (config)# interface S1/0
R1 (config-if)# no ip address
R1 (config-if)# no shutdown
R1w(config-if)# encapsulation frame-relay
R1 (config-if)# clock rate 64000
R1 (config-if)# frame-relay intf-type dce
R1 (config-if)#frame-reply interface-dlci 201
R1 (config-if)# frame-relay route 201 interface s1/0 102
R1 (config-if)# frame-relay lmi-type ansi
2:进入第二台路由器进行如下的配置
Router>en
Router#config t
Router(config)#hostname R2
R2(config)# interface s0/0
R2(config-if)# encapsulation frame-relay
R2(config-if)# ip address 192.168.1.1 255.255.255.0
R2(config-if)# frame-relay lmi-type ansi
R2(config-if)# encapsulation frame-relay
R2(config-if)# ip address 192.168.1.1 255.255.255.0
R2(config-if)# frame-relay lmi-type ansi
R2(config-if)# no shut
3:进入第三台路由器进行如下的配置
Router>en
Router#config t
Router(config)#hostname R3
R3(config)# interface s0/0
R3(config-if)# encapsulation frame-relay
R3(config-if)# ip address 192.168.1.2 255.255.255.0
R3(config-if)# frame-relay lmi-type ansi
R3(config-if)# encapsulation frame-relay
R3(config-if)# ip address 192.168.1.2 255.255.255.0
R3(config-if)# frame-relay lmi-type ansi
R3(config-if)# no shut
4:测试R2和R3ping通
小结:
默认的是动态的映射关系
检查FR常用命令:
检查映射
router# show frame-relay map
检查PVC
router# show frame-relay pvc
检查LMI
router# show frame-relay lmi
检查接口状态
router#show int s0
转载于:https://blog.51cto.com/huangkai/281584


 1329
1329

 被折叠的 条评论
为什么被折叠?
被折叠的 条评论
为什么被折叠?
 到【灌水乐园】发言


