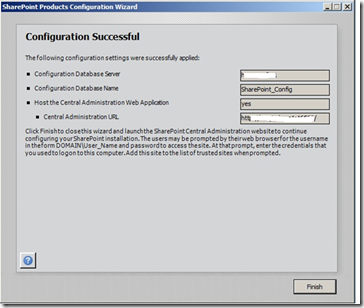
1. Configure SharePoint server 2010 Server Farm
2. Ensure connect to the database to normal.
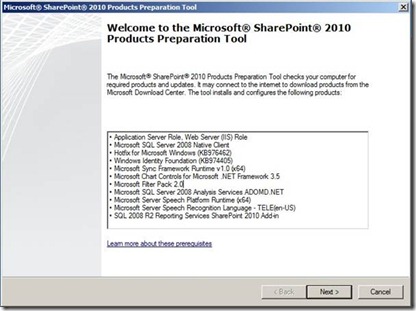
3. Install project server 2010.
Open “setup.cmd” or “setup.exe”
4. Configure services and service applications
To start the Project Application Service
1). On the SharePoint Central Administration home page, in the System Settings section, click Manage services on server.
2). On the Service list, click Start next to Project Application Service.
To start the PerformancePoint Service
1). On the Central Administration home page, in the System Settings section, click Manage services on server.
2). On the Service list, click Start next to PerformancePoint Service.
5. To create a Project Server service application
To create a Project Server service application
1). On the Central Administration home page, in the Application Management section, click Manage service applications.
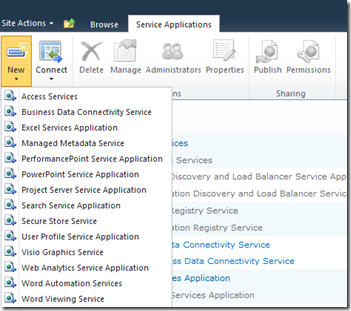
2). On the Manage Service Applications page, on the ribbon, click New, and then click Project Server Service Application.
3). On the Create Project Web App service application page:
a. In the Project Web App service application name box, type Project Server Service App.
b. In the Application Pool section, select the Create new application pool option, and in the Application pool name box, type Project AppPool.
c. Click OK.
To create a PerformancePoint service application
1). On the Central Administration home page, in the Application Management section, click Manage service applications.
2). On the Manage Service Applications page, on the ribbon, click New, and then click PerformancePoint Service Application.
3). On the New PerformancePoint Service Application page:
a. In the Name box, type PerformancePoint Service Application.
b. Select the Add this service application’s proxy to the farm’s default proxy list check box.
c. In the Application Pool area, select the Create new application pool option, and in the Application pool name box, type PerformancePointAppPool.
d. Click Create.
4). When the service application has been successfully created, click OK.
Configure the top-level Web site
A Web application is required to host the Project Web App web site and the associated project sites. Perform the following procedure to create a Web application.
To create a Web application
1). In Central Administration, in the Application Management section, click Manage Web applications.
2). On the toolbar, click New.
3). On the Create New Web Application page, keep the default values, and then click OK.
4). When the Web application has been created, click OK.
The next step is to create a top-level Web site and give users read permission to that site.
To create a top-level Web site
1). In Central Administration, in the Application Management section, click Create site collections.
2). Click OK.
To set Read permissions on the top-level Web site
1). Navigate to the root site (http://litware-proj).
2). Click Site Actions.
3). Click Site Permissions.
4). Click Grant Permissions.
5). In the Users/Groups box, type NT AUTHORITY\Authenticated Users.
6). Click OK.
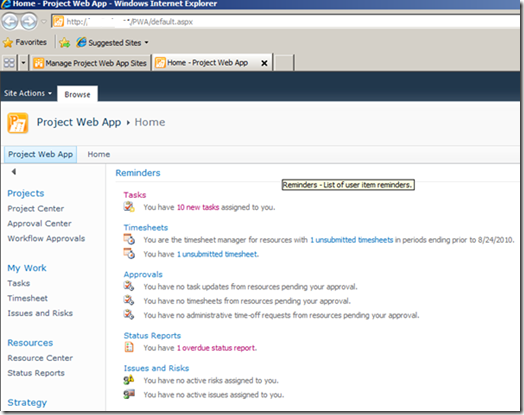
To create a PWA site
1). In the SharePoint Central Administration Web site, in the Application Management section, click Manage service applications.
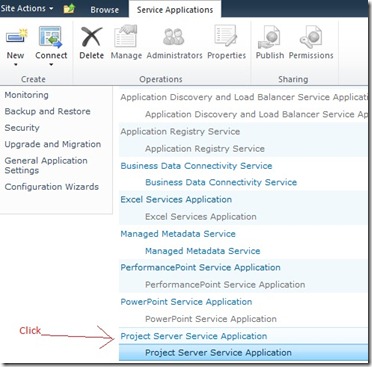
2). On the Manage Service Applications page, click the Project Server Service Application.
3). On the Manage Project Web App Sites page, click Create Project Web App Site.
4). Keep the default values, and then click OK.
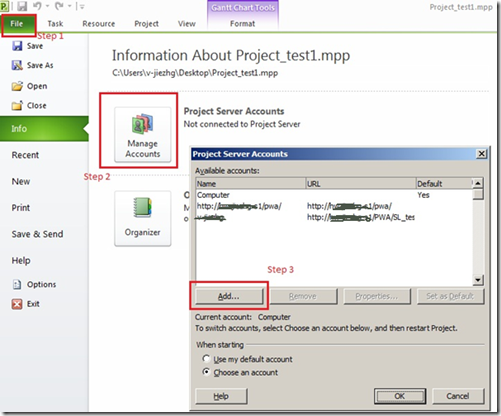
Configure Project Professional
1). Select File tab and click Manage Accounts in Info, then click Add…
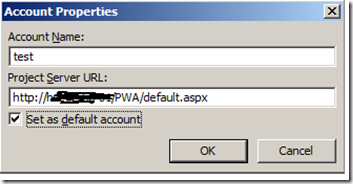
2). Type Project Web App
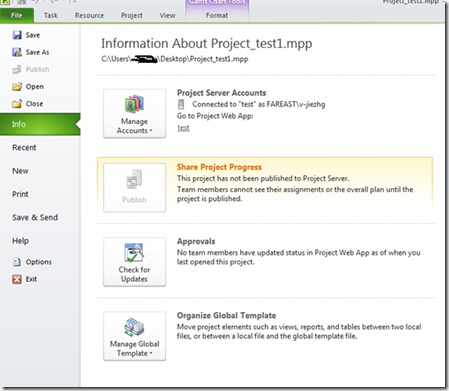
3). Publish project task


 本文详细介绍了如何配置 SharePoint Server 2010 的服务器场、安装 Project Server 2010 并设置相关服务和服务应用的过程,包括创建 Web 应用、顶级网站及配置权限等关键步骤。








 5019
5019

 被折叠的 条评论
为什么被折叠?


