


 本文提供了一套简洁明了的Git入门教程,从安装GitBash开始,逐步指导如何创建仓库、添加文件到暂存区、进行基本的文件操作以及撤销操作。通过实际操作示例,帮助读者理解Git的基本概念与使用流程,从而在日常开发中有效管理代码版本。
This tutorial is actually for myself as some memos. It provides some example and explanation for the most important commands which might be simple but is worth noting down for your long term memory. I am not going to write tons of commands and their appending complex options, but some of examples that could be easy to understand and enough for your daily work at most of time. I hope they can reflect the backbone of Git and expire you to draw your own diagram for this wonderful version control system in your mind.
Long way to go, but step by step. Here we go...
Before we touch Git, I find necessary and important to take a look at the picture below
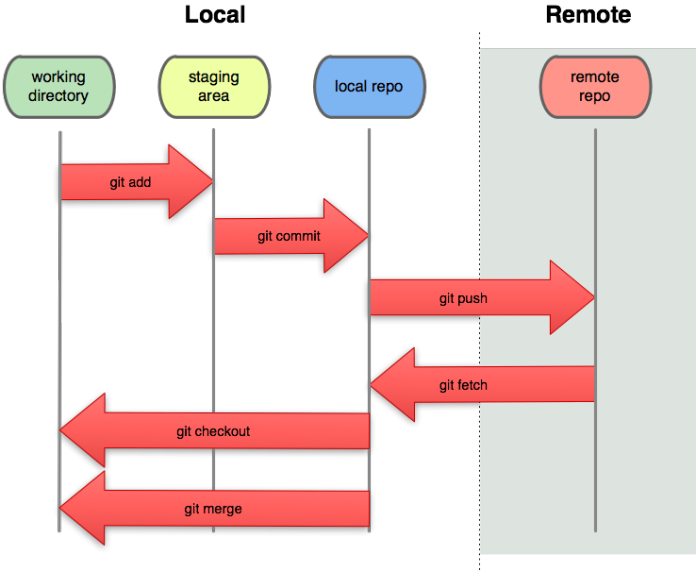
figure 1.1
This is very clear for you to understand what typical architecture Git is about. That's of course very different from any previous version control systems I've ever used such as VSS(Microsoft Visual SourceSafe) and TFS(Microsoft Team Foundation Server).
Please try to make sure you have installed git bash. This is a cool tool in the terminal I am going to play when going through the tutorials.
As the picture below we can see, there are 3 files in all in the folder /g/html5/openoffice . Trust me there is no more file even start with dot(.)
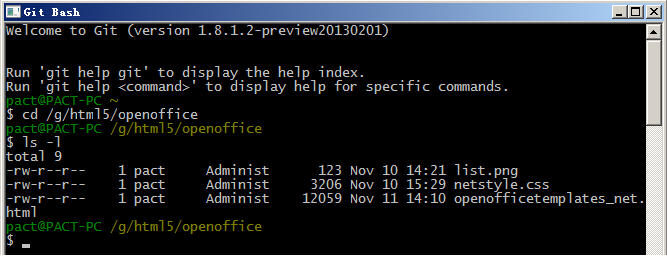
figure 1.2
That's the folder which is my Working Directory where the files could be managed by Git.
Let's type the command to create a repository here.
git init
After running the command, system creates a folder calls .git in the folder where you want to create repository, as shown below
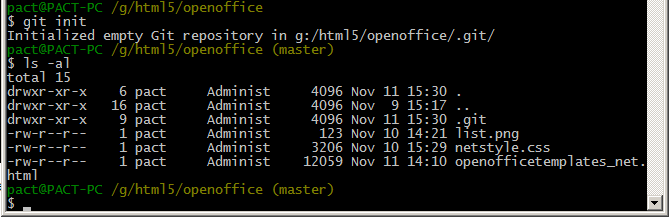
figure 1.3
In addition to that, it automatically creates a branch called 'master' for you by default which you are currently working on. That's why I can see the prompt message ends with string '(master)'. We'll talk about branch later on in Git Tutorial 5.
Since the new folder name starts with a dot(.), you might not see it in the explorer unless you set the Folder Options by checking item 'Show hidden files, folders, and drives'. But if you don't like to change the setting, it doesn't matter. Typing the command ls with option -a could show you all the hidden files and folders if they are over there as I do in the terminal.
I am about to add these 3 files to the Staging Area. Take a look back at the figure 1.1, and guess which command we are about to type. Yes, that's command add as the picture shown obviously.
git add --all
or
git add .
Type command status to show the result after running command add
git status
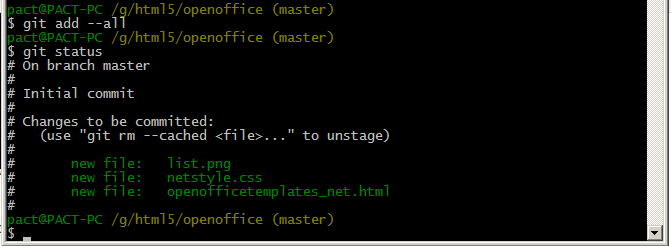
figure 1.4
If you find you've done something wrong by adding more than you need, for example here, list.png is not supposed to be added, you can undo the command add by running command rm
git rm --cached list.png
or even you want to undo all of them you've added to staging are, you can run this
git rm --cached *
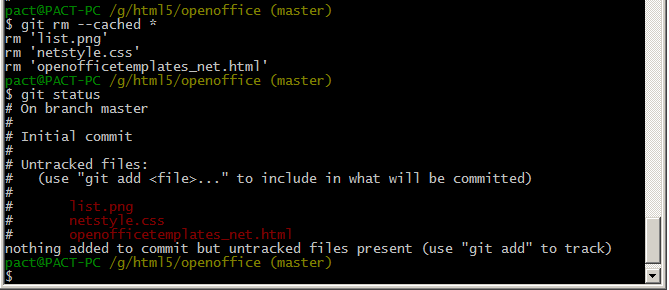
figure 1.5
As the picture shows the 3 files have already come out of staging area and back to untracked files.


 被折叠的 条评论
为什么被折叠?
被折叠的 条评论
为什么被折叠?
 到【灌水乐园】发言


