


 本文介绍如何在CentOS7和RHEL7中配置网卡绑定(NIC bonding),实现高可用性和冗余。通过创建bond接口并设置不同模式来提供故障容忍和负载均衡,适用于希望提高网络稳定性的系统管理员。

Configure NIC(Network Interface Card) bonding in CentOS 7 / RHEL 7
by Pradeep Kumar · Published August 31, 2015 · Updated August 31, 2015
NIC(Network Interface Card) bonding is also known as Network bonding. It can be defined as the aggregation or combination of multiple NIC into a single bond interface. It’s main purpose is to provide high availability and redundancy.
In this article we will learn how to configure nic or netwok bonding in CentOS 7 & RHEL 7. In my case i have two interface cards (enp0s3 & enp0s8) and will form a bond interface (bond0).
Prerequisite :
If bonding module is not loaded on your linux box then use the below command to load.
[root@openstack ~]# modprobe bonding
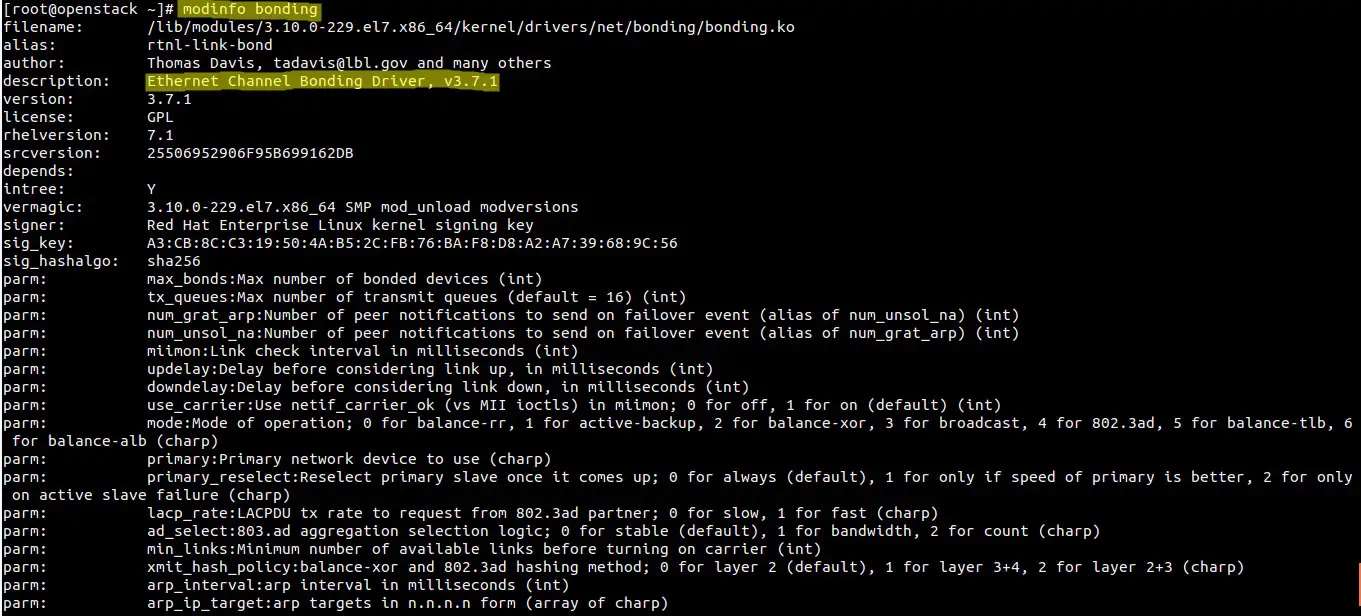
To list the bonding module info, use following command.
[root@openstack ~]# modinfo bonding
Output will be something like below
Step:1 Create Bond Interface File
Create a bond interface file (ifcfg-bond0) under the folder “/etc/sysconfig/network-scripts/”
[root@openstack network-scripts]# vi ifcfg-bond0
DEVICE=bond0
TYPE=Bond
NAME=bond0
BONDING_MASTER=yes
BOOTPROTO=none
ONBOOT=yes
IPADDR=192.168.1.70
NETMASK=255.255.255.0
GATEWAY=192.168.1.1
BONDING_OPTS="mode=5 miimon=100"
Save & exit the file.
Specify the IP address, Netmask & bonding modes as per your requirement. In my example i am using ‘mode=5′ which is used to provide fault tolerance and load balancing.
Please refer this for Different Modes in NIC bonding
Step:2 Edit the NIC interface files
For ifcfg-enp0s3
[root@openstack ~]# vi /etc/sysconfig/network-scripts/ifcfg-enp0s3
TYPE=Ethernet
BOOTPROTO=none
DEVICE=enp0s3
ONBOOT=yes
HWADDR="08:00:27:69:60:c9"
MASTER=bond0
SLAVE=yes
For ifcfg-enp0s8
[root@openstack ~]# cat /etc/sysconfig/network-scripts/ifcfg-enp0s8
TYPE=Ethernet
BOOTPROTO=none
DEVICE=enp0s8
ONBOOT=yes
HWADDR="08:00:27:ea:71:8d"
MASTER=bond0
SLAVE=yes
Step:3 Restart the Network Service
Below command will restart the network service and will bring above changes into the effect.
[root@openstack ~]# systemctl restart network.service
Step:4 Test & Verify bond interface.
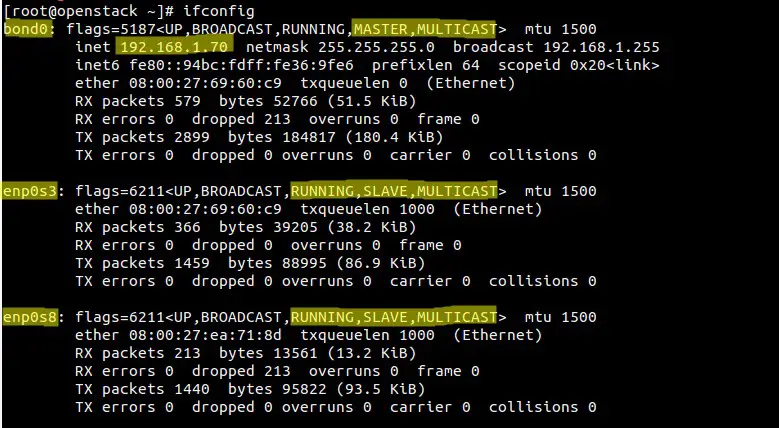
Use ‘ifconfig‘ & ‘ip add‘ command to check bond interface along with its slave interfaces.
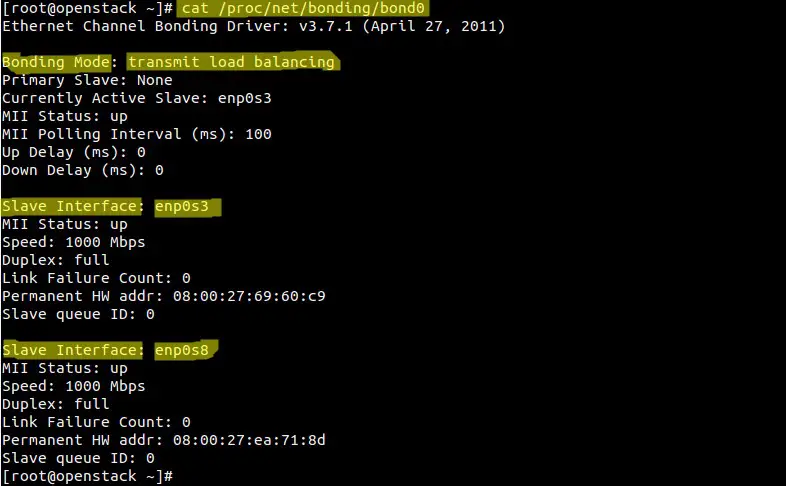
Use following command to view bond interface settings like bonding mode & slave interface.
[root@openstack ~]# cat /proc/net/bonding/bond0
Step:5 Fault tolerance testing
To test the fault tolerance we can down one interface and check whether you are still able access the server.
[root@openstack ~]# ifdown enp0s8
Device 'enp0s8' successfully disconnected.
[root@openstack ~]#


 被折叠的 条评论
为什么被折叠?
被折叠的 条评论
为什么被折叠?
 到【灌水乐园】发言


