


 本文介绍如何使用Windows Workflow Foundation创建自定义Activity,包括设置属性、添加执行组件及发送邮件功能。
本文内容来自
Microsoft Hands-on Labs for Windows Workflow Foundation RC
中的
HOL02
中的第二个练习,其中包括六个任务:
使用
Activity Designer
创建一个复杂活动
Composite Activity
Ø
创建一个工作流项目
Ø
创建一个
Activity Project
活动项目
Ø
生成工作流解决方案
Ø
添加一个执行组件
Ø
生成项目
Ø
更新
Activity
来发送
Email
<?XML:NAMESPACE PREFIX = O />
这个练习中将创建另一个工作流项目包含一个可以自定义属性的
Activity
。你可以使用一个自定义属性字段来指定
Email
消息。将为这个基本的自定义活动添加一个执行组件来添加到工作流。这个执行组件(
executor component
)使用
ASP.NET
的
API
和包含在字段中的
email
信息数据。
1
.打开
Visual Studio 2005
,新建一个
Sequential
Workflow Console Application
类型的项目。路径:
C:\Windows Workflow Foundation\Labs\Lab02
。项目名称为
CustomPropertySample
。
2
.将
Workflow1.cs
文件重命名为
SendMailWorkflow.cs
。
任务一完成。
3
.新建一个工作流项目,选择
Workflow
Activity Library
模板。在
Name
字段中输入
SendMailActivityLibrary
。
4
.选择添加到解决方案,点击
OK
。
5
.将
Activity1.cs
文件重命名为
SendMailActivity.cs
。
6
.点击
SendMailActivity
,查看属性窗口。
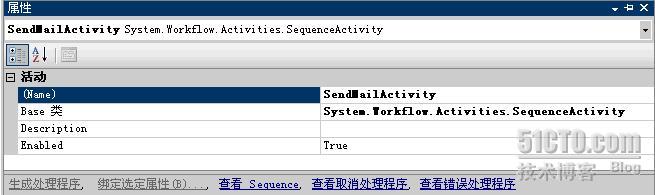
7.在属性窗口中选择Base Class属性,点击右边出现的“...”按钮。
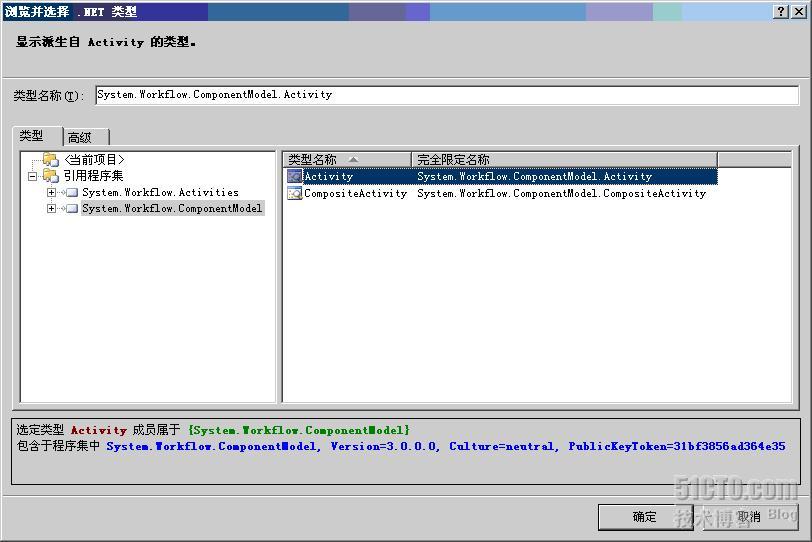
8
.在弹出的窗口中选择类型选项卡,选择
System.Workflow.ComponentModel
作为基类。
9
.选择
System.Workflow.ComponentModel
后,右边列出了两个基类:
Activity
和
Composite Activity
。
10
.选择
Activity
。效果如下:
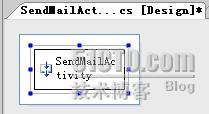
11
.转到
SendMailActivity.cs
代码视图。
12
.在
SendMailActivity
构造函数后面按两次回车。按鼠标右键选择“插入代码段”。
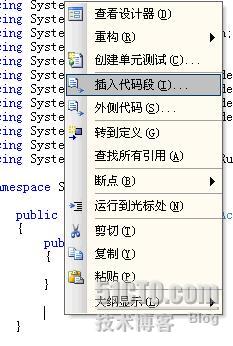
13.选择Workflow。
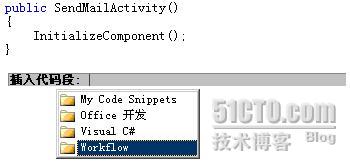
14.选择DependencyProperty - Property。

15
.这个片段将添加一些可以自定义的代码模板。
16
.以下是一些特性
attributes
的描述,可以添加到属性的标签中。
|
Name
|
Type
|
Description
|
|
Browseable
|
Boolean
|
Indicates whether this property appears in the Properties window.
|
|
Category
|
String
|
A user-defined category for the property.
|
|
Description
|
String
|
A description for the property.
|
|
DesignerSerializationVisibility
|
Visible, Hidden, or Content
|
Determines how and if properties will be serialized.
Visible
(the default) – the property will be serialized normally.
Hidden
– prevents property serialization
Content
– used for collection properties. The collection object itself is not serialized, however the contents of the collection are.
If a developer chooses a collection type, this property will be set to Content. If a developer chooses a non-serializable type, this property will be set to Hidden.
|
|
ValidationVisibility
|
Optional, Required, or Hidden
|
Specifies how the property’s value is validated.
Optional
(the default) – the property can accept null values.
Required
– The property must be set to a non-null value and is checked to ensure that this is the case.
Hidden
– There is no automatic validation of the property’s value.
If ValidationVisibility is set to ‘Required,’ when the component is reused, it will require the property to be configured via smart tags, obviating the need for a check in the activity’s Validator class.
|
17
.在生成的代码样板中输入这些字段的值。使用
Tab
键可以在这些绿色底的值之间移动,用回车键完成输入。
Name
:
To
Type
:
String
Description
:
To Email Address
Category
:
EmailActivity
设置完毕后,代码如下:
public static DependencyProperty ToProperty = System.Workflow.ComponentModel.DependencyProperty.Register("To", typeof(string), typeof(SendMailActivity));
[Description("To Email Address")]
[Category("EmailActivity")]
[Browsable(true)]
[DesignerSerializationVisibility(DesignerSerializationVisibility.Visible)]
public string To
{
get
{
return ((string)(base.GetValue(SendMailActivity.ToProperty)));
}
set
{
base.SetValue(SendMailActivity.ToProperty, value);
}
}
18
.使用同样的方法输入以下属性:
|
Name
|
Type
|
Description
|
Category
|
|
From
|
string
|
From Email Address
|
EmailActivity
|
|
Subject
|
string
|
Subject of Email
|
EmailActivity
|
|
Body
|
string
|
Body of Email
|
EmailActivity
|
这样这个
activity
就拥有了
4
个属性。
任务二完成。
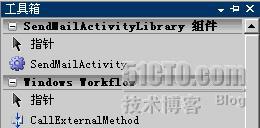
19
.编译生成解决方案。这一步会在工具箱中添加一个
SendMailActivity
。切换到
SendMailWorkflow
设计视图如下:
20
.在设计视图中添加一个
SendMailActivity
,并修改
Name
属性为
sendMail
。
21
.这时在属性窗口中可以看到刚才自定义的属性。

22
.现在就可以设置这些自定义属性的值了:
Body
:
body of email
。
From
:
email@any.domain
Subject
:
subject of email
To
:
email@some.domain
任务三完成。
任务四:添加一个
Executor Component
23
.切换到
SendMailActivity
代码视图。
24
.在代码文件的底部,在
Activity
类内定义的范围内,
override
覆写
Execute method
。在这个方法中添加如下代码,可以访问
activity
的其中一个自定义属性并显示它的内容。
protected override ActivityExecutionStatus Execute(ActivityExecutionContext executionContext)
{
Console.WriteLine(To);
return ActivityExecutionStatus.Closed;
}
任务四完成。
25
.重新生成解决方案。
26
.切换到
SendMailWorkflow
设计视图,按
Ctrl+F5
选择不调试运行。刚才设置的
To
属性的值会显示出来。
27
.按回车键结束。
任务五完成。
任务六:更新
Activity
发送
Email
28
.首先,需要在实验及其上建立
email
。这个实验是假设
SMTP server
已经实验机器上建立好了。
29
.切换到
SendMailActivity
代码视图。在顶部添加命名空间。
using
System.Net.Mail;
30
.在方法中使用
MailMessage
和
SMTPClient
类实现发送
Email
。代码如下:
MailAddress toAddress = new MailAddress(To);
MailAddress fromAddress = new MailAddress(From);
MailAddressCollection addresses = new MailAddressCollection();
addresses.Add(toAddress);
MailMessage msg = new MailMessage(fromAddress, toAddress);
msg.Subject = Subject;
msg.Body = Body;
SmtpClient mail = new SmtpClient("localhost");
mail.Send(msg);
return ActivityExecutionStatus.Closed;
31
.切换到
SendMailActivity
设计视图。设置
sendMail
Activity
的
To
属性为一个真实的
Email
地址。
32
.生成解决方案。按
Ctrl+F5
选择不调试运行。这里我使用的公司的
Exchange Server
进行实验的,用
OutLook
收邮件,实验成功。
任务六完成。
参考资料:
转载于:https://blog.51cto.com/bearstudyhard/299564


 被折叠的 条评论
为什么被折叠?
被折叠的 条评论
为什么被折叠?
 到【灌水乐园】发言


