


 本文介绍如何使用stencil buffer来可视化3D场景中每个像素的深度复杂度,即该点上的深度测试次数。通过两个不同的DepthStencilState设置,先记录深度复杂度,后根据stencil buffer中的值绘制出不同深度复杂度的区域。
这是一道在《Introduction to 3D Game Programming with DirectX 11》上的练习题。
要求把某个像素点上的Depth Complexity(深度复杂度?)可视化输出。Depth Complexity即某个点上有多少次depth test。
根据题目中的提示,我们可以用stencil buffer完成。
简要步骤如下:
绘制场景,设置DepthStencilState为stencil test永远通过,通过后stencil buffer中的值+1。这样每个点绘制后在stencil buffer中的点就会+1。
根据stencil buffer中的值绘制深度信息。
要做到这一点,我们只需要置StencilFunc为D3D11_COMPARISON_EQUAL,此时只有在stencil buffer中的值和stencilRef中的值相同的像素点会通过测试。接着对所有的可能的深度值(比如0~5),把整个屏幕用设定的颜色重新绘制一遍即可。这里的绘制不需要具体的顶点信息,只需要覆盖整个屏幕即可(我们会绘制一个覆盖屏幕的四边形,在接下来的shader中可以看到我们是如何做到这一点的)
综上所述,我们需要创建两个depth stencil state,第一个用来绘制场景,同时给stencil buffer中对应的点+1。注意,这个depth stencil state应该设置为在不通过或者通过depth test时都为stencil buffer +1。
建立一个名为DepthCounterDSS的depth stencil state
    D3D11_DEPTH_STENCIL_DESC dsdesc = { 0 };
    dsdesc.DepthEnable = true;                                      //深度测试无所谓
    dsdesc.DepthFunc = D3D11_COMPARISON_LESS;
    dsdesc.DepthWriteMask = D3D11_DEPTH_WRITE_MASK_ALL;
    dsdesc.StencilEnable = true;
    dsdesc.StencilReadMask = 0xff;
    dsdesc.StencilWriteMask = 0xff;
    dsdesc.FrontFace.StencilFunc = D3D11_COMPARISON_ALWAYS;         //Stencil test永远通过
    dsdesc.FrontFace.StencilDepthFailOp = D3D11_STENCIL_OP_INCR;    //depth fail失败了也+1
    dsdesc.FrontFace.StencilPassOp = D3D11_STENCIL_OP_INCR;
    dsdesc.FrontFace.StencilFailOp = D3D11_STENCIL_OP_KEEP;         //不会失败,这项无意义。
    //背面被剔除了,下面这些设置无意义。
    dsdesc.BackFace.StencilDepthFailOp = D3D11_STENCIL_OP_INCR;
    dsdesc.BackFace.StencilFailOp = D3D11_STENCIL_OP_KEEP;
    dsdesc.BackFace.StencilFunc = D3D11_COMPARISON_ALWAYS;
    dsdesc.BackFace.StencilPassOp = D3D11_STENCIL_OP_INCR;

    HR(device->CreateDepthStencilState(&dsdesc, &DepthCounterDSS));
第二个depth stencil state用于绘制深度信息。需要做的工作就是让stencil buffer中的值和stencilRef相等时通过stencil test,否则不通过即可。
注意,此时我们要绘制的图形只有一个覆盖整个屏幕的四边形(两个三角形组成)。
建立一个名为DepthVisualDSS的depth stencil state
    D3D11_DEPTH_STENCIL_DESC dvdesc = { 0 };
    dvdesc.DepthEnable = false;                                     //深度测试无所谓
    dvdesc.DepthFunc = D3D11_COMPARISON_LESS;
    dvdesc.DepthWriteMask = D3D11_DEPTH_WRITE_MASK_ALL;
    dvdesc.StencilEnable = true;
    dvdesc.StencilReadMask = 0xff;
    dvdesc.StencilWriteMask = 0xff;
    dvdesc.FrontFace.StencilFunc = D3D11_COMPARISON_EQUAL;          //相等时才通过
    dvdesc.FrontFace.StencilDepthFailOp = D3D11_STENCIL_OP_KEEP;    //不管成功失败都不修改stencil buffer
    dvdesc.FrontFace.StencilPassOp = D3D11_STENCIL_OP_KEEP;
    dvdesc.FrontFace.StencilFailOp = D3D11_STENCIL_OP_KEEP;
    //背面无所谓。
    dvdesc.BackFace.StencilDepthFailOp = D3D11_STENCIL_OP_KEEP;
    dvdesc.BackFace.StencilFailOp = D3D11_STENCIL_OP_KEEP;
    dvdesc.BackFace.StencilFunc = D3D11_COMPARISON_EQUAL;
    dvdesc.BackFace.StencilPassOp = D3D11_STENCIL_OP_KEEP;
    HR(device->CreateDepthStencilState(&dvdesc, &DepthVisualDSS));
接下来我们修改DrawScene()函数,使其在绘制场景前设置stencil depth state为我们的DepthCounterDSS,然后照常绘制即可。(注意在绘制中途stencil depth state有无改变)
void BlendApp::DrawScene()
{
    md3dImmediateContext->ClearRenderTargetView(mRenderTargetView, reinterpret_cast<const float*>(&Colors::Silver));
    md3dImmediateContext->ClearDepthStencilView(mDepthStencilView, D3D11_CLEAR_DEPTH|D3D11_CLEAR_STENCIL, 1.0f, 0);
    md3dImmediateContext->OMSetDepthStencilState(RenderStates::DepthCounterDSS, 0); //StencilRef没有用
    //普通绘制
    //……
    //绘制结束,此时stencil buffer中存的就是每个像素的深度复杂度

    DrawComplexity();
}
再实现DrawComplexity函数
void BlendApp::DrawComplexity()
{

    ID3DX11EffectTechnique* quadTech = Effects::BasicFX->DepthVisual;
    D3DX11_TECHNIQUE_DESC techDesc;
    quadTech->GetDesc(&techDesc);
    for (UINT p = 0; p<techDesc.Passes; ++p)
    {
        for (int i = 0; i<10; ++i)          //假设最多有10层深度
        {
            md3dImmediateContext->OMSetDepthStencilState(RenderStates::DepthVisualDSS, i);  //设置stencilref=i

            Effects::BasicFX->SetDVColor(Colors::White/10*i);       //设置绘制颜色,i越大白色越浓

            quadTech->GetPassByIndex(p)->Apply(0, md3dImmediateContext);

            md3dImmediateContext->Draw(3, 0);       //绘制一个四边形,具体的顶点信息由vertex shader自己给出
        }
    }
}
以上代码中的DepthVisual是一个简单的对全屏幕进行一次指定颜色绘制的technique,shader代码如下。
cbuffer quadColor
{
    float4 gDVColor;
}

VertexOut VSfullscreenQuad(uint id : SV_VERTEXID)       //SV_VERTEXID由gpu给出,指定当前顶点序号
{
    VertexOut output;

    // 计算齐次坐标
    output.PosH.x = (float) (id / 2) * 4.0 - 1.0f;
    output.PosH.y = (float) (id % 2) * 4.0 - 1.0f;
    output.PosH.z = 0.0f;
    output.PosH.w = 1.0f;

    return output;
}

float4 PScolorOnly(VertexOut pin) : SV_Target
{
    return gDVColor;
}

technique11 DepthVisual
{
    pass P0
    {
        SetVertexShader(CompileShader(vs_5_0, VSfullscreenQuad()));
        SetGeometryShader(NULL);
        SetPixelShader(CompileShader(ps_5_0, PScolorOnly()));
    }
}
完成效果如下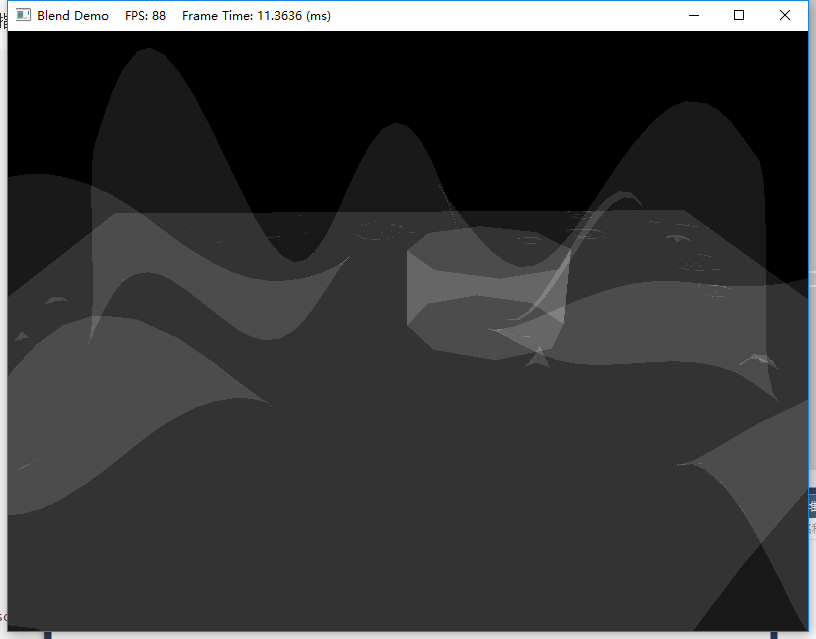


 6564
6564

 被折叠的 条评论
为什么被折叠?
被折叠的 条评论
为什么被折叠?
 到【灌水乐园】发言


