samba:是实现window和Linux之间文件共享的
1、使用的进程及使用的端口号:
nmbd:NETBIOS.(UDP<137,138>,TCP<139>)
smbd:FILEsharing.(TCP<445>)
2、配置文件:
/etc/samba/smb.conf、/etc/samba/*
3、启动samba服务:
/etc/init.d/smb start(注意要先关掉selinux,使用#setenforce 0)
4、使用的软件包:
samba.i386.rpm 服务端的
samba-client.i386.rpm 客户端的
samba-common.i386.rpm 公用的
samba-swat.i386.rpm 图形化界面的
5、查看默认的配置文件:
# grep -v "[^[:space:]]*#" /etc/samba/smb.conf| grep -v "^;" | grep -v "^$"
[global]
workgroup = MYGROUP
server string = Samba Server Version %v
security = user //安全级别
passdb backend = tdbsam
load printers = yes
cups options = raw
[homes]
comment = Home Directories
browseable = no
writable = yes
[printers]
comment = All Printers
path = /var/spool/samba
browseable = no
guest ok = no
writable = no
printable = yes
这里面可以根据自己的需要进行设置,当然也可以自己在加一个分享的目录
格式可以按照上面的格式写
eg: [tools]
comment = share_from_linux //描述信息
path = /share //共享目录
public = yes //
browseable = yes //可浏览
writable = yes //可写
write list = gentoo //允许写入的用户(+GROUPNAME 或@GROUPNAME)
6、做完配置之后,可以使用testparm检查配置文件
[root@ns3 ~]# testparm
Load smb config files from /etc/samba/smb.conf
Processing section "[homes]"
Processing section "[printers]"
Processing section "[tools]"
Loaded services file OK.
Server role: ROLE_STANDALONE
Press enter to see a dump of your service definitions
如果按下Enter键,可以看到当前所有有效的配置信息
7、启动samba:
service smb start
8、使用系统用户进行登录,如果不是匿名的用户,可以使用smbpasswd来为samba添加用户
smbpasswd [options] USERNAME
-a 加入到samba
-x 删除
-d 临时禁用指定用户
-e 启用用户
eg:smbpasswd -a gentoo //把gentoo添加为samba用户
9、使用samba的客户端工具查看、登录
smbclient -L HOST|IP -U USERNAME //查看指定samba显示的共享目录
eg:#smbclient -L 192.168.1.109 -U gentoo
smbclient //HOST/SHARE -U USERNAME //登录到共享目录
eg:# smbclient //192.168.1.109/tools -U gentoo
也可以使用挂载到本地的方式来访问
mount -t cifs //IP/share /mnt -o username=USERNAME
[root@www1 ~]# mkdir /mnt/smb
# mount -t cifs //192.168.1.109/tools /mnt/smb/ -o username=gentoo
Password:
# cd /mnt/smb/
# ls
a.txt
登录之后就可以使用get、put等命令来实现上传和下载了
10、图形化界面管理samba:
安装上samba-swat软件包
他依赖于超级守护进程,在/etc/xinetd.d/swat下
vim /etc/xinitd.d/swat
把里面的disable = yes 改成 disable = no
only_from = 192.168.1.0/24 指定可以访问的网段或主机
这里面显示的有使用的port = 901
使用service xinetd start
[root@ns3 xinetd.d]# netstat -ntlp | grep :901
tcp 0 0 0.0.0.0:901 0.0.0.0:* LISTEN 30259/xinetd
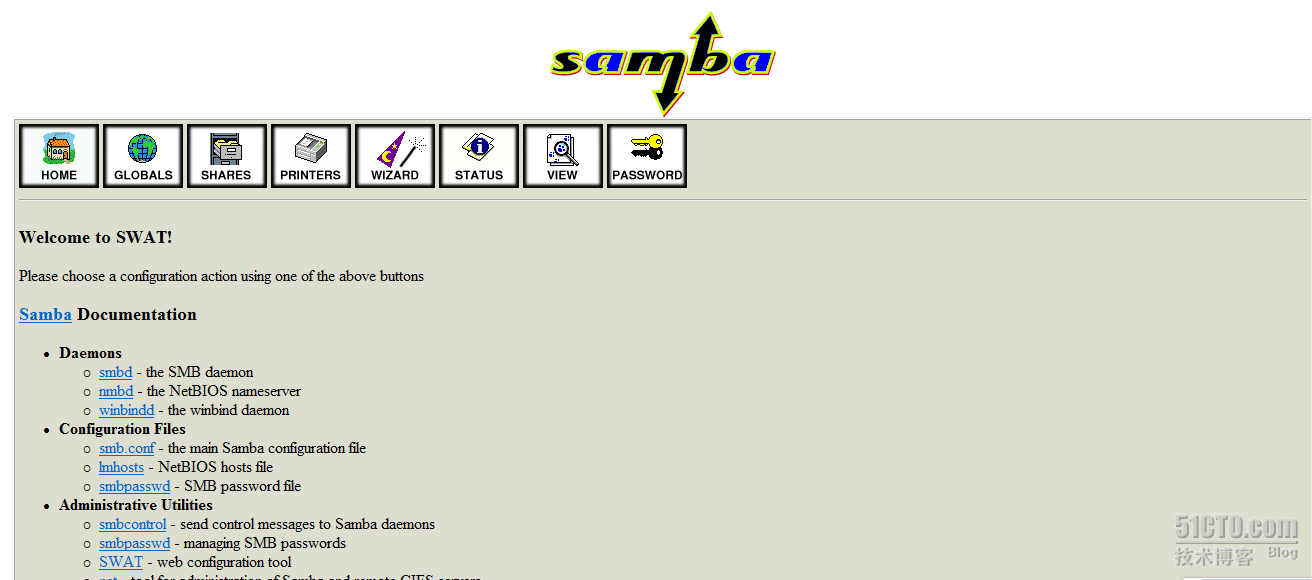
然后在浏览器中输入 http://IP:901即可进行图形化界面的配置
如图所示:

在这里面可以进行更详细的配置,但是建议配置前把系统的smb.conf备份一份,这样就可以在使用图形化界面配置出现错误后可以恢复过来,图形化界面配置完成之
后,只要保存,就立即覆盖原有的配置文件,而且自动重启服务。
转载于:https://blog.51cto.com/luoweiro/641962


 本文详细介绍Samba的配置步骤和服务启动方法,包括进程端口、配置文件解析、客户端工具使用及图形化管理等内容,帮助读者实现Windows与Linux间的文件共享。


 39万+
39万+

 被折叠的 条评论
为什么被折叠?


