


 本文详细介绍SpringBoot结合JPA进行数据库操作的具体实践,包括配置、实体类定义、Repository接口使用及常见异常处理等。

什么是JPA
JPA是Java Persistence API的简称,中文名Java持久层API,是JDK 5.0注解或XML描述对象-关系表的映射关系,并将运行期的实体对象持久化到数据库中。
JPA的宗旨是为POJO提供持久化标准规范,其持久化API是Sun公司在Java EE 5规范中提出的Java持久化接口。Hibernate是它的一种实现。除了Hibernate,还有EclipseLink(曾经的toplink),OpenJPA等可供选择,所以使用Jpa的一个好处是,可以更换实现而不必改动太多代码。
JPA——Hibernate
添加依赖
<!-- 添加mysql数据库驱动依赖 -->
		 <dependency>
			<groupId>mysql</groupId>
			<artifactId>mysql-connector-java</artifactId>
		</dependency>
			<!-- 添加spring-data-jpa依赖 -->
		<dependency>
			<groupId>org.springframework.boot</groupId>
			<artifactId>spring-boot-starter-data-jpa</artifactId>
		</dependency>
添加配置文件
spring.datasource.url=jdbc:mysql://localhost:3306/test
spring.datasource.username= root
spring.datasource.password= 123
spring.datasource.driverClassName = com.mysql.jdbc.Driver
spring.datasource.max-active = 20
spring.datasource.max-idle = 8
spring.datasource.min-idle = 8
spring.datasource.initial-size = 10


#JPA Configuration:
spring.jpa.database=MYSQL
# Show or not log for each sql query
spring.jpa.show-sql=true
spring.jpa.generate-ddl=true
# Hibernate ddl auto (create, create-drop, update)
spring.jpa.hibernate.ddl-auto=update
#spring.jpa.database-platform=org.hibernate.dialect.MySQL5Dialect
spring.jpa.hibernate.naming_strategy=org.hibernate.cfg.ImprovedNamingStrategy
#spring.jpa.database=org.hibernate.dialect.MySQL5InnoDBDialect
spring.jpa.properties.hibernate.dialect=org.hibernate.dialect.MySQL5Dialect
创建实体类
/**
 * 创建了一个实体类
 * @Entity 注解 进行持久化 当jpa检测到该注解时,会在数据库中生成相应的表结构信息
 * @author Administrator
 *
 */
@Entity
public class Cat {
	/**
	 * 使用@Id指定主键
	 * @GeneratedValue(strategy=GenerationType.AUTO)指定主键的生成策略,mysql默认是自增长
	 */
	@Id@GeneratedValue(strategy=GenerationType.AUTO)
	private  int id;
	@Column(nullable=false,length=500)//指定数据库该字段非空,长度为500
	private String catName;
	private int catAge;
	get/set()...
}
创建jpa接口继承CrudRepository
public interface CatReposity extends CrudRepository<Cat, Integer>{

}
创建service,并绑定事务
@Service
public class CatService {
	@Resource
	private CatReposity catReposity;

	/**
	 * save update delete 需要绑定事务 使用@Transactional进行事务的绑定
	 * @param cat
	 */
	@Transactional
	public void save(Cat cat){
		catReposity.save(cat);
	}

	@Transactional
	public void delete(int id) {
		catReposity.delete(id);

	}

	public Iterable<Cat> getAll(){
		return catReposity.findAll();
	}
}
创建controller类
@RestController
@RequestMapping("/cat")
public class CatController {
	@Resource
	private CatService catService;

	@RequestMapping("/save")
	public String save(){
		Cat cat = new Cat();
		cat.setCatName("小花");
		cat.setCatAge(2);
		catService.save(cat );
		return "save.ok";
	}
	@RequestMapping("/delete")
	public String delete(){
		catService.delete(1);
		return  "delete ok.";
	}
	@RequestMapping("/getAll")
	public Iterable<Cat> getAll(){
		return catService.getAll();
	}
}
启动服务,页面访问
JPA——Spring Data JPA
Spring data JPA提供了一个核心接口 Repository,它不提供任何方法,是一个空接口。
若我们定义的接口继承了repository,则该接口会被IOC容器识别为一个RepositoryBean纳入到IOC容器中,进而可以在该接口中定义满足一定规范的方法。实际上也可以通过@RepositoryDefinition注解来替代继承Repository接口。查询方法以find/read/get开头。涉及查询条件时,条件的属性同条件关键字连接,要注意的是条件属性首字母大写,使用@Query注解可以自定义JPQL语句实现更灵活的查询。
CrudRepository接口提供了最基本的对实体类的增删改查操作:
- S save(S entity); 保存单个实体
- Iterable<S> save(Iterable<S> entities); 保存集合
- T findOne(ID id); 根据id查找实体
- boolean exists(ID id); 根据id判断实体是否存在
- Iterable<T> findAll(); 查询所有实体,不用或慎用
- Iterable<T> findAll(Iterable<ID> ids); 根据id集合查询实体集合
- long count(); 查询实体数量
- void delete(ID id); 根据id删除实体
- void delete(T entity); 直接删除一个实体
- void delete(Iterable<? extends T> entities);删除实体集合
- void deleteAll(); 删除所有实体,不用或慎用
PagingAndSortingRepository接口:该接口提供了排序与分页的功能
- Iterable<T> findAll(Sort sort); 排序
- Page<T> findAll(Pageable pageable); 分页查询(含排序功能)
JpaRepository接口:查找所有实体,排序、查找所有实体 ,执行缓存与数据库同步
JpaSpecificationExecutor接口:不属于Repository体系,实现一组JPA Criteria查询相关的方法,封装JPA criteria查询条件,通常使用匿名内部类的方式来创建该接口的对象。
自定义Repository:可以自定义死一个MyRepository接口。
以上接口均可按照规则添加自己新加入的方法
public interface Cat2Repository extends Repository<Cat, Integer>{

	/**
	 * 查询方法以find/read/get开头
	 * 涉及查询条件时,条件的属性同条件关键字连接,要注意的是条件属性首字母大写
	 */
	//根据catName查询
	public Cat findByCatName(String catName);
	/**
	 * 如何编写JPQL语句
	 * JPQL语句与HQL语句类似
	 */
	@Query("from Cat where catName=:name")
	public Cat findByJpql(@Param("name")String catName);
}
JPA——jdbcTemplate
添加依赖
<!-- 添加spring-data-jdbc依赖 如果已经 加入jpa依赖该依赖则不用再次添加-->
		<dependency>
			<groupId>org.springframework.boot</groupId>
			<artifactId>spring-boot-starter-jdbc</artifactId>
		</dependency>
编写dao
/**
 *@Repository 使用该注解是表明是一个持久化
 * @author Administrator
 *
 */
@Repository
public class CatDao {
	/**
	 * 定义一个sql
	 * 定义一个RowMapper
	 * 执行查询方法
	 */
	@Resource
	private JdbcTemplate jdbcTemplate;
	public Cat selectByCatName(String catName) {
		String sql = "select * from cat where cat_name = ?";
		RowMapper<Cat> rowMapper = new BeanPropertyRowMapper<>(Cat.class);
		Cat cat=jdbcTemplate.queryForObject(sql, new Object[]{catName},rowMapper );
		return cat;

	}
}
//service编写
@Service
public class CatService {
@Resource
private CatDao catDao;
public Cat selectByCatName(String catName) {
return catDao.selectByCatName(catName);
}
}
//controller编写
@RequestMapping("/selectByCatName")
public Cat selectByCatName(String catName) {
return catService.selectByCatName(catName);
}
全局异常捕捉
/**
 * 新建一个类并注解@ControllerAdvice
 * 在方法上注解@ExceptionHandler(value=Exception.class)
 * 添加一个方法,并在上面添加@ExceptionHandler(value=Exception.class)拦截相应的异常信息
 * 若果放回的是view,方法的返回值是ModelAndView
 * 若返回的是String或者json,需要在方法上添加注解@ResponseBody
 * @author Administrator
 *
 */
@ControllerAdvice
public class GlobalDefaultExceptionHandler {
	@ResponseBody
	@ExceptionHandler(value=Exception.class)
	public String defaultExceptionHandler(HttpServletRequest request,Exception e) {
		return "服务器异常,请稍后再试!sorry";
	}
}
SpringBoot使用theymeleaf
添加依赖
<!-- 添加thymeleaf依赖 -->
		<dependency>
			<groupId>org.springframework.boot</groupId>
			<artifactId>spring-boot-starter-thymeleaf	</artifactId>
		</dependency>
关闭thymeleaf缓存
########################################################
###THYMELEAF (ThymeleafAutoConfiguration)
########################################################
#spring.thymeleaf.prefix=classpath:/templates/
#spring.thymeleaf.suffix=.html
#spring.thymeleaf.mode=HTML5
#spring.thymeleaf.encoding=UTF-8
# ;charset=<encoding> is added
#spring.thymeleaf.content-type=text/html
# set to false for hot refresh
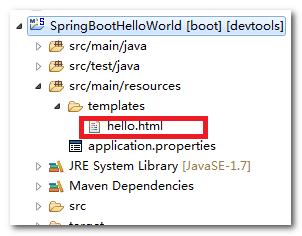
spring.thymeleaf.cache=false 创建html
<body>
	<h1>
		hello, thymeleaf !<br /> This is my first thymeleaf demo !
		<hr />
		welcome  <span th:text="${name}"></span>
	</h1>
</body>
编写controller
/**
 * 在Thymeleaf 模板文件中 3.0之前是要求标签必须闭合的
 * @author Administrator
 *
 */
@Controller
@RequestMapping("/templates")
public class TemplatesController {
	/**
	 * 映射地址是:/templates/hello
	 * @return
	 */
	@RequestMapping("/hello")
	public String hello(Map<String, Object> map){
		map.put("name", "zhangsan");
		//返回的黑丝ModelAndView
		return "hello";
	}
}
页面测试
SpringBoot使用freemarker
添加依赖
<!-- 添加freemarker依赖 -->
		<dependency>
			<groupId>org.springframework.boot</groupId>
			<artifactId>spring-boot-starter-freemarker</artifactId>
		</dependency>
关闭freemarker缓存
########################################################
###freemarker
########################################################
spring.freemarker.allow-request-override=false
spring.freemarker.cache=false
spring.freemarker.check-template-location=true
spring.freemarker.charset=UTF-8
spring.freemarker.content-type=text/html
spring.freemarker.expose-request-attributes=false
spring.freemarker.expose-session-attributes=false
spring.freemarker.expose-spring-macro-helpers=false
#spring.freemarker.prefix=
#spring.freemarker.request-context-attribute=
#spring.freemarker.settings.*=
#spring.freemarker.suffix=.ftl
#spring.freemarker.template-loader-path=classpath:/templates/
#comma-separated list
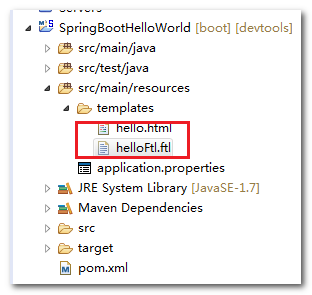
#spring.freemarker.view-names= # whitelist of view names that can be resolved编写模板文件 .ftl
<!DOCTYPE html>
<html>
<head>
<meta charset="UTF-8" />
<title>Insert title here</title>
</head>
<body>
     hello , freemarker !
      hello , ${name} !
</body>
</html>
TemplatesController添加方法
	@RequestMapping("/helloFtl")
	public String helloHtl(Map<String, Object> map){
		map.put("name", "lisi");
		return "helloFtl";
	}
页面测试
SpringBoot添加jsp支持
创建Maven Web project
在pom.xml中添加依赖
<!-- Spring父节点依赖,引入后相关的依赖不再需要添加版本信息,spring boot会选择合适的依赖版本 -->
<parent>
<groupId>org.springframework.boot</groupId>
<artifactId>spring-boot-starter-parent</artifactId>
<version>1.4.1.RELEASE</version>
</parent>
<properties>
<project.build.sourceEncoding>UTF-8</project.build.sourceEncoding>
<!-- 指定jdk版本 1.7 默认1.6 -->
<java.version>1.7</java.version>
</properties>
<dependencies>
<!-- springboot启动依赖 -->
<dependency>
<groupId>org.springframework.boot</groupId>
<artifactId>spring-boot-starter-web</artifactId>
</dependency>
<!-- servlet依赖 -->
<dependency>
<groupId>javax.servlet</groupId>
<artifactId>javax.servlet-api</artifactId>
<scope>provided</scope>
</dependency>
<!-- jstl标签库 -->
<dependency>
<groupId>javax.servlet</groupId>
<artifactId>jstl</artifactId>
</dependency>
<!-- tomca支持 -->
<dependency>
<groupId>org.springframework.boot</groupId>
<artifactId>spring-boot-starter-tomcat</artifactId>
<scope>provided</scope>
</dependency>
<dependency>
<groupId>org.apache.tomcat.embed</groupId>
<artifactId>tomcat-embed-jasper</artifactId>
<scope>provided</scope>
</dependency>
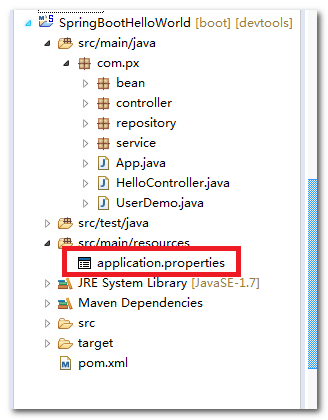
</dependencies>配置application.properties支持jsp
spring.mvc.view.prefix=/WEB-INF/jsp/
spring.mvc.view.suffix=.jsp
编写controller
@Controller
public class HelloController {
	@RequestMapping("/index")
	public String hello(){
		return "index";
	}
	@RequestMapping("/index2")
	public String hello2(Map<String, Object> map){
		map.put("name","张三");
		return "index2";
	}
}
编写jsp页面
<body>
	<h2>hello ,jsp page !</h2>
</body>

<body>
	<h2>hello , ${name}!</h2>
</body>
编写启动类App.java
@SpringBootApplication
public class App {
	public static void main(String[] args) {
		SpringApplication.run(App.class, args);
	}
}
启动项目,页面测试
SpringBoot集成Mybatis
创建maven project
在pom.xml中添加依赖
<!-- Spring父节点依赖,引入后相关的依赖不再需要添加版本信息,spring boot会选择合适的依赖版本 -->
	<parent>
		<groupId>org.springframework.boot</groupId>
		<artifactId>spring-boot-starter-parent</artifactId>
		<version>1.4.1.RELEASE</version>
	</parent>
	<properties>
		<project.build.sourceEncoding>UTF-8</project.build.sourceEncoding>
		<!-- 指定jdk版本 1.7 默认1.6 -->
		<java.version>1.7</java.version>
	</properties>

	<dependencies>
		<!-- springboot启动依赖 -->
		<dependency>
			<groupId>org.springframework.boot</groupId>
			<artifactId>spring-boot-starter-web</artifactId>
		</dependency>
		<!-- 添加mysql数据库驱动依赖 -->
		<dependency>
			<groupId>mysql</groupId>
			<artifactId>mysql-connector-java</artifactId>
		</dependency>
		<!--springboot mybatis 依赖 不要使用1.0.0版本,因为还不支持拦截器插件 -->
		<dependency>
			<groupId>org.mybatis.spring.boot</groupId>
			<artifactId>mybatis-spring-boot-starter</artifactId>
			<version>1.1.1</version>
		</dependency>
		<!-- mybatis的分页插件 -->
		<dependency>
			<groupId>com.github.pagehelper</groupId>
			<artifactId>pagehelper</artifactId>
			<version>4.1.0</version>
		</dependency>
	</dependencies>
创建启动类 注意@MapperScan("com.px.*")注解添加
/**
 * springboot启动类
 */
@SpringBootApplication
@MapperScan("com.px.*")//扫描该包下相应的mybatis持久化类
public class App{
	public static void main(String[] args) {
		SpringApplication.run(App.class, args);
	}

}
编写实体类
public class Student {
	private long id;
	private String name;
set/get方法。。。
}
编写Mapper 注解@select @Insert @Options
public interface StudentMapper {
	/**
	 * #{name}参数占位符
	 * @param name
	 * @return
	 */
	@Select("select * from Student where name = #{name}")
	public List<Student> likeName (String name);
	@Select("select * from Student where id = #{id}")
	public Student getById(long id);
	@Select("select name from Student where id = #{id}")
	public String getNameById(long id);

	@Insert("insert into Student (name) values( #{name})")
	@Options(useGeneratedKeys=true,keyProperty="id",keyColumn="id") //返回自增主键
	public void save(Student student );
}
编写Service
@Service
public class StudentService {
	@Autowired
	private StudentMapper studentMapper;

	public  List<Student> likeName(String name){
		return studentMapper.likeName(name);
	}

	@Transactional
	public void save(Student student ){
		 studentMapper.save(student);
	};
}
编写Controller
@RestController
public class StudentController {
	@Autowired
	private StudentService studentService;

	@RequestMapping("/studentName")
	public List<Student> likeName(String name){
		PageHelper.startPage(1, 2);
		return studentService.likeName(name);
	}
	@RequestMapping("/save")
	public Student save(){
		Student student = new Student();
		student.setName("zhangsan");
		 studentService.save(student);
		 return student;
	}
}
加入pageHelper配置
@Configuration
public class MyBatisConfiguration {
	@Bean
	public PageHelper pageHelper() {
		PageHelper pageHelper = new PageHelper();
		Properties p = new Properties();
		p.setProperty("offsetAsPageNum", "true");
		p.setProperty("rowBoundsWithCount", "true");
		p.setProperty("reasonable", "true");
		pageHelper.setProperties(p);
		return pageHelper;
	}
}
页面测试


 被折叠的 条评论
为什么被折叠?
被折叠的 条评论
为什么被折叠?
 到【灌水乐园】发言


