转载自:http://raspberrypihq.com/how-to-share-a-folder-with-a-windows-computer-from-a-raspberry-pi/
Sharing files over the network is often very useful. Whether you need to transfer media files to the Raspberry Pi or you want to use the raspberry as a simple Network-Attached Storage (NAS) device, this guide will show you how to enable file sharing of a folder on the Raspberry Pi running the Raspbian OS.
Prerequisites & Equipment
You are going to need the following:
- A Raspberry Pi (Buy here)
- A SD Card flashed with the Raspbian OS (Here is a guide if you need)
- Access to the Raspberry either via keyboard and a monitor or remotely
- A home network
- A Windows computer (for this guide we will be running Windows 7)
Install and configure required software
To share network folders to a Windows computer we need to install some special software on the Raspberry Pi. The software providing the secret sauce this time is called Samba. The Samba software package implements the SMB protocol and provides support for the Windows naming service (WINS) and for joining a Windows Workgroup.
Installing the software is easy – login to your Raspberry Pi and run:
sudo apt-get install samba samba-common-bin
After installation configure the software by opening the file /etc/samba/smb.conf using the command:
sudo nano /etc/samba/smb.conf
Read through the file and make sure you have the following parameters set:
workgroup = WORKGROUP
wins support = yes
You can use anything as your workgroup name as long as it is alphanumerical and matches the workgroup you would like to join. The default workgroup in Windows 7 is WORKGROUP.
Setup folder to share
Next step is to create the folder you would like to share. To create a folder called “share” in your home directory do the following:
mkdir ~/share
With the folder created we can now tell the Samba software to share it on the network. Open the file /etc/samba/smb.conf using the command:
sudo nano /etc/samba/smb.conf
Scroll to the bottom and add the following:
[PiShare]
 comment=Raspberry Pi Share
 path=/home/pi/share
 browseable=Yes
 writeable=Yes
 only guest=no
 create mask=0777
 directory mask=0777
 public=no
Notice how we tell Samba that public access is not allowed via “public=no” – this means that anyone wanting to access the shared folder must login with a valid user.
In this case the valid user is the user called “pi”. To let Samba know that “pi” is a network user run the command:
sudo smbpasswd -a pi
And enter pi’s password twice (default: raspberry).
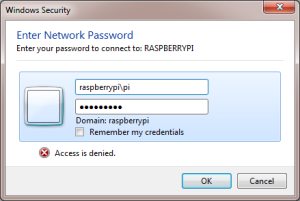
At this point we can now login to the share from our Windows computer – use Domain: raspberrypi, User: pi and Password: raspberry (unless you changed the password) as you can see below:
If you do not want to deal with logging in you can always make the share publicly available by changing the config file to say:
public=yes
However please note that this is extremely dangerous since anyone will be able to access, modify and delete your files.


 本文介绍如何通过安装和配置Samba软件将Raspberry Pi作为简易网络附加存储(NAS)设备,实现与Windows计算机之间的文件共享。


 1111
1111

 被折叠的 条评论
为什么被折叠?


