


 本文介绍了使用 Android 中 RadioGroup 和 FragmentTabHost 两种方式实现 TabHost 的具体步骤及代码示例,帮助开发者理解不同实现方式的特点。

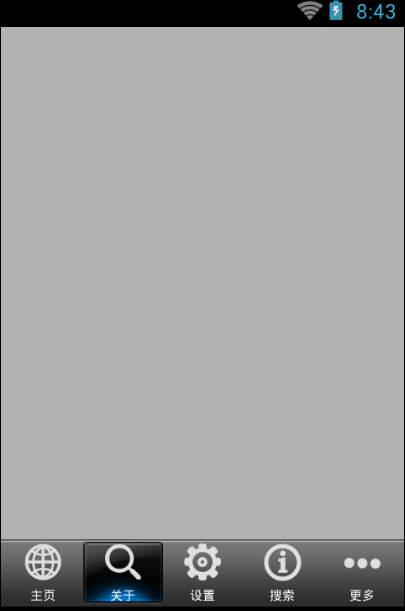
现在网上一般的实现方式就是用radoigroup或者fragmentLayout两种方式来实现tabhost,一下我分别来介绍这两种方式。
方式一:RadioGroup
主布局文件:main_fragment_tabs.xml
<?xml version="1.0" encoding="utf-8"?>

<LinearLayout xmlns:android="http://schemas.android.com/apk/res/android"
    android:layout_width="match_parent"
    android:layout_height="match_parent"
    android:orientation="vertical" >

    <android.support.v4.app.FragmentTabHost
        android:id="@android:id/tabhost"
        android:layout_width="match_parent"
        android:layout_height="match_parent"
        android:background="#b2b2b2" >

        <LinearLayout
            android:layout_width="match_parent"
            android:layout_height="match_parent"
            android:orientation="vertical" >

            <TabWidget
                android:id="@android:id/tabs"
                android:layout_width="fill_parent"
                android:layout_height="wrap_content" />
          <!-- 设置每个选项卡之间比列都为1,设置tabhost自带选择卡不可见 -->
            <FrameLayout
                android:id="@android:id/tabcontent"
                android:layout_width="match_parent"
                android:layout_height="0dp"
                android:layout_weight="1"
                android:visibility="gone" />
          <!-- 设置设置内容权重为1 -->
            <FrameLayout
                android:id="@+id/realtabcontent"
                android:layout_width="match_parent"
                android:layout_height="0dp"
                android:layout_weight="1" />
        </LinearLayout>

        <!-- 以RadioGroup代替tabhost选项卡 -->
        <RadioGroup
            android:id="@+id/main_radiogroup"
            android:layout_width="fill_parent"
            android:layout_height="wrap_content"
            android:layout_gravity="bottom"
            android:background="@drawable/tab_widget_background"
            android:gravity="center_vertical"
            android:orientation="horizontal"
            android:padding="2dip" >

            <RadioButton
                android:id="@+id/RadioButton0"
                style="@style/tab_item_background"
                android:drawableTop="@drawable/tab_icon1"
                android:text="主页" />

            <RadioButton
                android:id="@+id/RadioButton1"
                style="@style/tab_item_background"
                android:drawableTop="@drawable/tab_icon2"
                android:text="关于" />

            <RadioButton
                android:id="@+id/RadioButton2"
                style="@style/tab_item_background"
                android:drawableTop="@drawable/tab_icon3"
                android:text="设置" />

            <RadioButton
                android:id="@+id/RadioButton3"
                style="@style/tab_item_background"
                android:drawableTop="@drawable/tab_icon4"
                android:text="搜索" />

            <RadioButton
                android:id="@+id/RadioButton4"
                style="@style/tab_item_background"
                android:drawableTop="@drawable/tab_icon5"
                android:text="更多" />
        </RadioGroup>
    </android.support.v4.app.FragmentTabHost>

</LinearLayout>
public class MainActivity extends FragmentActivity{

	private FragmentTabHost mTabHost;
	private RadioGroup m_radioGroup;
	String tabs[] = {"Tab1","Tab2","Tab3","Tab4","Tab5"};
	//切换的fragment
	Class<?> cls[] = {Fragment1.class,Fragment2.class,Fragment3.class,Fragment4.class,Fragment5.class};
	@Override
	protected void onCreate(Bundle savedInstanceState) {
		super.onCreate(savedInstanceState);
		setContentView(R.layout.main_fragment_tabs);
		init();
	}

	private void init()
	{

		mTabHost = (FragmentTabHost)this.findViewById(android.R.id.tabhost);
		//初始化tabhost的内容
		mTabHost.setup(this, getSupportFragmentManager(), R.id.realtabcontent);
		//设置选项卡不可见
		mTabHost.getTabWidget().setVisibility(View.GONE);
		//设置切换内容
		for(int i=0;i<tabs.length;i++){
			mTabHost.addTab(mTabHost.newTabSpec(tabs[i]).setIndicator(tabs[i]),cls[i], null);
		}
		//RadioGroup设置监听改变状态
		m_radioGroup = (RadioGroup) findViewById(R.id.main_radiogroup);
		m_radioGroup.setOnCheckedChangeListener(new OnCheckedChangeListener() {

			@Override
			public void onCheckedChanged(RadioGroup group, int checkedId) {
				switch(checkedId){
				case R.id.RadioButton0:

					mTabHost.setCurrentTabByTag(tabs[0]);
					break;
				case R.id.RadioButton1:
					mTabHost.setCurrentTabByTag(tabs[1]);
					break;
				case R.id.RadioButton2:
					mTabHost.setCurrentTabByTag(tabs[2]);
					break;
				case R.id.RadioButton3:
					mTabHost.setCurrentTabByTag(tabs[3]);
					break;
				case R.id.RadioButton4:
					mTabHost.setCurrentTabByTag(tabs[4]);
					break;
				}
			}
		});

		((RadioButton) m_radioGroup.getChildAt(0)).toggle();
	}


}
public class Fragment1 extends Fragment {


 //其中的具体内容可自行添加
    @Override
    public View onCreateView(LayoutInflater inflater, ViewGroup container,
 Bundle savedInstanceState) {
 // TODO Auto-generated method stub
 return super.onCreateView(inflater, container, savedInstanceState);
   }
}
方式二:fragmentLayout
主布局文件:activity_main.xml
<LinearLayout xmlns:android="http://schemas.android.com/apk/res/android"
    xmlns:tools="http://schemas.android.com/tools"
    android:layout_width="fill_parent"
    android:layout_height="fill_parent"
    tools:context=".MainActivity"
    android:orientation="vertical" >

    <!-- 设置内容的权重为1 -->
    <FrameLayout
        android:id="@+id/fragment_content"
        android:layout_width="fill_parent"
        android:layout_height="0dip"
        android:layout_weight="1"
        />

    <!-- 设置选项卡的权重为默认 -->
    <android.support.v4.app.FragmentTabHost
        android:id="@android:id/tabhost"
        android:layout_width="fill_parent"
        android:background="#E6E6FA"
        android:layout_height="wrap_content"
        >

        <!-- 设置每个选项卡之间权重为1 -->
        <FrameLayout
            android:id="@+id/fragment_tabmost_item"
            android:layout_width="wrap_content"
            android:layout_height="0dp"
            android:layout_weight="1"
            />
    </android.support.v4.app.FragmentTabHost>

</LinearLayout>
public class MainActivity extends FragmentActivity {

	FrameLayout content_frameLayout;
	Class<?>[] frames = {Fragment1.class,Fragment2.class,Fragment3.class,Fragment4.class};
	private final String[] titles = {"资料","门诊","住院","疾病"};
    private final int[] images = {R.drawable.tab_information,R.drawable.tab_outpatient,
    		R.drawable.tab_hospital,R.drawable.tab_disease};

	@Override
	protected void onCreate(Bundle savedInstanceState) {
		super.onCreate(savedInstanceState);
		setContentView(R.layout.activity_main);
		initWidget();
	}

     private void initWidget() {
		// TODO Auto-generated method stub
      FragmentTabHost tabHost = (FragmentTabHost) findViewById(android.R.id.tabhost);
      //初始化tabhost内容
	  tabHost.setup(this, getSupportFragmentManager(), R.id.fragment_content);
	  //为每个tabhost设置内容
	  for(int i=0;i<titles.length;i++){
		  TabSpec tabSpec = tabHost.newTabSpec(titles[i]).setIndicator(getTabItemView(i));
		  tabHost.addTab(tabSpec,frames[i],null);
		  tabHost.getTabWidget().getChildAt(i).setBackgroundResource(R.drawable.main_tab_bg);
	  }
     }

 	/**
 	 * 给Tab按钮设置图标和文字
 	 */
 	private View getTabItemView(int index){
 		View view = LayoutInflater.from(this).inflate(R.layout.tab_item_view, null);
 		ImageView imageView = (ImageView) view.findViewById(R.id.imageview);
 		imageView.setImageResource(images[index]);
 		TextView textView = (TextView) view.findViewById(R.id.textview);
 		textView.setText(titles[index]);
 		return view;
 	}
}

比较以上的两种方式,个人觉得第二种方式更简便些,当然两种方式都能满足我们的要求。取舍需要自己去判断了。。。


 699
699

 被折叠的 条评论
为什么被折叠?
被折叠的 条评论
为什么被折叠?
 到【灌水乐园】发言


