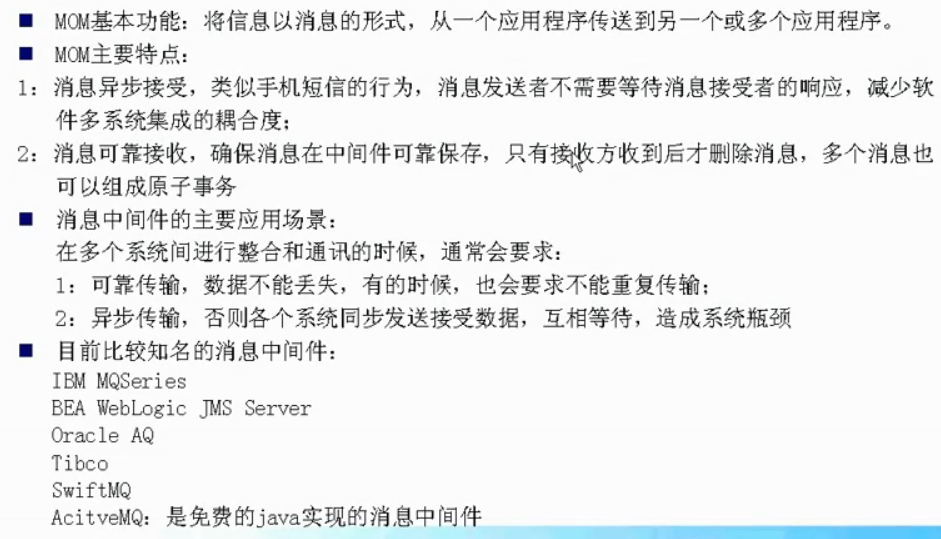
1.1消息中间件的介绍
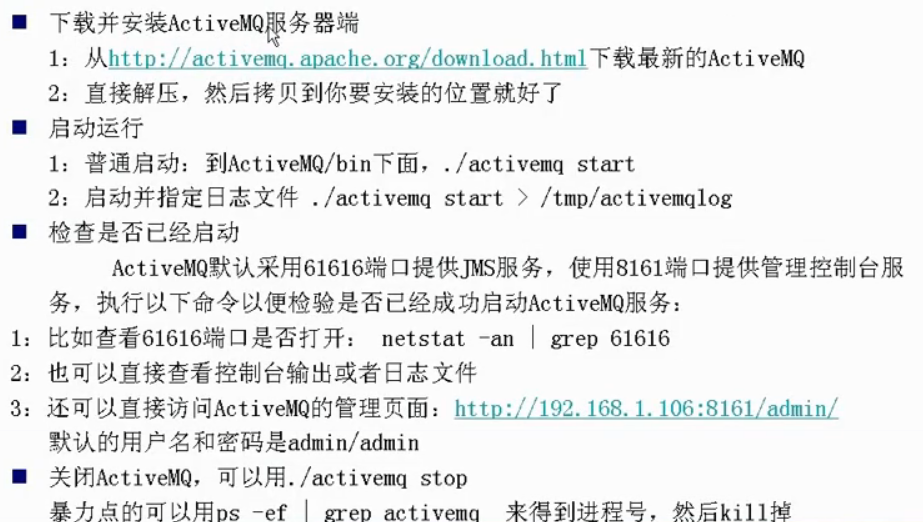
1.2ActiveMQ安装和基本使用
1.2.1安装jdk
http://www.oracle.com/technetwork/java/javase/downloads/index.html安装包下载
解压
加入环境变量
|
1
|
vim
/etc/profile
|
|
1
2
3
4
5
6
|
JAVA_HOME=
/usr/local/jdk
JAVA_BIN=$JAVA_HOME
/bin
JRE_HOME=$JAVA_HOME
/jre
PATH=$PATH:$JAVA_BIN:$JRE_HOME
/bin
CLASSPATH=$JRE_HOME
/lib
:$JAVA_HOME
/lib
:$JRE_HOME
/lib/charsets
.jar
export
JAVA_HOME PATH
|
|
1
|
sourceetc
/profile
|
|
1
2
3
4
|
[root@lanyezi ~]
# java -version
java version
"1.7.0_80"
Java(TM) SE Runtime Environment (build1.7.0_80-b15)
Java HotSpot(TM) 64-Bit Server VM (build 24.80-b11,mixed mode)
|
1.2.2下载activemq安装包
|
1
|
http:
//archive
.apache.org
/dist/activemq/apache-activemq/5
.9.0
/apache-activemq-5
.9.0-bin.
tar
.gz
|
1.2.3解压
|
1
2
3
4
5
6
|
[root@lanyezi
tar
.
dir
]
# tar xfapache-activemq-5.9.0-bin.tar.gz
[root@lanyezi
tar
.
dir
]
# mv apache-activemq-5.9.0/usr/local/activemq-5.9.0
[root@lanyezi activemq-5.9.0]
# pwd
/usr/local/activemq-5
.9.0
[root@lanyezi activemq-5.9.0]
# ls
activemq-all-5.9.0.jar bin conf data docs examples lib LICENSE NOTICE README.txt webapps webapps-demo
|
1.2.4启动运行
|
1
2
3
4
5
6
7
8
9
|
[root@lanyezi bin]
# ./activemq start
INFO: Using default configuration
(you can configure options
in
one of these
file
:
/etc/default/activemq
/root/
.activemqrc)
INFO: Invoke the following
command
to create a configuration
file
.
/activemq
setup [
/etc/default/activemq
|
/root/
.activemqrc ]
INFO: Using java
'/usr/local/jdk/bin/java'
INFO: Starting - inspect logfiles specified
in
logging.properties and log4j.properties to get details
INFO: pidfile created :
'/usr/local/activemq-5.9.0/data/activemq-lanyezi.pid'
(pid
'35680'
)
[root@lanyezi bin]
#
|
|
1
2
3
4
5
6
7
8
9
10
11
12
13
14
15
|
[root@lanyezi ~]
# netstat -lntup
Active Internet connections (only servers)
Proto Recv-Q Send-Q Local Address Foreign Address State PID
/Program
name
tcp 0 0 192.168.0.201:52115 0.0.0.0:* LISTEN 29265
/openvpn
tcp 0 0 0.0.0.0:22 0.0.0.0:* LISTEN 33088
/sshd
tcp 0 0 0.0.0.0:23 0.0.0.0:* LISTEN 29361
/u7ek18eknaekl
tcp 0 0 0.0.0.0:8088 0.0.0.0:* LISTEN 34483
/nginx
tcp 0 0 :::8161 :::* LISTEN 35680
/java
tcp 0 0 :::5672 :::* LISTEN 35680
/java
tcp 0 0 :::61613 :::* LISTEN 35680
/java
tcp 0 0 :::61614 :::* LISTEN 35680
/java
tcp 0 0 :::61616 :::* LISTEN 35680
/java
tcp 0 0 :::22 :::* LISTEN 33088
/sshd
tcp 0 0 :::37626 :::* LISTEN 35680
/java
tcp 0 0 :::1883 :::* LISTEN 35680
/java
|
[root@lanyezi ~]#
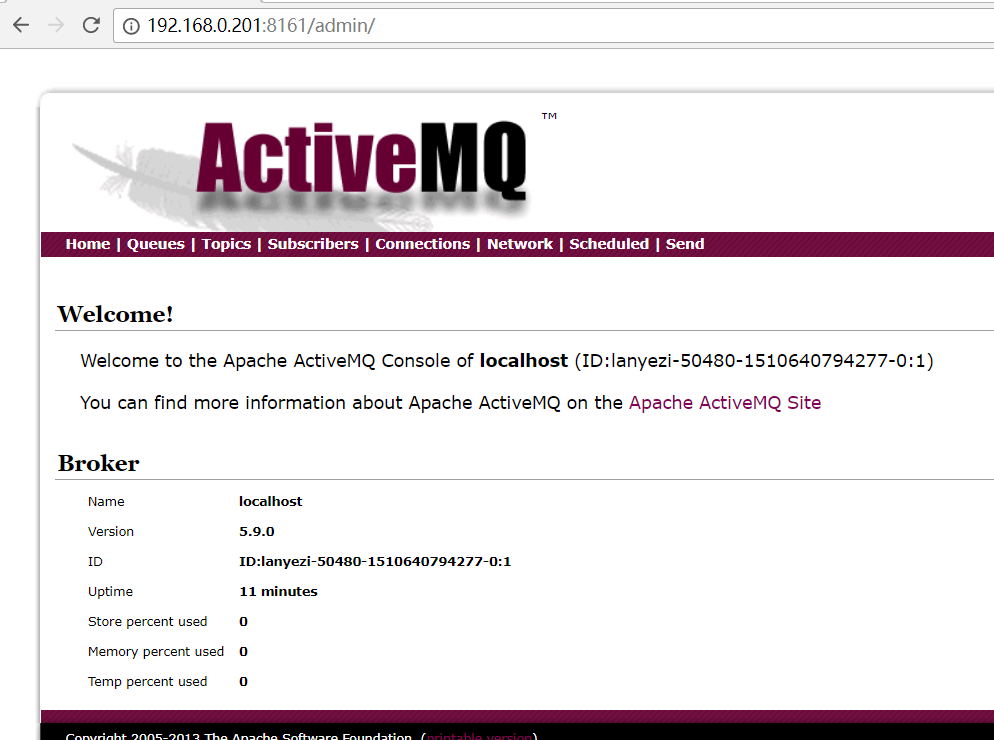
通过浏览器访问192.168.0.201:8161/admin
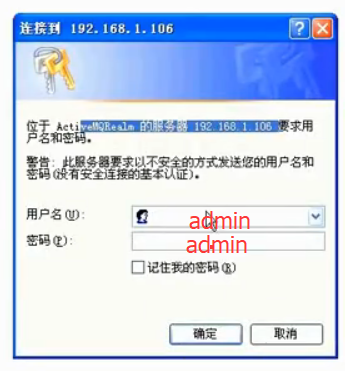
此时会输入用户名密码 admin admin
|
1
2
|
[root@lanyezi ~]
# ps -ef |grep active
root 35680 1 2 14:25 pts
/1
00:00:16
/usr/local/jdk/bin/java
-Xms1G-Xmx1G -Djava.util.logging.config.
file
=logging.properties-Dhawtio.realm=activemq -Dhawtio.role=admins-Dhawtio.rolePrincipalClasses=org.apache.activemq.jaas.GroupPrincipal-Djava.security.auth.login.config=
/usr/local/activemq-5
.9.0
/conf/login
.config-Dcom.sun.management.jmxremote -Djava.awt.headless=
true
-Djava.io.tmpdir=
/usr/local/activemq-5
.9.0
/tmp-Dactivemq
.classpath=
/usr/local/activemq-5
.9.0
/conf
; -Dactivemq.home=
/usr/local/activemq-5
.9.0-Dactivemq.base=
/usr/local/activemq-5
.9.0-Dactivemq.conf=
/usr/local/activemq-5
.9.0
/conf-Dactivemq
.data=
/usr/local/activemq-5
.9.0
/data
-jar
/usr/local/activemq-5
.9.0
/bin/activemq
.jar start
|
|
1
2
3
4
5
6
|
[root@lanyezi bin]
# ./activemq setup/etc/default/activemq
INFO: Creating configuration
file
:
/etc/default/activemq
INFO: It
's recommend to limit access to'
/etc/default/activemq
' to the priviledged user
INFO: (recommended:
chown
'root'
:nogroup
'/etc/default/activemq'
;
chmod
600
'/etc/default/activemq'
)
[root@lanyezi bin]
# ls /etc/default/activemq
/etc/default/activemq
|
本文转自 蓝叶子Sheep 51CTO博客,原文链接:http://blog.51cto.com/dellinger/1981631,如需转载请自行联系原作者


 1096
1096

 被折叠的 条评论
为什么被折叠?


