


 本文介绍如何在CentOS 7.2环境下利用Nginx进行反向代理,并通过具体的步骤展示了如何设置Nginx代理服务器来为HTTP服务器提供服务。此外,还详细讲解了如何通过location规则实现静态资源的灵活定位。

环境:centos7.2
node1:192.168.169.103(Nginx代理服务器,静态资源服务器)
Nginx版本:1.12.2
node2:192.168.169.154(http服务器)
实验策略:node2的http服务,首页为index.html静态页,首先用Nginx反向代理node2的web服务,然后用location规则设置访问HTML文件为代理服务器的静态资源路径。
(1)node2首先创建http服务首页,默认为/var/www/html/路径下的index.html,
cd /var/www/html
vim index.html
this is http-server!!!
#保存退出
开启node2 的http服务
systemctl start httpd
浏览器访问node2的http服务
使用node1的Nginx反向代理node2的http服务
(2)在node1上:
安装Nginx之后,开启Nginx,访问node1,初始页面
查看主配置文件
cat /etc/nginx/nginx.conf #只粘贴出生效的配置
user nginx;
worker_processes auto;
error_log /var/log/nginx/error.log;
pid /run/nginx.pid;
include /usr/share/nginx/modules/*.conf;
events {
worker_connections 1024;
}
http {
log_format main '$remote_addr - $remote_user [$time_local] "$request" '
'$status $body_bytes_sent "$http_referer" '
'"$http_user_agent" "$http_x_forwarded_for"';
access_log /var/log/nginx/access.log main;
sendfile on;
tcp_nopush on;
tcp_nodelay on;
keepalive_timeout 65;
types_hash_max_size 2048;
include /etc/nginx/mime.types;
default_type application/octet-stream;
include /etc/nginx/conf.d/*.conf;
server {
listen 80 default_server;
listen [::]:80 default_server;
server_name _;
root /usr/share/nginx/html;
include /etc/nginx/default.d/*.conf;
location / {
}
error_page 404 /404.html;
location = /40x.html {
}
error_page 500 502 503 504 /50x.html;
location = /50x.html {
}
}
}
黄色部分为会被加载的配置文件,即在/etc/nginx/conf.d下的所有以".conf"结尾命名的配置文件都会被加载。
红色部分是设置监听的server配置,可以使用修改主配置文件或者在/etc/nginx/conf.d路径下创建配置文件两种方法进行代理设置。
方法一(修改主配置文件):
在红色字段配置中的
location / {
}
修改为
location / {
proxy_pass http://192.168.169.154:80;
}
保存之后,重新加载Nginx,systemctl reload nginx
浏览器访问node1的代理服务

代理成功,通过路径方式访问node2的index.htmll首页
(3)访问成功,然后设置所有的html文件都从Nginx代理服务器指定的目录下读取。
首先自定义一个放置HTML文件的目录,定义在/opt/nginx下
mkdir /opt/nginx
vim index.html #创建一个与node2http服务相同名称的index首页
this is nginx_server!!!
#保存退出
修改主配置文件:
在刚配置location下再配置一个location:
location ~* \.html$ {
root /opt/nginx;
}
#保存退出
重新加载Nginx:systemctl reload nginx
查看代理:
通过路径访问代理服务器,与之前的路径访问对比:

访问路径成功被重定向到nginx指定的路径下。
(4)为实验更加明显
在node2的http服务网页配置路径下创建一个新文件
node2下:
cd /var/www/html/
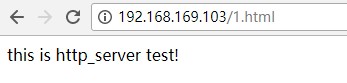
vim 1.html #名字随意
this is http_server test!
#保存退出
重启http服务
访问node2的http下的1.html文件

在node1上,首先在主配置文件中将之前配置的
location ~* \.html$ {
root /opt/nginx;
}
注释掉。
然后路径浏览器访问node1的1.html,请求被分发到了node2的http服务下的1.html
然后再将node1下nginx的主配置文件的配置
location ~* \.html$ {
root /opt/nginx;
}
撤掉注释。
重新加载nginx服务
重新路径访问node1代理服务的1.html页面

发现出现404页面找不到
再访问index.html文件

发现关于访问HTML页面的请求被定向到了定义的路径下,访问node1下的1.html页面出现404是因为没有在指定的/opt/nginx路径下找到1.html
在node1下的/opt/nginx路径下创建
cd /opt/nginx/
vim 1.html
this is nginx_server test!
#保存退出
重新加载nginx服务
浏览器访问node1的1.html页面

规则配置成功。
(5)方法二(在/etc/nginx/conf.d下创建新的配置文件,文件名随意,最好有辨识度,文件名后缀以.conf结尾即可):
在node1下:
修改主配置文件:
将以下关于server的配置注释,文件是先加载主配置文件,再根据主配置文件的配置加载其他文件,所以如果不注销,之后的设置可能无效:
server {
listen 80 default_server;
listen [::]:80 default_server;
server_name _;
root /usr/share/nginx/html;
include /etc/nginx/default.d/*.conf;
location / {
}
error_page 404 /404.html;
location = /40x.html {
}
error_page 500 502 503 504 /50x.html;
location = /50x.html {
}
}
#保存退出
cd /etc/nginx/conf.d
vim html.conf #简单设置,出现效果即可,具体需求具体添加参数
server {
listen 80;
server_name _;
location / {
proxy_pass http://192.168.169.154:80;
}
}
#保存退出
将node2的http服务首页内容改为this is the second Method!!!
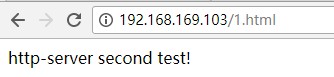
http服务下的1.html内容修改为http-server second test!
重新启动http服务并重新加载node1 的nginx服务
浏览器访问node1代理:

在html.conf文件下继续添加配置规则,在之前的location后边添加即可
server {
listen 80;
server_name _;
location / {
proxy_pass http://192.168.169.154:80;
}
location ~* \.html$ {
root /opt/nginx;
}
}
#保存退出
重新加载
路径访问代理服务的1.html

测试成功。


 2034
2034

 被折叠的 条评论
为什么被折叠?
被折叠的 条评论
为什么被折叠?
 到【灌水乐园】发言


