


 本文介绍如何使用jQueryEasyUI创建数据网格,并在分页工具栏上添加自定义按钮。包括获取分页对象、修改分页工具栏以及提供示例下载。

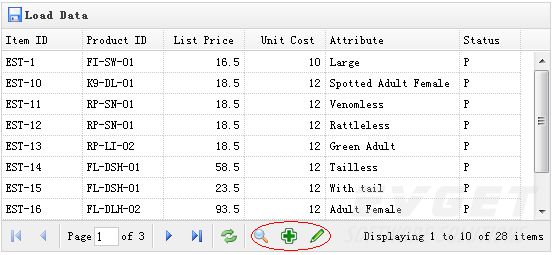
数据网格内置一个很好特性的分页功能,自定义也相当简单。在本教程中,我们将创建一个数据网格,并在分页工具栏上添加一些自定义按钮。
创建数据网格
<
table
id
=
"tt"
title
=
"Load Data"
class
=
"easyui-datagrid"
style
=
"width:550px;height:250px"
url
=
"data/datagrid_data.json"
iconcls
=
"icon-save"
pagination
=
"true"
>
<
thead
>
<
tr
>
<
th
field
=
"itemid"
width
=
"80"
>Item ID</
th
>
<
th
field
=
"productid"
width
=
"80"
>Product ID</
th
>
<
th
field
=
"listprice"
width
=
"80"
align
=
"right"
>List Price</
th
>
<
th
field
=
"unitcost"
width
=
"80"
align
=
"right"
>Unit Cost</
th
>
<
th
field
=
"attr1"
width
=
"100"
>Attribute</
th
>
<
th
field
=
"status"
width
=
"60"
align
=
"center"
>Stauts</
th
>
</
tr
>
</
thead
>
</
table
>
请注意设置 'pagination' 属性为true,这样才会生成分页工具栏。
自定义分页工具栏
var
pager = $(
'#tt'
).datagrid(
'getPager'
);
// get the pager of datagrid
pager.pagination({
showPageList:
false
,
buttons:[{
iconCls:
'icon-search'
,
handler:
function
(){
alert(
'search'
);
}
},{
iconCls:
'icon-add'
,
handler:
function
(){
alert(
'add'
);
}
},{
iconCls:
'icon-edit'
,
handler:
function
(){
alert(
'edit'
);
}
}],
onBeforeRefresh:
function
(){
alert(
'before refresh'
);
return
true
;
}
});
正如您所看到的,我们首先得到数据网格的pager对象,然后重新创建分页。我们隐藏页面列表,并添加三个新的按钮。
下载EasyUI示例:easyui-datagrid-demo.zip
有兴趣的朋友可以点击查看更多有关jQuery EasyUI的教程!


 1962
1962

 被折叠的 条评论
为什么被折叠?
被折叠的 条评论
为什么被折叠?
 到【灌水乐园】发言


