


 本文详细介绍如何使用Spring框架整合RabbitMQ,包括配置连接、定义队列与交换机、实现消息发送与接收的全过程。通过实例代码演示,帮助读者快速上手Spring AMQP与RabbitMQ的集成。
spring封装RabbitMQ看官网:https://spring.io/projects/spring-amqp#learn
开发时根据官网的介绍进行开发,具体的说明都有具体的声明
1、导入依赖
            <dependency>
                <groupId>org.springframework.amqp</groupId>
                <artifactId>spring-rabbit</artifactId>
                <version>2.1.4.RELEASE</version>
            </dependency>
2、配置文件
config.xml
<beans xmlns="http://www.springframework.org/schema/beans"
       xmlns:xsi="http://www.w3.org/2001/XMLSchema-instance"
       xmlns:rabbit="http://www.springframework.org/schema/rabbit"
       xsi:schemaLocation="http://www.springframework.org/schema/rabbit
           http://www.springframework.org/schema/rabbit/spring-rabbit.xsd
           http://www.springframework.org/schema/beans
           http://www.springframework.org/schema/beans/spring-beans.xsd">

        <!-- 1、定义RabbitMQ的连接工厂 -->
        <rabbit:connection-factory id="connectionFactory" host="192.168.1.130"
        username="user" password="user" virtual-host="/user" port="5672"/>

        <!-- 消息发送到交换机还是队列 -->
        <!-- 2、定义Rabbit模板指定连接的工厂以及定义的exchange -->
        <!-- 可以指定消息发送到交换机还是队列 -->
        <rabbit:template id="amqpTemplate" connection-factory="connectionFactory"
        exchange="spring_exchange" ></rabbit:template>

        <!-- MQ的管理:包括队列、交换机等 -->
        <!-- 如交换机、队列是否存在,是否需要进行创建 -->
        <rabbit:admin connection-factory="connectionFactory"/>

        <!-- 定义队列 -->
        <!-- auto-declare:自动声明,交换机不存在的时候进行创建,存在不声明 -->
        <rabbit:queue name="myQueue" auto-declare="true"></rabbit:queue>

        <!-- 定义交换机 -->
        <!-- auto-declare:自动声明,交换机不存在的时候进行创建,存在不声明 -->
        <rabbit:fanout-exchange name="spring_exchange" auto-declare="true" >
            <!-- 将队列绑定到交换机 -->
            <rabbit:bindings>
                <rabbit:binding queue="myQueue"></rabbit:binding>
            </rabbit:bindings>
        </rabbit:fanout-exchange>

        <!-- 定义监听容器,当收到消息的时候会执行内部的配置 -->
        <rabbit:listener-container connection-factory="connectionFactory">
            <!-- 定义那个方法用于用于处理到接收到的消息 -->
            <rabbit:listener ref="consumer" method="listen" queue-names="myQueue"/>
        </rabbit:listener-container>

        <!-- 消费者 -->
        <bean id="consumer" class="com.rabbitmq.spring.Receive"></bean>
</beans>
3、消费者
package com.rabbitmq.spring;

import org.springframework.amqp.rabbit.core.RabbitTemplate;
import org.springframework.context.ApplicationContext;
import org.springframework.context.support.ClassPathXmlApplicationContext;

public class Receive {
    //接受消息
    public void listen(String foo){
        System.out.println("foo:" + foo);
    }
}
4、测试类
package com.rabbitmq.spring;
import org.springframework.amqp.rabbit.core.RabbitTemplate;
import org.springframework.context.ApplicationContext;
import org.springframework.context.support.ClassPathXmlApplicationContext;

public class test {
    public static void main(String[] args) {
        ClassPathXmlApplicationContext  app = new ClassPathXmlApplicationContext("classpath:/config.xml");
        RabbitTemplate template = app.getBean(RabbitTemplate.class);
        template.convertAndSend("hello foo");
        app.close();
        System.out.println("send...");
    }

}
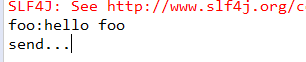
结果如图:
详细具体可以参考:https://blog.youkuaiyun.com/leixiaotao_java/article/details/78952930


 1475
1475

 被折叠的 条评论
为什么被折叠?
被折叠的 条评论
为什么被折叠?
 到【灌水乐园】发言


