


 本文详细介绍了如何在Silverlight中实现一个带有删除线的字体控件,通过自定义控件和模板,实现了文本对比工具的Silverlight版本。包括代码实现、控件模板定义以及在RichTextBox中的应用,最终展示了一个简单的实现效果。
在silverlight中实现带删除线的字体
之前写了一个WPF的文本对比工具,最近想把它改为为Silverlight版本,遇到的一个问题是Silverlight中RichTextBox没有删除线,于是只好自己写一个控件。
简单思路如下:在一个textblock上面放一个Line,Line随textblock的大小的改变而改变。

 View Code
 1 [TemplatePart(Name = InlinesEx.ElementTextName, Type = typeof(TextBlock))]
 2 [TemplatePart(Name = InlinesEx.ElementStrikeLineName, Type = typeof(Line))]
 3 public class InlinesEx : Control
 4 {
 5     internal const string ElementTextName = "TextBlock";
 6
 7     internal const string ElementStrikeLineName = "StrikeLine";
 8
 9
10     public InlinesEx(string text)
11         : base()
12     {
13         this.text = text;
14         this.DefaultStyleKey = typeof(InlinesEx);
15     }
16
17     public string Text
18     {
19         get { return text; }
20     }
21
22     public override void OnApplyTemplate()
23     {
24         base.OnApplyTemplate();
25
26         textBlock = GetTemplateChild(ElementTextName) as TextBlock;
27         strikeThroughLine = GetTemplateChild(ElementStrikeLineName) as Line;
28
29         if (textBlock != null)
30         {
31             textBlock.SizeChanged += new SizeChangedEventHandler(textBlock_SizeChanged);
32             textBlock.Text = text;
33         }
34     }
35
36     void textBlock_SizeChanged(object sender, SizeChangedEventArgs e)
37     {
38           strikeThroughLine.Stroke = this.Foreground;
39           strikeThroughLine.X1 = 0;
40           strikeThroughLine.Y1 = textBlock.ActualHeight / 2;
41           strikeThroughLine.X2 = textBlock.ActualWidth - 1;
42           strikeThroughLine.Y2 = strikeThroughLine.Y1;
43     }
44
45     private TextBlock textBlock;
46     private Line strikeThroughLine;
47     private string text;
48 }
然后定义其template
View Code
 1 <Style TargetType="effect:InlinesEx">
 2     <Setter Property="Background" Value="Transparent"/>
 3     <Setter Property="BorderBrush" Value="Transparent"/>
 4     <Setter Property="BorderThickness" Value="0"/>
 5     <Setter Property="Template">
 6         <Setter.Value>
 7             <ControlTemplate TargetType="effect:InlinesEx">
 8                 <Grid>
 9                     <Border Background="{TemplateBinding Background}" BorderBrush="{TemplateBinding BorderBrush}" BorderThickness="{TemplateBinding BorderThickness}">
10                         <Grid>
11                             <TextBlock x:Name="TextBlock" Foreground="{TemplateBinding Foreground}" />
12                             <Line x:Name="StrikeLine"/>
13                         </Grid>
14                     </Border>
15                 </Grid>
16             </ControlTemplate>
17         </Setter.Value>
18     </Setter>
19 </Style>
在RichTextBox中使用它:
View Code
1 InlineUIContainer container = new InlineUIContainer();
2
3 InlinesEx inline = new InlinesEx(text);
4 inline.Foreground = new SolidColorBrush(Colors.Red);
5
6 container.Child = inline;
7
8 richTextBox.Selection.Insert(container);
当然这仅仅是个简单实现,还可以对他进行其他扩展,比如加入背景等等。
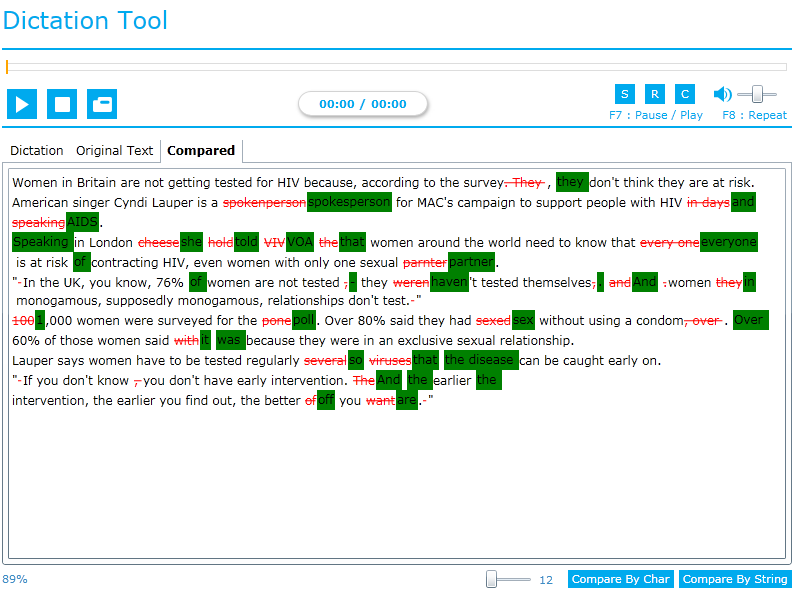
最后效果如下图:


 1万+
1万+

 被折叠的 条评论
为什么被折叠?
被折叠的 条评论
为什么被折叠?
 到【灌水乐园】发言


