Umbraco is the most powerful and flexible CMS I have ever seen so far. I just write this essay to demonstrate how to develop an Umbraco DataType for the folks who have basic Asp.net development knowledge.
Here we go, outlines for the steps.
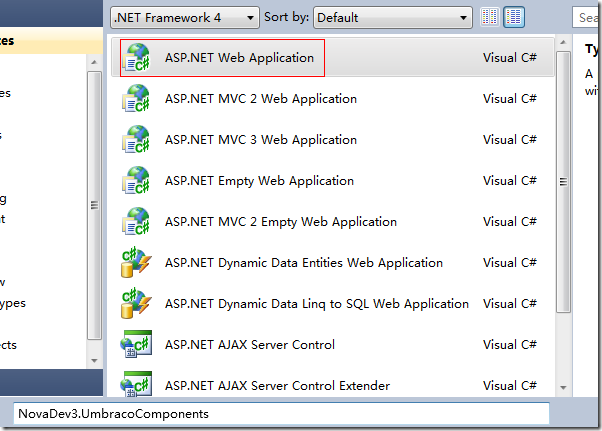
- Create an Asp.net application project
- Add reference to umbraco.editorControls.dll
- Add the usercontrol
- Copy the dll and ascx to Umbraco site
- Run in Umbraco site
1. Create an Asp.net Application project
The purpose of the Asp.net application project is to debug the usercontrol directly. It is not convenient if you try to debug your usercontrol in Umbraco site environment. It is recommended to name of the project as that you expect in the deployment. Let’s say, the expected assembly name is “NovaDev3.UmbracoComponents”. We name the Asp.net application project “NovaDev3.UmbracoComponents”.
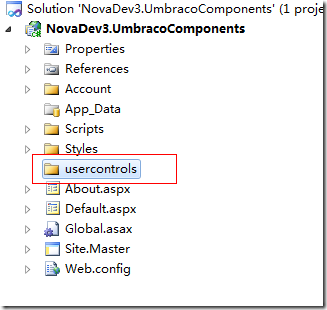
Then create a folder named “usercontrols” in the project. You will find that umbraco site probe the *.ascx file in “usercontrols” folder as well. You created usercontrol will be put in this folder.
2. Add reference to umbraco.editorControls.dll
You can add the reference of umbraco.editorContorls.dll from your umbraco site/bin folder directly. We will implement umbraco.editorControls.userControlGrapper.IUsercontrolDataEditor when we create the usercontrol for the umbraco site. IUsercontrolDataEditor has only one property defined and you could ignore it at all if you don’t plan to save the value in the umbraco db.
namespace umbraco.editorControls.userControlGrapper
{
    public interface IUsercontrolDataEditor
    {
        object value { get; set; }
    }
}
3. Add the usercontrol
Let’s add the usercontrol named “InventoryItemCategories”. It is recommended to follow umbraco naming convention that use camel style to name the control. The difference between normal asp.net usercontrol and the umbraco-featured user control is the implementation of IUsercontrolDataEditor.
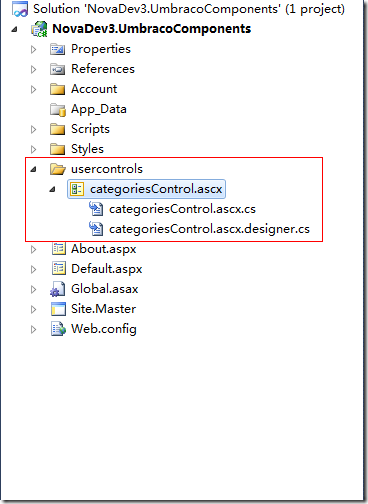
Let’s just add some simple code to categoriesControl and add it to Default.aspx to test.
categoriesControl.ascx
<%@ Control Language="C#" AutoEventWireup="true" CodeBehind="categoriesControl.ascx.cs" Inherits="NovaDev3.UmbracoComponents.usercontrols.categoriesControl" %>
<asp:DropDownList ID="categoriesDropdown" runat="server" />
categoriesControl.cs
using System;
using System.Collections.Generic;
using System.Linq;
using System.Web;
using System.Web.UI;
using System.Web.UI.WebControls;
using umbraco.editorControls.userControlGrapper;

namespace NovaDev3.UmbracoComponents.usercontrols
{
    public partial class categoriesControl : System.Web.UI.UserControl, IUsercontrolDataEditor
    {
        protected void Page_Load(object sender, EventArgs e)
        {
            if (!IsPostBack)
            {
                categoriesDropdown.DataSource = new string[] {
                    "Rental",
                    "Spa",
                    "Class",
                    "Dining",
                    "Retail"
                };

                categoriesDropdown.DataBind();
            }
        }

        public object value
        {
            get
            {
                return string.Empty;
            }
            set
            {
                //do nothing
            }
        }
    }
}
<%@ Register TagPrefix="novaCtrl" TagName="categoriesControl" Src="~/usercontrols/categoriesControl.ascx" %>

<asp:Content ID="HeaderContent" runat="server" ContentPlaceHolderID="HeadContent">
</asp:Content>
<asp:Content ID="BodyContent" runat="server" ContentPlaceHolderID="MainContent">
    <div>
        <novaCtrl:categoriesControl ID="categories" runat="server" />
    </div>
</asp:Content>
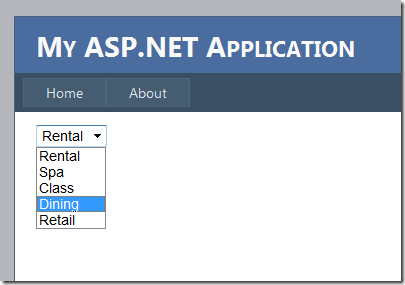
When you run your Asp.net project, the dropdownlist display successfully as below.
You can develop usercontrol with complex business logic in this way for incremental coding and debugging in the asp.net application site.
4. Copy the dll and ascx to Umbraco site
When you development completes, you can copy the dll and ascx to the umbraco site folder.
- Copying NovaDev3.UmbracoComponents.dll and its dependency dlls to umbraco site/bin folder
- Copying *.ascx files to umbraco site/usercontrols folder.
It is recommended to write a copying bat to do it at the beginning of the development.
5. Run in Umbraco site
Go to the Data Types node in the Developer section in umbraco backoffice after you copy the *.dll and *.adcx files to umbraco site folders. Create a datatype named “Categories” and select its render control as “umbraco usercontrol wrapper”.
After you click "Save” button, the “Usercontrol” dropdown list appear under the Database datatype, and then select “categoriesControl.ascx”
Now, you have added the usercontrol as an Umbraco datatype into Umbraco site successfully.
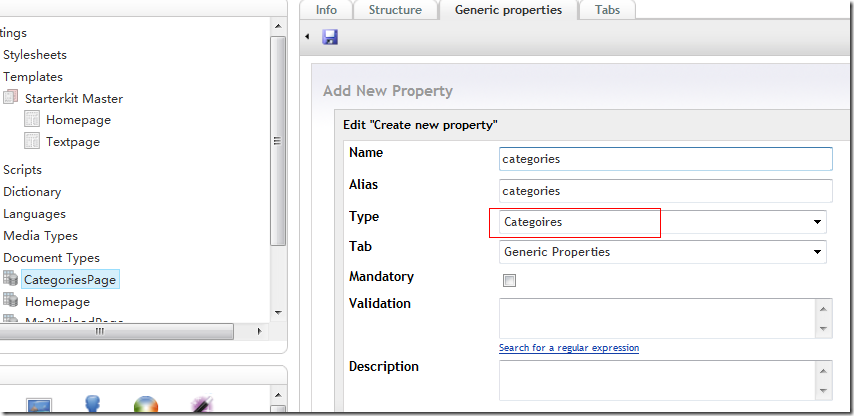
Let’s add a CategoriesPage document type(don’t select “Creating matching template” option) to hold the “Categories” datatype.
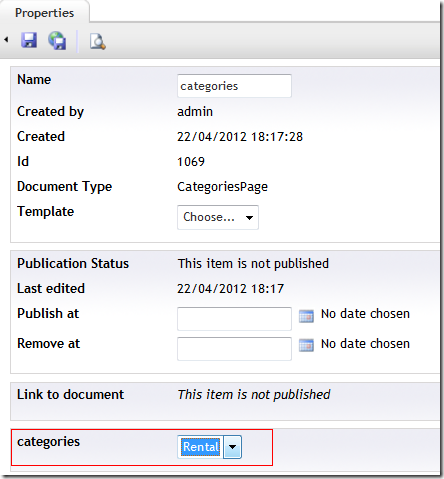
Then add a content of “CategoriesPage” to get the category dropdownlist you have just completed in the Asp.net application project.
Other considerations such as the database access layer and settings in the configuration file are ignored here. So you may have additional step to add the database connection string or dependency web service configuration to the web.config in the umbraco site if your usercontrol consumes data from database or other web services.
I will appreciate if you have any suggestions on the practices.
Please refer the source code at my Code Plex
Supported by Nova Umbraco


 本文详细介绍了如何利用Umbraco构建自定义数据类型,适用于具备基本ASP.NET开发知识的开发者。从创建ASP.NET应用程序项目开始,到引用Umbraco编辑控件库,直至在Umbraco站点中运行并完成数据类型的开发流程。通过此教程,开发者能够掌握从设计用户控件到部署到Umbraco站点的完整步骤。




 89
89

 被折叠的 条评论
为什么被折叠?


