一.先检查编译环境
[root@localhost ~]# yum grouplist
需要安装的几组工具
Development Libraries (开发库)
Development Tools (开发工具)
Legacy Software Development (传统软件开发工具)
X Software Development
二.构建编译环境,使用yum安装:
[root@localhost ~]# yum -y groupinstall "Development Libraries" "Development Tools" "Legacy Software Development"
环境构建完毕之后我们就可以编译apache,mysql,php的源码包。这里我们使用mysql绿色安装方式,所要使用到的包我们已经准备好了:
httpd-2.2.19.tar.bz2
mysql-5.5.15-linux2.6-i686.tar.gz 绿色的软件
php-5.3.7.tar
三.安装mysql,这里使用绿色安装方式,直接解压到/usr/local重命名为mysql下即可使用
[root@localhost ~]# tar -zxvf mysql-5.5.15-linux2.6-i686.tar.gz -C /usr/local
[root@localhost ~]# cd /usr/local
这里需要重命名mysql,建立一个软连接
[root@localhost local]# ln -s mysql-5.5.15-linux2.6-i686 mysql
[root@localhost local]#
[root@localhost local]#
[root@localhost local]# ls
bin games lib mysql sbin src
etc include libexec mysql-5.5.15-linux2.6-i686 share
[root@localhost local]# cd mysql
[root@localhost mysql]#
[root@localhost mysql]# less INSTALL-BINARY #参照install-binary来配置
[root@localhost mysql]# groupadd mysql
[root@localhost mysql]# useradd -r -g mysql mysql
[root@localhost mysql]#
[root@localhost mysql]# chown -R mysql .
[root@localhost mysql]# chgrp -R mysql .
[root@localhost mysql]# chown -R root .
[root@localhost mysql]# chown -R mysql data
[root@localhost mysql]#
初始化数据库
[root@localhost mysql]# scripts/mysql_install_db --user=mysql &
[root@localhost mysql]#
启动mysql
[root@localhost mysql]# bin/mysqld_safe --user=mysql &
[root@localhost mysql]#
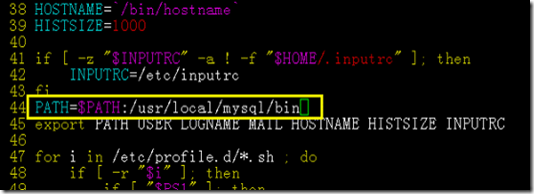
修改环境变量
[root@localhost mysql]# vim /etc/profile
重新读取数据库文件
[root@localhost mysql]# . /etc/profile
[root@localhost mysql]# echo $PATH
/usr/kerberos/sbin:/usr/kerberos/bin:/usr/local/sbin:/usr/local/bin:/sbin:/bin:/usr/sbin:/usr/bin:/root/bin:/usr/local/mysql/bin:/usr/local/mysql/bin
[root@localhost mysql]#
[root@localhost mysql]# mysqld_safe --user=mysql &
[root@localhost mysql]#
[root@localhost mysql]# cd support-files/
[root@localhost support-files]# cp my-large.cnf /etc/my.cnf
[root@localhost support-files]# cp mysql.server /etc/init.d/mysqld
对头文件进行连接
[[root@localhost support-files]# cd /usr/include
[root@localhost include]# ln -s /usr/local/mysql/include mysql
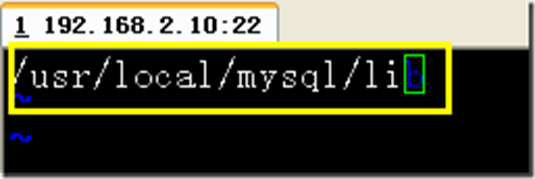
对库文件进行连接
[root@localhost include]# cat /etc/ld.so.conf
include ld.so.conf.d/*.conf
[root@localhost include]# cd /etc/ld.so.conf.d
[root@localhost ld.so.conf.d]# vim mysqld.conf
四.安装Apache
对该源码进行解压缩
[root@localhost ~]# cd
[root@localhost ~]# tar -jxvf httpd-2.2.19.tar.bz2 -C /usr/local/src
[root@localhost ~]# cd /usr/local/src
[root@localhost ~]# cd httpd-2.2.19
[root@localhost ~]#
[root@localhost httpd-2.2.19]# ./configure --prefix=/usr/local/apache --sysconfdir=/etc/httpd --enable-ssl --enable-so --with-z
对源码进行编译
[root@localhost httpd-2.2.19]# make
**************************
/mappers/libmod_actions.la modules/mappers/libmod_userdir.la modules/mappers/libmod_alias.la modules/mappers/libmod_so.la server/mpm/prefork/libprefork.la os/unix/libos.la -lm /usr/local/src/httpd-2.2.19/srclib/pcre/libpcre.la /usr/local/src/httpd-2.2.19/srclib/apr-util/libaprutil-1.la -lexpat /usr/local/src/httpd-2.2.19/srclib/apr/libapr-1.la -luuid -lrt -lcrypt -lpthread -ldl
make[1]: Leaving directory `/usr/local/src/httpd-2.2.19'
[root@localhost httpd-2.2.19]#
对源码进行安装
[root@localhost httpd-2.2.19]# make install
***************************
Installing CGIs
mkdir /usr/local/apache/cgi-bin
Installing header files
Installing build system files
Installing man pages and online manual
mkdir /usr/local/apache/man
mkdir /usr/local/apache/man/man1
mkdir /usr/local/apache/man/man8
mkdir /usr/local/apache/manual
make[1]: Leaving directory `/usr/local/src/httpd-2.2.19'
[root@localhost httpd-2.2.19]#
[root@localhost httpd-2.2.19]# cd /etc/httpd/
[root@localhost httpd]# ll
[root@localhost httpd]#
改写主配置文档
[root@localhost httpd]# vim httpd.conf
测试
[root@localhost httpd-2.2.19]# cd /usr/local/apache/htdocs
修改系统的环境变量,在45行上面添加“:/usr/local/apache/bin”
[root@localhost htdocs]# vim /etc/profile
重新读取该文件
[root@localhost htdocs]# . /etc/profile
[root@localhost htdocs]# echo $PATH
/usr/kerberos/sbin:/usr/kerberos/bin:/usr/local/sbin:/usr/local/bin:/sbin:/bin:/usr/sbin:/usr/bin:/usr/local/mysql/bin:/root/bin:/usr/local/mysql/bin:/usr/local/apache/bin
[root@localhost htdocs]#
对库文件进行连接
[root@localhost htdocs]# cd /etc/ld.so.conf.d/
[root@localhost htdocs]# vim httpd.conf
[root@localhost ld.so.conf.d]# apachectl stop
[root@localhost ld.so.conf.d]# apachectl start
[root@localhost ld.so.conf.d]# netstat -tupln |grep httpd
tcp 0 0 :::80 :::* LISTEN 2862/httpd
[root@localhost ld.so.conf.d]#
五.安装PHP
对源码进行解压缩
[root@localhost ~]# tar -jxvf php-5.3.7.tar.bz2 -C /usr/local/src
切换目录
[root@localhost ~]# cd /usr/local/src/php-5.3.7
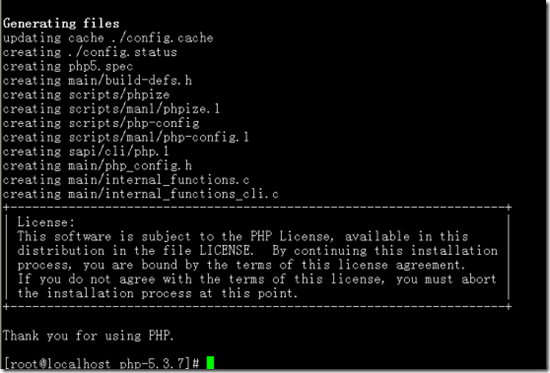
[root@localhost php-5.3.7]# ./configure --prefix=/usr/local/php --with-apxs2=/usr/local/apache/bin/apxs --with-mysql=/usr/local/mysql --with-mysqli=/usr/local/mysql/bin/mysql_config --enable-mbstring=all
编译
[root@localhost php-5.3.7]# make
安装
[root@localhost php-5.3.7]# make install
修改主配置文档
编辑 /etc/httpd/httpd.conf 文件
[root@localhost php-5.3.7]# vim /etc/httpd/httpd.conf
[root@localhost php-5.3.7]# cd /usr/local/apache/htdocs/
[root@localhost htdocs]#
[root@localhost htdocs]# vim index.php
[root@localhost php-5.3.7]# cd /usr/local/apache/modules/
[root@localhost modules]# ll
总计 20364
-rw-r--r-- 1 root root 9149 03-20 18:08 httpd.exp
-rw-r--r-- 1 root root 1193 03-20 18:53 libphp5.la
-rwxr-xr-x 1 root root 20798513 03-20 18:53 libphp5.so
[root@localhost modules]#
[root@localhost php-5.3.7]# apachectl start
六.成功返回php 的相关信息,说明安装成功
./configure 常用的选项
--prefix=/usr/local/apache
--sysconfdir=/etc/httpd
--enable-so 启用以dso模式的加载模块
--enable-ssl 启用加密的功能
--with-ssl=/usr/local/ssl
--enable-rewrite 支持url的重写功能
--with-z 使用zlib
--enable-suexec
--with-suexec-caller=damon(用户名)
转载于:https://blog.51cto.com/chengmingshu/810965








 69
69

 被折叠的 条评论
为什么被折叠?


