


 本文详细介绍了Android开发中线性布局的基本概念、常用属性及实际应用案例。包括android:orientation设置组件排列方向,android:gravity定义组件对齐方式,以及android:layout_width等属性的作用。

线性布局是将放入其中的组件按照垂直或水平方向来布局。每一行或每一列中只能放一个组件,并且Android的线性布局不会换行,当组件排列到窗口边缘后将不会被显示出来。基本的语法格式如下:
<LinearLayout xmlns:android = "http://scshemas.android.com/apk/res/android"
   属性列表
   >
</LinearLayout>
在线性布局管理器中,常用的属性包括android:orientation、android:gravity、android:layout_width、android:layout_height、android:id和android:background。其中,前两个属性是属于线性布局管理器支持的属性,后面四个是android.view.View和android.view.ViewGroup支持的属性,下面进行详细介绍。
1、android:orientation
android:orientation属性用于设置布局管理器内组件的排列方式,其可选值为horizontal和vertical,默认值为vertical。
- horizontal 表示水平排序;
- vertical 表示垂直排列;
2、android:gravity
android:gravity属性用户设置布局管理器内组件的对齐方式,其可选值包括如下:
| top | 将对象放在其容器的顶部,不改变其大小. |
| bottom | 将对象放在其容器的底部,不改变其大小. |
| left | 将对象放在其容器的左侧,不改变其大小. |
| right | 将对象放在其容器的右侧,不改变其大小. |
| center_vertical | 将对象纵向居中,不改变其大小. 垂直对齐方式:垂直方向上居中对齐。 |
| fill_vertical | 必要的时候增加对象的纵向大小,以完全充满其容器. 垂直方向填充 |
| center_horizontal | 将对象横向居中,不改变其大小. 水平对齐方式:水平方向上居中对齐 |
| fill_horizontal | 必要的时候增加对象的横向大小,以完全充满其容器. 水平方向填充 |
| center | 将对象横纵居中,不改变其大小. |
| fill | 必要的时候增加对象的横纵向大小,以完全充满其容器. |
| clip_vertical | 附加选项,用于按照容器的边来剪切对象的顶部和/或底部的内容. 剪切基于其纵向对齐设置:顶部对齐时,剪切底部;底部对齐时剪切顶部;除此之外剪切顶部和底部. 垂直方向裁剪 |
| clip_horizontal | 附加选项,用于按照容器的边来剪切对象的左侧和/或右侧的内容. 剪切基于其横向对齐设置:左侧对齐时,剪切右侧;右侧对齐时剪切左侧;除此之外剪切左侧和右侧. 水平方向裁剪 |
这些属性值也可以同时指定,各属性值之间用竖线隔开。例如,要指定组件靠右下角对齐,可以使用属性值right|bottom。
注:Android:layout_gravity和android:gravity的使用区别;
3、android:layout_width
本属性用于设置组件的基本宽度,其可选值包括如下:
- fill_parent 表示该组件的宽度与父类容器的宽度相同;
- match_parent 与fill_parent相同,从Android2.2开始推荐使用;
- wrap_content 表示该组件的宽度恰好能包裹它的内容;
说明:android:layout_width属性是ViewGroup.LayoutParams所支持的XML属性,对于其他的布局管理器同样适用注:android:layout_width和android:layout_weight关系
android:layout_width和android:width的区别
4、android:layout_height
本属性用于设置组件的基本高度,其可选值包括如下:
- fill_parent 表示该组件的宽度与父类容器的宽度相同;
- match_parent 与fill_parent相同,从Android2.2开始推荐使用;
- wrap_content 表示该组件的宽度恰好能包裹它的内容;
说明:android:layout_width属性是ViewGroup.LayoutParams所支持的XML属性,对于其他的布局管理器同样适用注:android:layout_height和android:height的区别
5、android:id
本属性用于为当前组件指定一个id属性,在Java代码中可以应用该属性单独引用这个组件。为组件指定id属性后,在R.java文件中,会自动派生一个对应的属性,在Java代码中,可以通过findViewById()方法来获取它。
6、android:background
本属性用于为组件设置背景,可以是背景图片,也可以是背景颜色。为组件指定背景图片时,可以将准备好的背景图片复制到目录下,然后使用下面的代码进行设置:
android:background="@drawable/background"如果想指定背景颜色,可以使用颜色值。代码如下:
android:background="#FFFFFFFF"7、样例代码清单
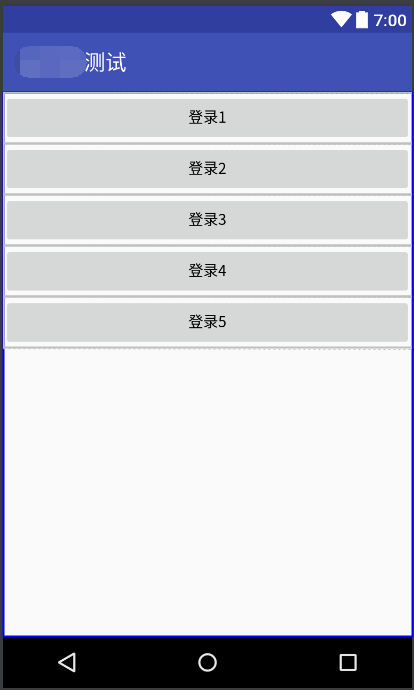
- 垂直列表
<?xml version="1.0" encoding="utf-8"?>
<LinearLayout xmlns:android="http://schemas.android.com/apk/res/android"
    android:orientation="vertical" android:layout_width="match_parent"
    android:layout_height="match_parent">

    <Button
        android:id="@+id/buttonCeshi1"
        android:layout_width="match_parent"
        android:layout_height="wrap_content"
        android:text="登录1"/>
    <Button
        android:id="@+id/buttonCeshi2"
        android:layout_width="match_parent"
        android:layout_height="wrap_content"
        android:text="登录2"/>
    <Button
        android:id="@+id/buttonCeshi3"
        android:layout_width="match_parent"
        android:layout_height="wrap_content"
        android:text="登录3"/>
    <Button
        android:id="@+id/buttonCeshi4"
        android:layout_width="match_parent"
        android:layout_height="wrap_content"
        android:text="登录4"/>
    <Button
        android:id="@+id/buttonCeshi5"
        android:layout_width="match_parent"
        android:layout_height="wrap_content"
        android:text="登录5"/>

</LinearLayout>
效果如下:
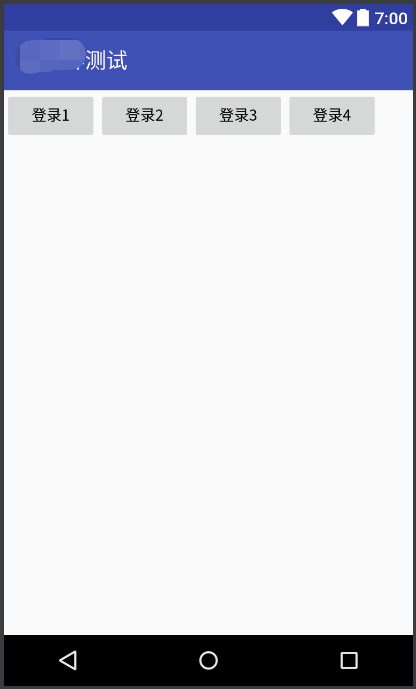
- 水平列表
<?xml version="1.0" encoding="utf-8"?>
<LinearLayout xmlns:android="http://schemas.android.com/apk/res/android"
    android:orientation="" android:layout_width="match_parent"
    android:layout_height="match_parent">

    <Button
        android:id="@+id/buttonCeshi1"
        android:layout_width="wrap_content"
        android:layout_height="wrap_content"
        android:text="登录1"/>
    <Button
        android:id="@+id/buttonCeshi2"
        android:layout_width="wrap_content"
        android:layout_height="wrap_content"
        android:text="登录2"/>
    <Button
        android:id="@+id/buttonCeshi3"
        android:layout_width="wrap_content"
        android:layout_height="wrap_content"
        android:text="登录3"/>
    <Button
        android:id="@+id/buttonCeshi4"
        android:layout_width="wrap_content"
        android:layout_height="wrap_content"
        android:text="登录4"/>

</LinearLayout>
效果如下:


 1611
1611

 被折叠的 条评论
为什么被折叠?
被折叠的 条评论
为什么被折叠?
 到【灌水乐园】发言


