


 本文通过实例讲解了JavaScript中面向对象编程的概念及其优势,并演示了如何使用面向对象及继承来简化代码,提高复用性。
我相信,当你读完这篇100%原创文章时,javascript 面向对象和继承轻松拿下不再是问题。
统一的html和css
       <div id="app"></div>
        #app{
            position: relative;
            width:500px;
            height:500px;
            background: #ccc;
        }
第一,面向对象是什么,为什么需要它。
这里有另外一个词,叫面向过程。先理解这个,比如我们需要用js写出一个div自由降落的效果。我们自然而然是手动创建一个div,并且赋予它大小颜色位置做出运动。ok,这个问题不大,相信每个人都能搞定。
var app = document.getElementById('app');
var div = document.createElement('div');
var count = 0;
div.style.position = 'absolute';
div.style.width = 20 + 'px';
div.style.height = 20 + 'px';
div.style.background = getColor();
app.appendChild(div);
requestAnimationFrame(rectMove)
function rectMove() {
	requestAnimationFrame(rectMove)
	div.style.top = (count++) + 'px';
	if(div.offsetTop>480){
		app.removeChild(div)
	}
}
function getColor(){
	return '#'+Math.floor(Math.random()*10)+Math.floor(Math.random()*10)+Math.floor(Math.random()*10);
}
然而,第二天产品说要源源不断的div(不同颜色,大小相同)自由降落,这时,我们脑袋就大了,难道要for循环几千上万个div?貌似不妥啊,小的做不到啊。。这就是面向过程的写法和弊端。
这时候就需要面向对象的方法了。也就是用一个function,生成源源不断的对象,这些对象大部分属性方法都相同(比如大小相同),个别属性方法特殊(比如颜色不同)。
var app = document.getElementById('app');
var rects = [];
var count = 0;
function Rect1(width,height,x,backColor){
       this.speed = -1;
      this.x = x;
	this.width = width;
	this.height = height;
	this.backColor = backColor;
}
Rect1.prototype.move = function(){
	this.nodeName.style.top = (this.nodeName.offsetTop - this.speed) + 'px';
};
function addChild(obj){
	var ele = document.createElement('div');
	ele.style.position = 'absolute';
      ele.style.x = obj.x + 'px';
	ele.style.width = obj.width + 'px';
	ele.style.height = obj.height + 'px';
	ele.style.background = obj.backColor;
	app.appendChild(ele);
	obj.nodeName = ele; //这个要注意
}
requestAnimationFrame(rectMove)
function rectMove() {
	requestAnimationFrame(rectMove)
	count++;
	if (count % 50 == 0) {
		var rect = new Rect1(20, 20,20, getColor());
		addChild(rect);
		rects.push(rect)
	}
	for (var i = 0; i < rects.length; i++) {
		rects[i].move();
		if (rects[i].nodeName.offsetTop > 480) {
			app.removeChild(rects[i].nodeName);
			rects.slice(item, 1)
		}
	}
}
function getColor(){
	return '#'+Math.floor(Math.random()*10)+Math.floor(Math.random()*10)+Math.floor(Math.random()*10);
}
效果不错吧,美滋滋,详细细节请看阮大神这一章封装。结论就是,面向对象最优的方法是把方法定义在prototype对象上,属性写在构造函数上。
但是,第三天,亲的产品又来了,说要再加一列div自由的降落。有了面向对象的我们,问题不大的,手起刀落写下下面的代码。
var app = document.getElementById('app');
var rects = [];
var rects2 = [];
var count = 0;

function Rect1(width,height,x,backColor){
	this.speed = -1;
	this.x = x;
	this.width = width;
	this.height = height;
	this.backColor = backColor;
}
Rect1.prototype.move = function(){
	this.nodeName.style.top = (this.nodeName.offsetTop - this.speed) + 'px';
};


//----- 新增重复的内容,第二列
function Rect2(width,height,x,backColor){
	this.speed = -1;
	this.x = x;
	this.width = width;
	this.height = height;
	this.backColor = backColor;
}
Rect2.prototype.move = function(){
	this.nodeName.style.top = (this.nodeName.offsetTop - this.speed) + 'px';
};
//----- 新增重复的内容


function addChild(obj){
	var ele = document.createElement('div');
	ele.style.position = 'absolute';
	ele.style.width = obj.width + 'px';
	ele.style.height = obj.height + 'px';
	ele.style.left = obj.x + 'px';
	ele.style.background = obj.backColor;
	app.appendChild(ele);
	obj.nodeName = ele;
}
requestAnimationFrame(rectMove)
function rectMove(){
	requestAnimationFrame(rectMove)
	count++;
	if(count%50==0){
		var rect = new Rect1(20,20,20,getColor());
		addChild(rect);
		rects.push(rect)
	}
	rects.forEach(function(item,index,array){
		item.move();
		if(item.nodeName.offsetTop>480){
			app.removeChild(item.nodeName);
			rects.slice(item,1)
		}
	})

	if(count%80==0){
		var rect = new Rect2(40,40,40,getColor());
		addChild(rect);
		rects2.push(rect)
	}
	rects2.forEach(function(item,index,array){
		item.move();
		if(item.nodeName.offsetTop>480){
			app.removeChild(item.nodeName);
			rects.slice(item,1)
		}
	})
}
function getColor(){
	return '#'+Math.floor(Math.random()*10)+Math.floor(Math.random()*10)+Math.floor(Math.random()*10)
}
效果如上,也还能见人。但是我们担心啊,万一万恶的产品明天要第三列怎么办,把新增重复的内容再来一遍?不可能啊,这多愚蠢啊。此时,我们伟大的继承上场了啊。
var app = document.getElementById('app');
var rects = [];
var rects2 = [];
var count = 0;

//父类构造函数和方法
function Rect(width,height,x,backColor){
	this.speed = -1;
	this.x = x;
	this.width = width;
	this.height = height;
	this.backColor = backColor;
}
Rect.prototype.move = function(){
	this.nodeName.style.top = (this.nodeName.offsetTop - this.speed) + 'px';
};
//增加一个extend继承函数(寄生组合继承)
function extend(Parent) {
	var Child = function(){
		return Parent.apply(this, arguments);
	};
	var F = function() {};
	F.prototype = Parent.prototype;
	Child.prototype = new F();
	Child.prototype.constructor = Child;
	Child.asdasdasdasd = Parent.prototype;
	return Child;
}

var Rect1 = extend(Rect);
var Rect2 = extend(Rect);
// 这里就可以继续增加各种构造函数了,然后衍生,比如第三列增加一个border-radius属性变成圆形。


function addChild(obj){
	var ele = document.createElement('div');
	ele.style.position = 'absolute';
	ele.style.width = obj.width + 'px';
	ele.style.height = obj.height + 'px';
	ele.style.left = obj.x + 'px';
	ele.style.background = obj.backColor;
	app.appendChild(ele);
	obj.nodeName = ele;
}
requestAnimationFrame(rectMove)
function rectMove(){
	requestAnimationFrame(rectMove)
	count++;
	if(count%50==0){
		var rect = new Rect1(20,20,20,getColor());
		addChild(rect);
		rects.push(rect)
	}
	rects.forEach(function(item,index,array){
		item.move();
		if(item.nodeName.offsetTop>480){
			app.removeChild(item.nodeName);
			rects.slice(item,1)
		}
	})

	if(count%80==0){
		var rect = new Rect2(40,40,40,getColor());
		addChild(rect);
		rects2.push(rect)
	}
	rects2.forEach(function(item,index,array){
		item.move();
		if(item.nodeName.offsetTop>480){
			app.removeChild(item.nodeName);
			rects.slice(item,1)
		}
	})
}
function getColor(){
	return '#'+Math.floor(Math.random()*10)+Math.floor(Math.random()*10)+Math.floor(Math.random()*10)
}
大家好好屡屡,
Rect,Rect1,Rect2三者的关系。一个爸爸两个儿子。
全部代码的地址 github。欢迎各位同学给右上角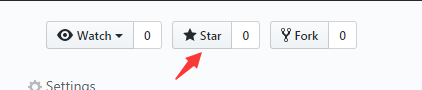 。
。


 1254
1254

 被折叠的 条评论
为什么被折叠?
被折叠的 条评论
为什么被折叠?
 到【灌水乐园】发言


