


Python django实现简单的邮件系统发送邮件功能
本文实例讲述了Python django实现简单的邮件系统发送邮件功能。
django邮件系统
Django发送邮件官方中文文档
总结如下:
1、首先这份文档看三两遍是不行的,很多东西再看一遍就通顺了。
2、send_mail()、send_mass_mail()都是对EmailMessage类使用方式的一个轻度封装,所以要关注底层的EmailMessage。
3、异常处理防止邮件头注入。
4、一定要弄懂Email backends 邮件发送后端
5、多线程的邮件发送。
个人简单配置如下:
首先是settings.py文件
|
1
2
3
4
5
6
7
8
9
10
|
#settings.py
#邮件配置
EMAIL_HOST
=
'smtp.gmail.com'
#SMTP地址
EMAIL_PORT
=
25
#SMTP端口
EMAIL_HOST_USER
=
'pythonsuper@gmail.com'
#我自己的邮箱
EMAIL_HOST_PASSWORD
=
'******'
#我的邮箱密码
EMAIL_SUBJECT_PREFIX
=
u
'[CoorCar网]'
#为邮件Subject-line前缀,默认是'[django]'
EMAIL_USE_TLS
=
True
#与SMTP服务器通信时,是否启动TLS链接(安全链接)。默认是false
#管理员站点
SERVER_EMAIL
=
'xinxinyu2011@163.com'
#The email address that error messages come from, such as those sent to ADMINS and MANAGERS.
|
这里推荐:各大型邮箱smtp服务器及端口收集

各大型邮箱smtp服务器及端口收集:

新浪邮箱smtp服务器
外发服务器:smtp.vip.sina.com
收件服务器:pop3.vip.sina.com
新浪免费邮件
外发服务器:smtp.sina.com.cn
收件服务器:pop3.sina.com.cn
163邮箱smtp服务器
pop: pop.163.com
smtp: smtp.163.com
QQ邮箱smtp服务器及端口
接收邮件服务器:imap.exmail.qq.com,使用SSL,端口号993
发送邮件服务器:smtp.exmail.qq.com,使用SSL,端口号465或587
yahoo邮箱smtp服务器
接:pop.mail.yahoo.com.cn
发:smtp.mail.yahoo.com
126邮箱smtp服务器
pop: pop.126.com
smtp: smtp.126.com
新浪免费邮箱
POP3:pop.sina.com
SMTP:smtp.sina.com
SMTP端口号:25
新浪VIP邮箱
POP3:pop3.vip.sina.com
SMTP:smtp.vip.sina.com
SMTP端口号:25
新浪企业邮箱
POP3:pop.sina.com
SMTP:smtp.sina.com
SMTP端口号:25
雅虎邮箱
POP3:pop.mail.yahoo.cn
SMTP:smtp.mail.yahoo.cn
SMTP端口号:25
搜狐邮箱
POP3:pop3.sohu.com
SMTP:smtp.sohu.com
SMTP端口号:25
TOM邮箱
POP3:pop.tom.com
SMTP:smtp.tom.com
SMTP端口号:25
Gmail邮箱
POP3:pop.gmail.com
SMTP:smtp.gmail.com
SMTP端口号:587 或 25
QQ邮箱
POP3:pop.exmail.qq.com
SMTP:smtp.exmail.qq.com
SMTP端口号:25
263邮箱
域名:263.net
POP3:263.net
SMTP:smtp.263.net
SMTP端口号:25
域名:x263.net
POP3:pop.x263.net
SMTP:smtp.x263.net
SMTP端口号:25
域名:263.net.cn
POP3:263.net.cn
SMTP:263.net.cn
SMTP端口号:25
域名:炫我型
POP3:pop.263xmail.com
SMTP:smtp.263xmail.com
SMTP端口号:25
21CN 免费邮箱
POP3:pop.21cn.com
SMTP:smtp.21cn.com
IMAP:imap.21cn.com
SMTP端口号:25
21CN 经济邮邮箱
POP3:pop.21cn.com
SMTP:smtp.21cn.com
SMTP端口号:25
21CN 商务邮邮箱
POP3:pop.21cn.net
SMTP:smtp.21cn.net
SMTP端口号:25
21CN 快感邮箱
POP3:vip.21cn.com
SMTP:vip.21cn.com
SMTP端口号:25
21CN Y邮箱
POP3:pop.y.vip.21cn.com
SMTP:smtp.y.vip.21cn.com
SMTP端口号:25
中华网任我邮邮箱
POP3:rwpop.china.com
SMTP:rwsmtp.china.com
SMTP端口号:25
中华网时尚、商务邮箱
POP3:pop.china.com
SMTP:smtp.china.com
SMTP端口号:25
那么发送邮件如下:
|
1
2
3
4
5
6
7
8
9
10
11
12
13
14
15
16
17
18
19
20
21
22
23
24
25
26
27
28
|
def
setEmail(request):
if
request.method
=
=
"POST"
:
# 方式一:
# send_mail('subject', 'this is the message of email', 'pythonsuper@gmail.com', ['1565208411@qq.com','1373763906@qq.com'], fail_silently=True)
# 方式二:
# message1 = ('subject1','this is the message of email1','pythonsuper@gmail.com',['1565208411@qq.com','xinxinyu2011@163.com'])
# message2 = ('subject2','this is the message of email2','pythonsuper@gmail.com',['1373763906@qq.com','xinxinyu2011@163.com'])
# send_mass_mail((message1,message2), fail_silently=False)
# 方式三:防止邮件头注入
# try:
# send_mail(subject, message, from_email, recipient_list, fail_silently, auth_user, auth_password, connection)
# except BadHeaderError:
# return HttpResponse('Invaild header fount.')
# 方式四:EmailMessage()
#首先实例化一个EmailMessage()对象
# em = EmailMessage('subject','body','from@example.com',['1565208411@qq.com'],['xinxinyu2011@163.com'],header={'Reply-to':'another@example.com'})
#调用相应的方法
# 方式五:发送多用途邮件
subject,form_email,to
=
'hello'
,
'from@example.com'
,
'1565208411@qq.com'
text_content
=
'This is an important message'
html_content
=
u
'<b>激活链接:</b><a href="http://www.baidu.com" rel="external nofollow" >http:www.baidu.com</a>'
msg
=
EmailMultiAlternatives(subject,text_content,form_email,[to])
msg.attach_alternative(html_content,
'text/html'
)
msg.send()
# 发送邮件成功了给管理员发送一个反馈
# mail_admins(u'用户注册反馈', u'当前XX用户注册了该网站', fail_silently=True)
return
HttpResponse(u
'发送邮件成功'
)
return
render_to_response(
'common/test.html'
)
|
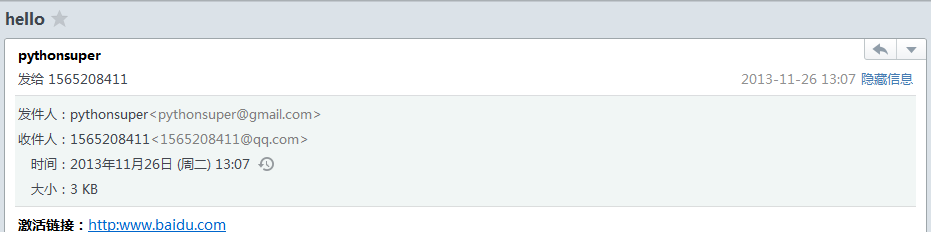
截图如下:
|
1
2
3
4
5
6
7
8
9
10
11
12
13
14
15
16
17
18
19
20
21
22
|
class
Send_mail(
object
):
'''发送邮件'''
def
__init__(
self
,sender,passward,receivers):
self
.sender
=
sender
self
.password
=
passward
self
.receivers
=
receivers
def
send(
self
,ShowText,Name,Header_show):
'''
:param ShowText: 发送内容
:param Name: 发送者
:param Header_show: 发送文件抬头
:return:
'''
message
=
MIMEText(
'%s'
%
(ShowText),
'plain'
,
'utf-8'
)
message[
'From'
]
=
Header(
"%s"
%
(Name),
'utf-8'
)
message[
'To'
]
=
Header(
"jiayuguang@qq.com"
)
message[
'Subject'
]
=
Header(
"%s"
%
(Header_show),
'utf-8'
)
smtpObj
=
smtplib.SMTP(
'smtp.163.com'
)
smtpObj.set_debuglevel(
1
)
smtpObj.login(
self
.sender,
self
.password)
smtpObj.sendmail(
self
.sender,
self
.receivers,message.as_string())
smtpObj.quit()
|


 被折叠的 条评论
为什么被折叠?
被折叠的 条评论
为什么被折叠?
 到【灌水乐园】发言


