


 本文介绍SpringBoot框架的基础使用方法,包括环境配置、创建RESTful Web服务应用及部署流程。通过一个简单的HelloWorld示例,展示如何快速搭建并运行SpringBoot项目。
引用百科的一句话来说,SpringBoot是一款全新框架,设计目的是为了简化新Spring应用的初始搭建以及开发过程。
怎么讲呢,首先要明确的就是SpringBoot不是替代Spring的一种解决方案,而是整合Spring技术资源的方案,它已经帮你集成了大量的内容,以至于你可以“开箱即用”,因为它需要的搭建步骤和配置文件真的很少很少。
这里直接从Spring官方的
Demo入手,带你领略一下SpringBoot的魅力所在。
1、Demo说明
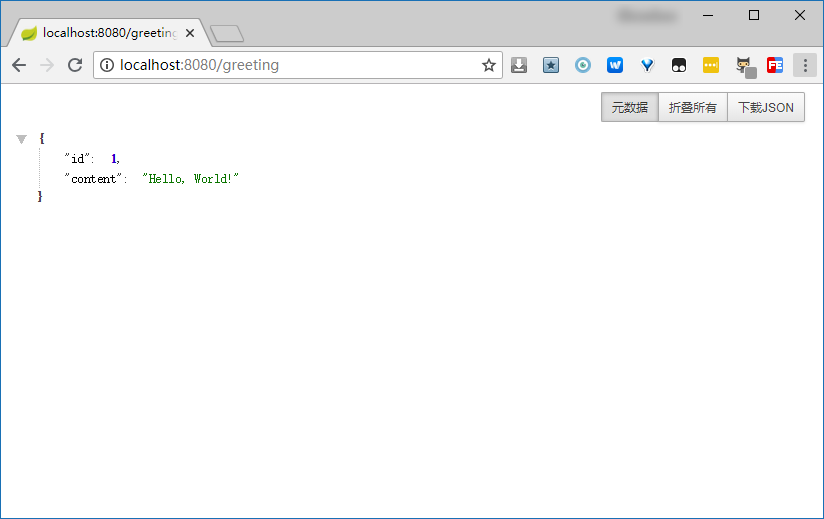
我们接下来将要使用SpringBoot来创建一个 RESTful 风格的Web服务应用,当然是Hello World级别的入门程序。
当我们访问 http://localhost:8080/greeting 时,服务器会返回JSON格式的数据,如 {"id":1, "content":"Hello, World!"};
如果我们对接口增加参数name时,如
http://localhost:8080/greeting?name=zhangsan
,则返回的数据为
{"id":1, "content":"Hello, zhangsan!"}
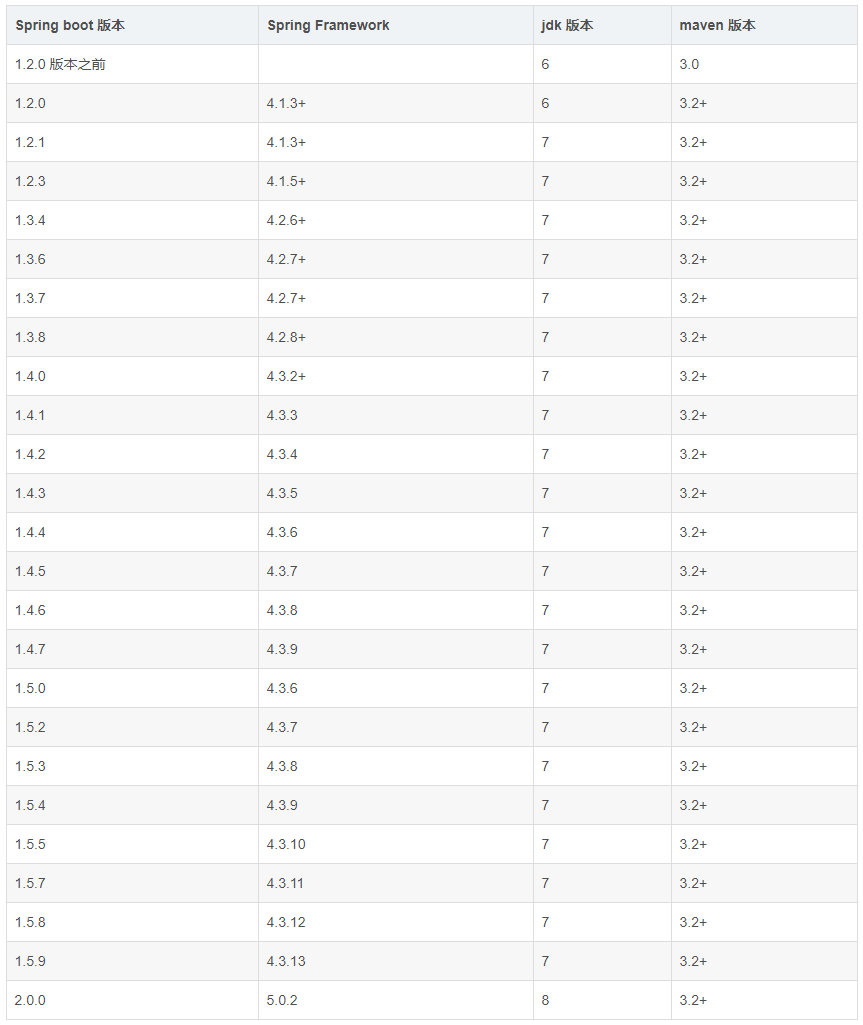
2、配置环境说明
- JDK 1.8+
- Maven 3.2+
以上是SpringBoot 从2.0版本开始的最低要求了,如果你的JDK版本较低,那么获取你也只能使用低版本的SpringBoot,本篇中的Demo将会基于SpringBoot-version2.0.3。
3、SpringBoot:Hello World
3.1 配置pom
新建一个Maven项目,然后在pom.xml中引入SpringBoot相关的配置,官方Demo中给出配置如下(看似配置很复杂,其实我们并用不了这么多,现在只管复制着用就好了,在后面会说明,实际上必要的pom配置也就三部分):
<?xml version="1.0" encoding="UTF-8"?>
<project xmlns="http://maven.apache.org/POM/4.0.0" xmlns:xsi="http://www.w3.org/2001/XMLSchema-instance"
    xsi:schemaLocation="http://maven.apache.org/POM/4.0.0 http://maven.apache.org/xsd/maven-4.0.0.xsd">
    <modelVersion>4.0.0</modelVersion>

    <groupId>org.springframework</groupId>
    <artifactId>gs-rest-service</artifactId>
    <version>0.1.0</version>

    <!-- Inherit defaults from Spring Boot -->
    <parent>
        <groupId>org.springframework.boot</groupId>
        <artifactId>spring-boot-starter-parent</artifactId>
        <version>2.0.3.RELEASE</version>
    </parent>

    <!-- Add typical dependencies for a web application -->
    <dependencies>
        <dependency>
            <groupId>org.springframework.boot</groupId>
            <artifactId>spring-boot-starter-web</artifactId>
        </dependency>
        <dependency>
            <groupId>org.springframework.boot</groupId>
            <artifactId>spring-boot-starter-test</artifactId>
            <scope>test</scope>
        </dependency>
        <dependency>
            <groupId>com.jayway.jsonpath</groupId>
            <artifactId>json-path</artifactId>
            <scope>test</scope>
        </dependency>
    </dependencies>

    <properties>
        <java.version>1.8</java.version>
    </properties>

    <!-- Package as an executable jar -->
    <build>
        <plugins>
            <plugin>
                <groupId>org.springframework.boot</groupId>
                <artifactId>spring-boot-maven-plugin</artifactId>
            </plugin>
        </plugins>
    </build>

    <!-- Add Spring repositories -->
    <!-- (you don't need this if you are using a .RELEASE version) -->
    <repositories>
        <repository>
            <id>spring-releases</id>
            <url>https://repo.spring.io/libs-release</url>
        </repository>
    </repositories>
    <pluginRepositories>
        <pluginRepository>
            <id>spring-releases</id>
            <url>https://repo.spring.io/libs-release</url>
        </pluginRepository>
    </pluginRepositories>
</project>
63
1
2
<project xmlns="http://maven.apache.org/POM/4.0.0" xmlns:xsi="http://www.w3.org/2001/XMLSchema-instance"
3
xsi:schemaLocation="http://maven.apache.org/POM/4.0.0 http://maven.apache.org/xsd/maven-4.0.0.xsd">
4
<modelVersion>4.0.0</modelVersion>
5
6
<groupId>org.springframework</groupId>
7
<artifactId>gs-rest-service</artifactId>
8
<version>0.1.0</version>
9
10
<!-- Inherit defaults from Spring Boot -->
11
<parent>
12
<groupId>org.springframework.boot</groupId>
13
<artifactId>spring-boot-starter-parent</artifactId>
14
<version>2.0.3.RELEASE</version>
15
</parent>
16
17
<!-- Add typical dependencies for a web application -->
18
<dependencies>
19
<dependency>
20
<groupId>org.springframework.boot</groupId>
21
<artifactId>spring-boot-starter-web</artifactId>
22
</dependency>
23
<dependency>
24
<groupId>org.springframework.boot</groupId>
25
<artifactId>spring-boot-starter-test</artifactId>
26
<scope>test</scope>
27
</dependency>
28
<dependency>
29
<groupId>com.jayway.jsonpath</groupId>
30
<artifactId>json-path</artifactId>
31
<scope>test</scope>
32
</dependency>
33
</dependencies>
34
35
<properties>
36
<java.version>1.8</java.version>
37
</properties>
38
39
<!-- Package as an executable jar -->
40
<build>
41
<plugins>
42
<plugin>
43
<groupId>org.springframework.boot</groupId>
44
<artifactId>spring-boot-maven-plugin</artifactId>
45
</plugin>
46
</plugins>
47
</build>
48
49
<!-- Add Spring repositories -->
50
<!-- (you don't need this if you are using a .RELEASE version) -->
51
<repositories>
52
<repository>
53
<id>spring-releases</id>
54
<url>https://repo.spring.io/libs-release</url>
55
</repository>
56
</repositories>
57
<pluginRepositories>
58
<pluginRepository>
59
<id>spring-releases</id>
60
<url>https://repo.spring.io/libs-release</url>
61
</pluginRepository>
62
</pluginRepositories>
63
</project>
3.2 新建实体类用以表示返回对象
JSON格式要求为 {"id":1, "content":"Hello, World!"} ,则对应的实体类如下:
public class Greeting {
    private final long id;
    private final String content;

    public long getId() {
        return id;
    }

    public String getContent() {
        return content;
    }

    public Greeting(long id, String content) {
        this.id = id;
        this.content = content;
    }
}
17
1
public class Greeting {
2
private final long id;
3
private final String content;
4
5
public long getId() {
6
return id;
7
}
8
9
public String getContent() {
10
return content;
11
}
12
13
public Greeting(long id, String content) {
14
this.id = id;
15
this.content = content;
16
}
17
}
3.3 新建Controller
@RestController
public class GreetingController {

    private static final String template = "Hello, %s!";
    private final AtomicLong counter = new AtomicLong();

    @RequestMapping("/greeting")
    public Greeting greeting(@RequestParam(value = "name", defaultValue = "World") String name) {
        return new Greeting(counter.incrementAndGet(), String.format(template, name));
    }

}
12
1
2
public class GreetingController {
3
4
private static final String template = "Hello, %s!";
5
private final AtomicLong counter = new AtomicLong();
6
7
("/greeting")
8
public Greeting greeting((value = "name", defaultValue = "World") String name) {
9
return new Greeting(counter.incrementAndGet(), String.format(template, name));
10
}
11
12
}
- @RestController 即表示了 @Controller 和 @ResponseBody 的整合
- @RequestMapping 用来映射url请求到该方法
- @RequestParam 用来绑定请求中的参数,其中value为参数名称,defaultValue为参数默认值
3.4 新建执行类
常规的方式我们往往将资源打为war包然后部署在服务器下,而SpringBoot则默认采用了打为jar包并执行main()函数的方法,我们新建类如下:
@SpringBootApplication
public class Application {
    public static void main(String[] args) {
        SpringApplication.run(Application.class, args);
    }
}
6
1
2
public class Application {
3
public static void main(String[] args) {
4
SpringApplication.run(Application.class, args);
5
}
6
}
- SpringBootApplication 整合了很多其他注解的功能(详见官方Demo部分的说明)
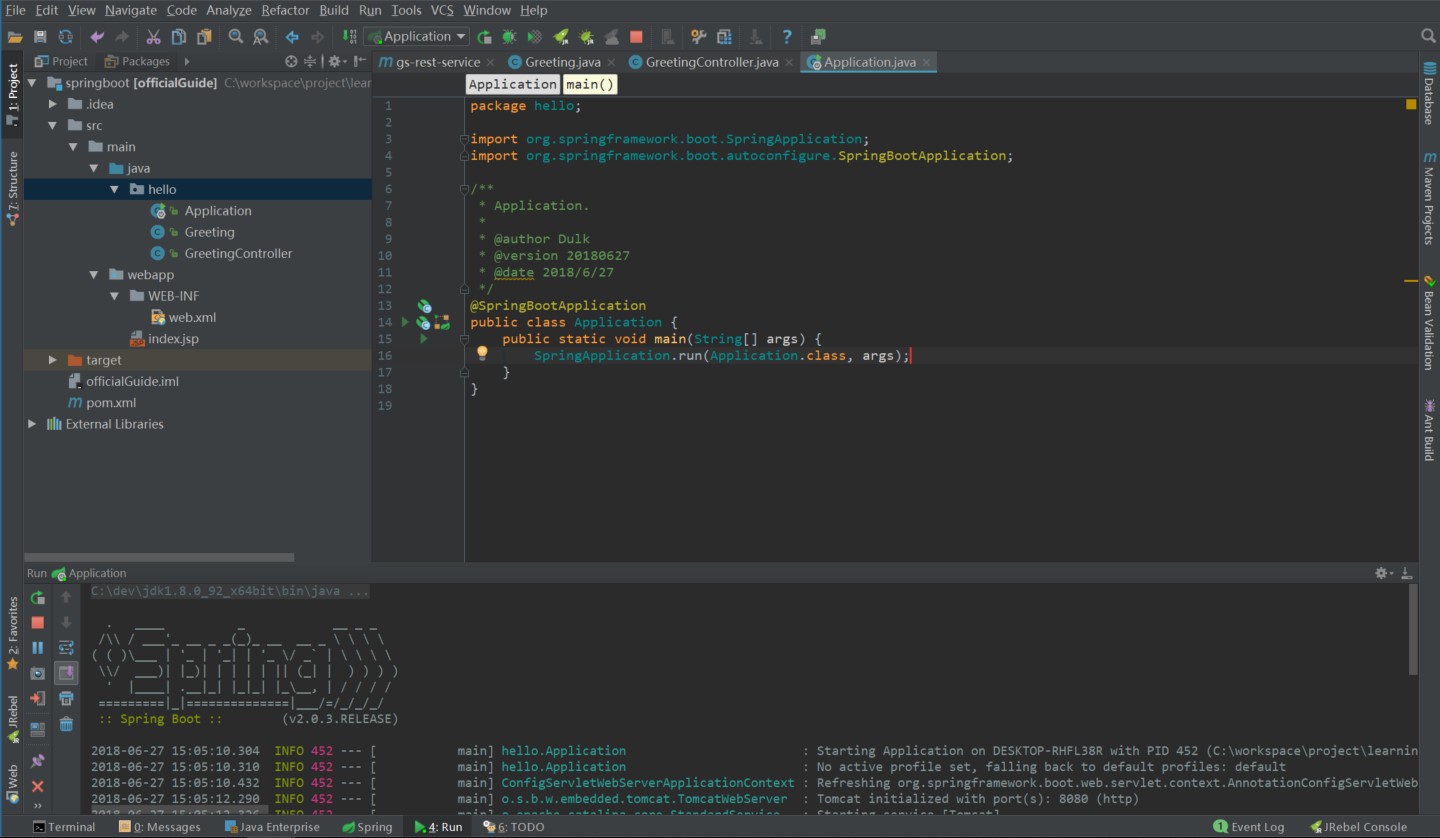
3.5 运行main函数
是的,接下来你只需要运行main函数就可以了:
你甚至可以将工程打成可执行的jar包(Maven,先clean,再package打包):
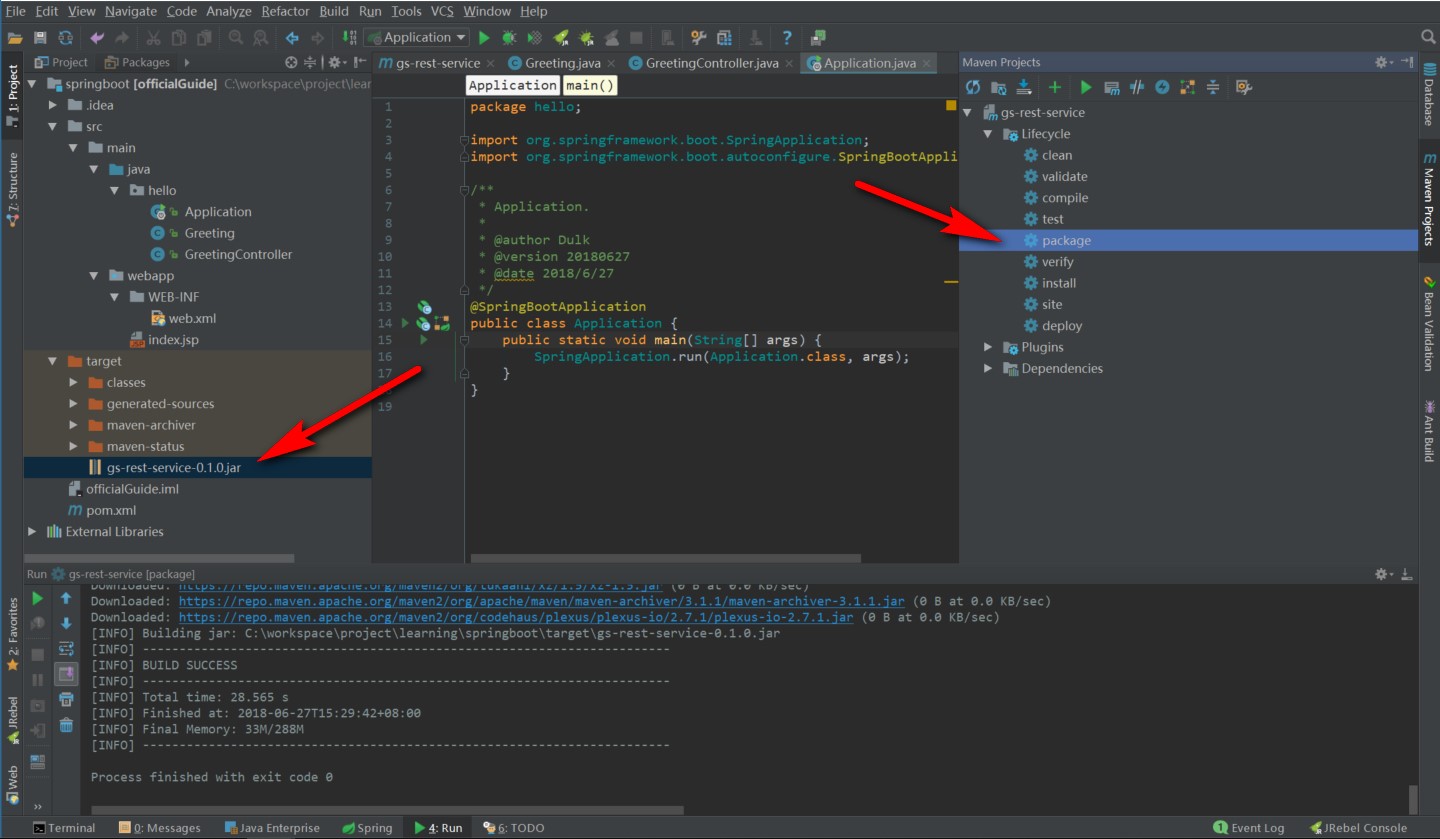
然后通过 java -jar 执行jar包的主程序,效果也是一样的:
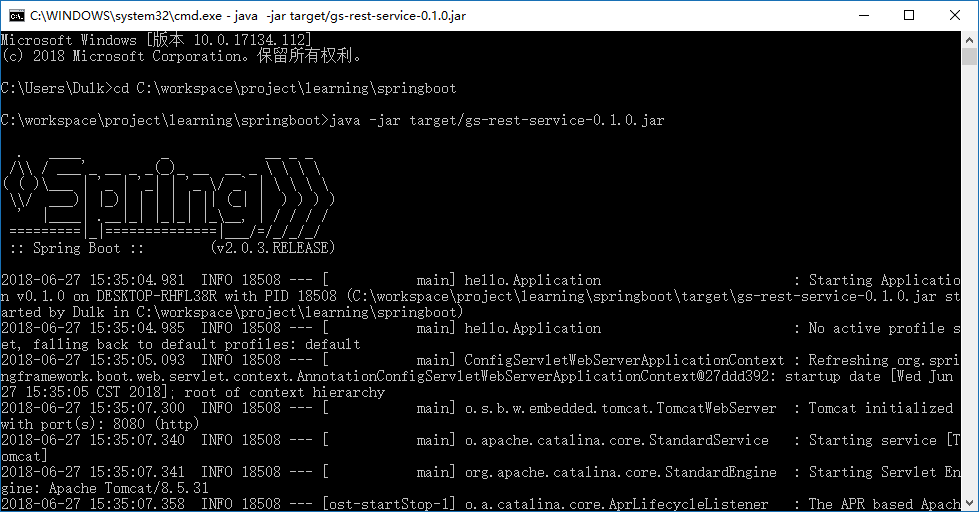
服务器哪来的,我明明只是执行了一个main函数而已:
- SpringBoot内置了三种Servlet容器:Tomcat、Jetty、Undertow
- 默认使用的是Tomcat
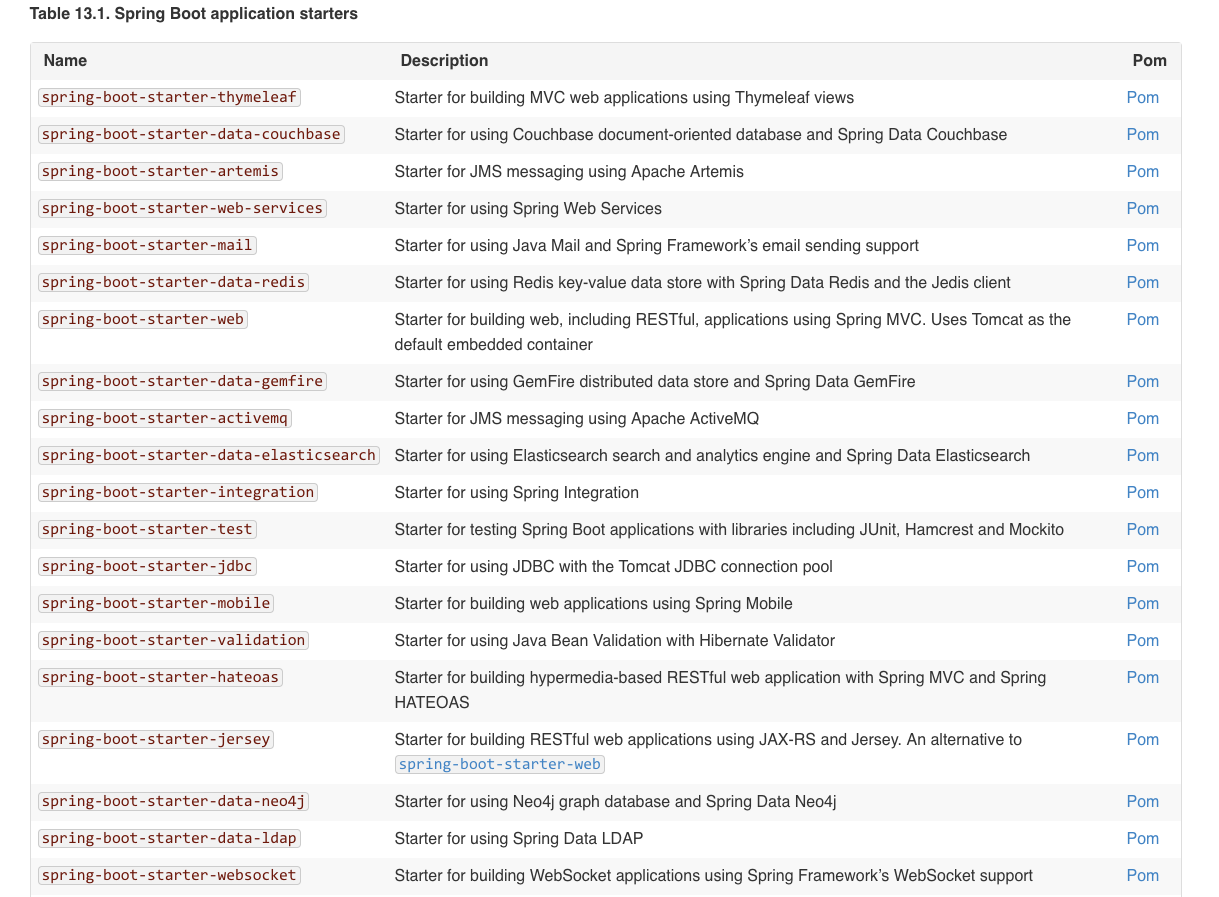
SpringBoot怎么知道我要的是MVC模式的web应用:
- 别忘了我们在pom中配置了所谓的“starter”
- SpringBoot提供各种starter,其实就是很多Spring包的集合,不过Spring替我们整合起来了
4、Demo部分补充说明
4.1 关于pom配置
对于SpringBoot的pom配置来说,官方也进行了
详细的说明。可以看出该Demo中其实必要的留下如下三部分即可:
<!-- Inherit defaults from Spring Boot -->
<!-- springBoot 核心包 -->
<parent>
    <groupId>org.springframework.boot</groupId>
    <artifactId>spring-boot-starter-parent</artifactId>
    <version>2.0.4.BUILD-SNAPSHOT</version>
</parent>

<!-- Add typical dependencies for a web application -->
<!-- 如果搭建的是web应用则增加典型的依赖 -->
<dependencies>
    <dependency>
        <groupId>org.springframework.boot</groupId>
        <artifactId>spring-boot-starter-web</artifactId>
    </dependency>
</dependencies>

<!-- Package as an executable jar -->
<!-- 将springBoot打包为jar包的插件 -->
<build>
    <plugins>
        <plugin>
            <groupId>org.springframework.boot</groupId>
            <artifactId>spring-boot-maven-plugin</artifactId>
        </plugin>
    </plugins>
</build>
27
1
<!-- Inherit defaults from Spring Boot -->
2
<!-- springBoot 核心包 -->
3
<parent>
4
<groupId>org.springframework.boot</groupId>
5
<artifactId>spring-boot-starter-parent</artifactId>
6
<version>2.0.4.BUILD-SNAPSHOT</version>
7
</parent>
8
9
<!-- Add typical dependencies for a web application -->
10
<!-- 如果搭建的是web应用则增加典型的依赖 -->
11
<dependencies>
12
<dependency>
13
<groupId>org.springframework.boot</groupId>
14
<artifactId>spring-boot-starter-web</artifactId>
15
</dependency>
16
</dependencies>
17
18
<!-- Package as an executable jar -->
19
<!-- 将springBoot打包为jar包的插件 -->
20
<build>
21
<plugins>
22
<plugin>
23
<groupId>org.springframework.boot</groupId>
24
<artifactId>spring-boot-maven-plugin</artifactId>
25
</plugin>
26
</plugins>
27
</build>
4.2 关于starter
依赖的集合,官方的说明(
13.5 Starters)就很贴切了:The starters contain a lot of the dependencies that you need to get a project up and running quickly and with a consistent, supported set of managed transitive dependencies.
4.3 关于默认配置变更
内置的Tomcat默认端口是8080,当然是可以修改的,抛砖引玉,本篇不做详述:
4.4 关于部署war包
SpringBoot默认是按照jar包执行,实际上也是可以打包成为war包,单独放在服务器下运行。同样,此处不展开,参考链接即可:


 被折叠的 条评论
为什么被折叠?
被折叠的 条评论
为什么被折叠?
 到【灌水乐园】发言


