


 本文详细介绍SSH(Struts2+Spring+Hibernate)框架的整合步骤,包括项目搭建、配置文件设置、类创建、页面引入等环节,并深入探讨了Struts2与Spring的两种整合方式。
-
整合方式一:无障碍整合
-
SSH框架回顾
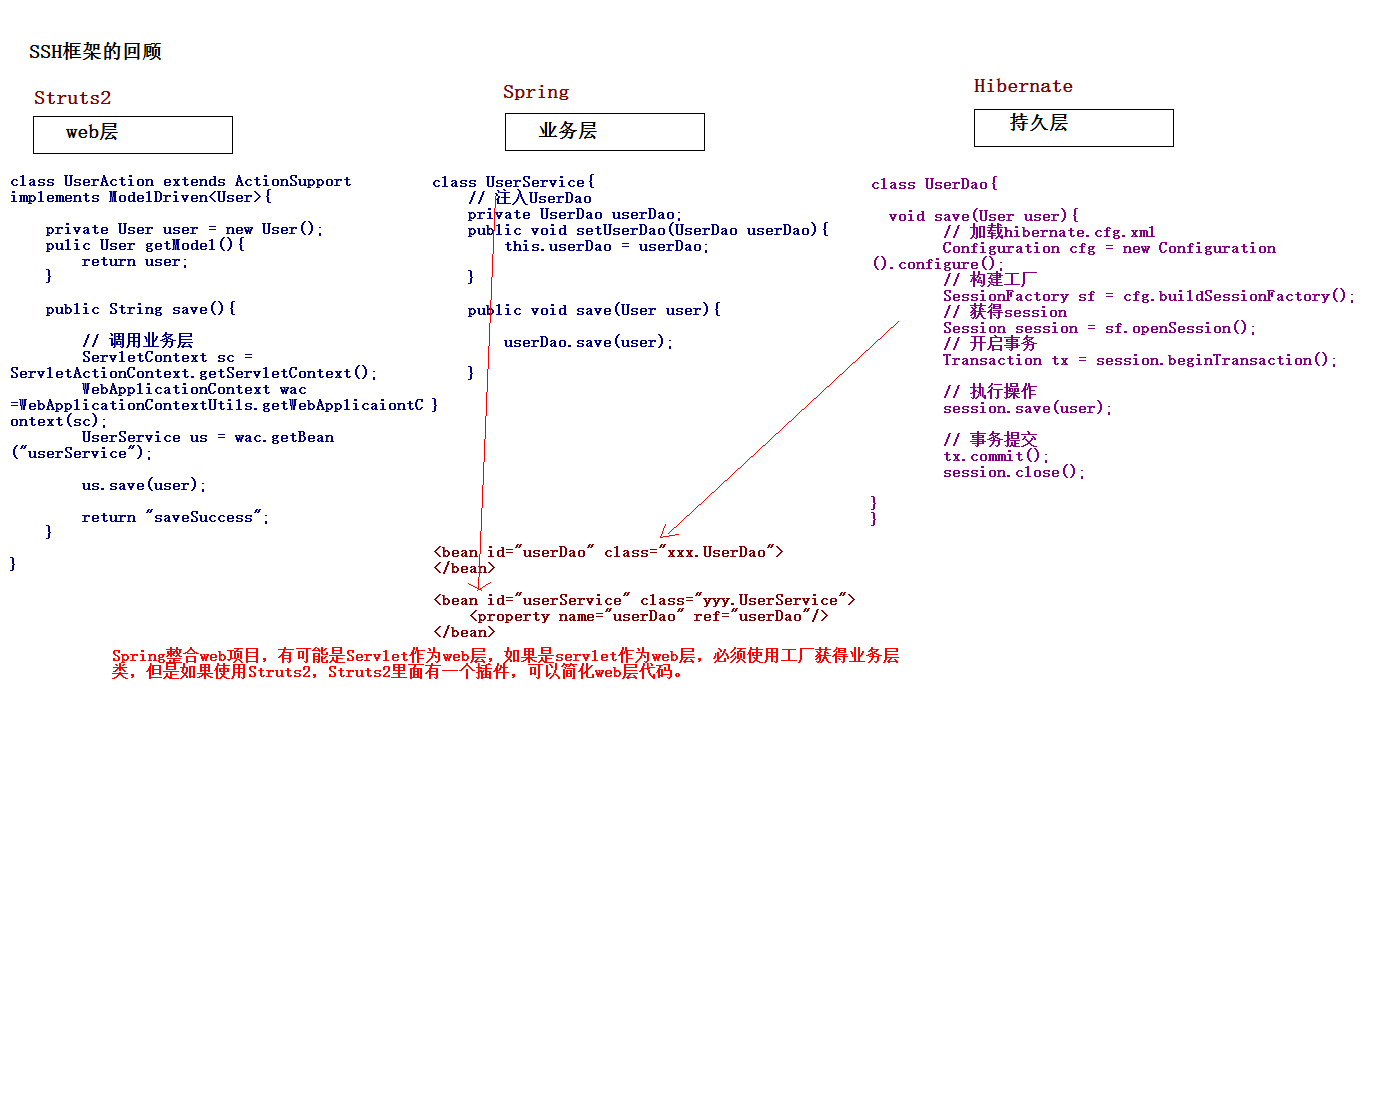
-
SSH整合
-
第一步:创建项目,引入jar包
- Struts2的jar包
- D:\Javasoft\struts-2.5.16-all\struts-2.5.16\apps\struts2-showcase\WEB-INF\lib
- 了解Struts2包
- struts2-convention-plugin-2.5.16.jar:Struts2的注解开发包
- struts2-json-plugin-2.5.16.jar:Struts2整合AJAX的开发包
- struts2-spring-plugin-2.5.16.jar:Struts2整合Spring的开发包
- Hibernate的jar包
- Hibernate开发必须的包
- hibernate-release-5.3.5.Final\hibernate-release-5.3.5.Final\lib\required
- MySql驱动
- 日志记录

注意:Struts2和hibernate都引入了一个相同的jar包(javassist包),必须删除一个。
- 使用C3P0连接池需要引包:hibernate-release-5.3.5.Final\hibernate-release-5.3.5.Final\lib\optional\c3p0

- Hibernate开发必须的包
- Struts2的jar包
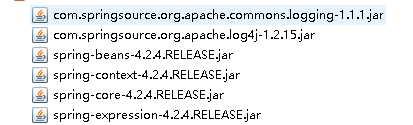
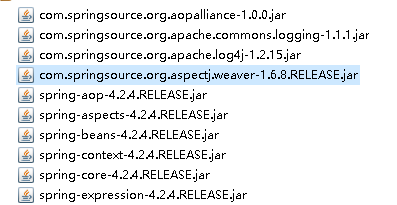
- Spring的jar包
- IOC开发
- AOP开发
- JDBC模板的开发
-
- 事务管理
- 整合单元测试的开发
- 整合WEB项目
- 整合hibernate
- IOC开发
- Spring的jar包
-
-


-
第二步:引入配置文件
-
Struts的配置文件
- web.xml
-
<!-- Struts2的核心过滤器 -->
  <filter>
      <filter-name>struts2</filter-name>
      <filter-class>org.apache.struts2.dispatcher.filter.StrutsPrepareAndExecuteFilter</filter-class>
  </filter>
  <filter-mapping>
      <filter-name>struts2</filter-name>
      <url-pattern>/*</url-pattern>
  </filter-mapping>
-
- struts.xml
- web.xml
-
Hibernate配置文件
- hibernate.cfg.xml
- 删除那个与线程绑定的session
- 映射文件
- 日志文件
- hibernate.cfg.xml
- Spring配置文件
- web.xml
-
<!-- Spring的核心监听器 -->
  <listener>
      <listener-class>org.springframework.web.context.ContextLoaderListener</listener-class>
  </listener>
  <context-param>
      <param-name>contextConfigLocation</param-name>
      <param-value>classpath:applicationContext.xml</param-value>
  </context-param>
  <!-- Struts2的核心过滤器 -->
  <filter>
      <filter-name>struts2</filter-name>
      <filter-class>org.apache.struts2.dispatcher.filter.StrutsPrepareAndExecuteFilter</filter-class>
  </filter>
  <filter-mapping>
      <filter-name>struts2</filter-name>
      <url-pattern>/*</url-pattern>
  </filter-mapping>
-
- applicationContext.xml
- 日志记录
- web.xml
-
-
-
第四步:创建相关类
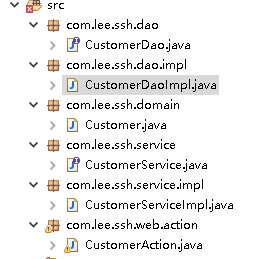
-
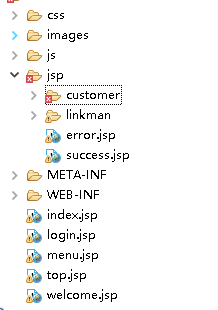
第五步:引入相关的页面
- 第六步:
- applicationContext.xml
-
<!-- 配置Service -->
    <bean id="customerService" class="com.lee.ssh.service.impl.CustomerServiceImpl">

    </bean>
-
- struts.xml
-
<struts>
      <!-- 配置struts2的常量 -->
     <constant name="struts.action.extension" value="action"></constant>
     <!-- 配置Action -->
     <package name="ssh" extends="struts-default" namespace="/">
         <action name="customer_*" class="com.lee.ssh.web.action.CustomerAction" method="{1}">

         </action>
     </package>
</struts>
-
- applicationContext.xml
-
第八步:Spring整合struts2方式二:Action交给Spring管理
- 引入插件包struts2-spring-plugin-2.5.16.jar
- 将Action配置到Spring里
- applicationContext.xml
-
<!-- 配置Action -->
    <bean id="customerAction" class="com.lee.ssh.web.action.CustomerAction">

    </bean>
- 在struts.xml引入
-
<struts>
     <!-- 配置struts2的常量 -->
     <constant name="struts.action.extension" value="action"></constant>
     <!-- 配置Action -->
     <package name="ssh1" extends="struts-default" namespace="/">
         <!-- class="CustomerAction"是applicationContext.xml中的Action的id,引入的就是它 -->
         <action name="customer_*" class="customerAction" method="{1}">

         </action>
     </package>
</struts>
-
-
注意:原来的Action是多例的,交给Spring后默认变成单例的,需要配置Action为多例
- applicationContext.xml
-
<!-- 配置Service -->
    <bean id="customerService" class="com.lee.ssh.service.impl.CustomerServiceImpl" scope="prototype">

    </bean>
-
注意:需要手动注入Service(applicationContext。xml)
-
<!-- 配置Action -->
    <bean id="CustomerAction" class="com.lee.ssh.web.action.CustomerAction"  scope="prototype">
        <property name="customerService" ref="customerService"></property>
    </bean>
-
- 第九步:Service调用DAO
- 将DAO交给Spring管理
-
<!-- 配置DAO --> <bean id="customerDao" class="com.lee.ssh.dao.impl.CustomerDaoImpl"> </bean> - package com.lee.ssh.service.impl;class CustomerServiceImpl
-
//注入DAO
    private CustomerDao customerDao;

    public void setCustomerDao(CustomerDao customerDao) {
        this.customerDao = customerDao;
    }
- 第十步:Spring整合Hibernate框架
- 编写实体和映射
- 在Spring配置文件中引入Hibernate的配置信息
-
<!-- Spring整合Hibernate --> <!-- 引入Hibernate的配置信息,并根据classpath:hibernate.cfg.xml生成配置文件======= --> <bean id="sessionFactory" class="org.springframework.orm.hibernate5.LocalSessionFactoryBuilder"> <!-- 引入Hibernate的配置文件 --> <property name="configLocation" value="classpath:hibernate.cfg.xml"></property> </bean> - 在Spring和Hibernate整合后,Spring提供了一个Hibernate的模板简化Hibernate的开发
- 改写DAO继承HibernateDaoSupport
-
package com.lee.ssh.dao.impl;

import java.util.List;

import org.hibernate.Session;
import org.hibernate.Transaction;
import org.springframework.orm.hibernate5.support.HibernateDaoSupport;

import com.lee.ssh.dao.CustomerDao;
import com.lee.ssh.domain.Customer;
import com.lee.ssh.utils.HibernateUtils;

public class CustomerDaoImpl extends HibernateDaoSupport implements CustomerDao {


    @Override
    public void save(Customer customer) {
        System.out.println("CustomerDaoImpl中的save方法执行了");
    }

}
- 在DAO中直接注入Session Factory:一旦注入,就会自动创建Hibernate模板类
-
<!-- 配置DAO --> <bean id="customerDao" class="com.lee.ssh.dao.impl.CustomerDaoImpl"> <property name="sessionFactory" ref="sessionFactory"></property> </bean> - 在DAO中使用Hibernate的模板完成保存操作
-
public void save(Customer customer) {
        System.out.println("CustomerDaoImpl中的save方法执行了");
        this.getHibernateTemplate().save(customer);
    }
- 第十一步:配置Spring的事务管理
-
public void save(Customer customer) {
        System.out.println("CustomerDaoImpl中的save方法执行了");
        this.getHibernateTemplate().save(customer);
    }
-
开启注解事务
-
<!-- 开启注解事务 --> <tx:annotation-driven transaction-manager="transactionManager"/> - 在业务层使用注解
-
@Transactional
public class CustomerServiceImpl implements CustomerService {
-
-
-
整合方式二:没有Hibernate文件,将hibernate的配置都交给Spring管理
-
Hibernate模板的使用
-
延迟加载问题的解决


 116
116

 被折叠的 条评论
为什么被折叠?
被折叠的 条评论
为什么被折叠?
 到【灌水乐园】发言


