


 本文详细介绍了如何在iOS应用中使用TableViewController作为主界面,并通过设置表格及单元格样式,实现动态展示数据及交互操作。包括删除现有视图界面、设置主界面为TableViewController、绑定视图控制器、配置单元格样式、展示数据及单元格交互等功能。
项目创建完毕后,默认是使用ViewController作为主界面视图。下面通过样例演示,如何使用TableViewController作为主界面视图,同时演示如何在storyboard中设置表格及内部单元格样式。
功能如下:
1,程序运行后即为表格页面
2,表格内容为“行号:内容”
3,点击单元格可以切换勾选与取消勾选状态
效果图如下:

详细步骤:
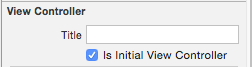
1,删掉storyboard现有的视图界面。然后从对象库中拖入一个TableViewController到场景中。同时将其Attributes面板中的,Is Initial View Controller选中。
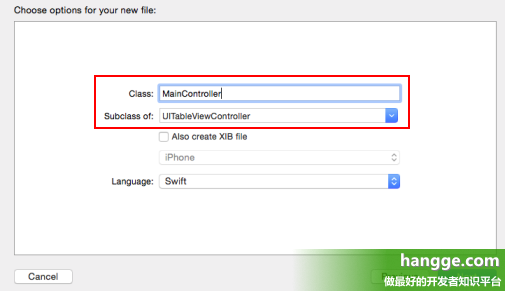
2,新建一个类MainController.swift,继承自UITableViewController
3,将场景中的TableViewController与新建的MainController进行绑定。选中主界面,然后再Identity面板中将CustomClass的Class属性设置为MainController即可。

4,选中单元格(TableViewCell),在Attributes面板中设置Identifier属性为“maincell”(供代码中使用)。
同时将Accessory属性设置为Checkmark(表示单元格尾部为勾号)

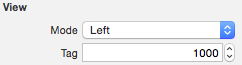
5,从对象库中拖入一个Label控件到cell中,用于显示内容。同时选中这个Label,在Attributes面板中设置Tag的值为1000,供代码中获取标签。
6,MainController.swift
|
1
2
3
4
5
6
7
8
9
10
11
12
13
14
15
16
17
18
19
20
21
22
23
24
25
26
27
28
29
30
31
32
33
34
35
36
37
38
39
40
41
42
|
import UIKitclass MainController: UITableViewController { var tasks:[String] = ["今天任务","明天任务","后天任务"] override func viewDidLoad() { super.viewDidLoad() } override func didReceiveMemoryWarning() { super.didReceiveMemoryWarning() } override func tableView(tableView: UITableView, numberOfRowsInSection section: Int) -> Int { return tasks.count } override func tableView(tableView: UITableView, cellForRowAtIndexPath indexPath: NSIndexPath) -> UITableViewCell { let cell = tableView.dequeueReusableCellWithIdentifier("maincell", forIndexPath: indexPath) as UITableViewCell //获取label let label = cell.viewWithTag(1000) as UILabel //设置label内容 label.text = "\(indexPath.row):\(tasks[indexPath.row])" return cell } override func tableView(tableView: UITableView, didSelectRowAtIndexPath indexPath: NSIndexPath) { //获取cell let cell = tableView.cellForRowAtIndexPath(indexPath) //根据原先状态,改变勾选或取消勾选状态 if cell?.accessoryType == UITableViewCellAccessoryType.None{ cell?.accessoryType = UITableViewCellAccessoryType.Checkmark }else{ cell?.accessoryType = UITableViewCellAccessoryType.None } //取消选中状态 tableView.deselectRowAtIndexPath(indexPath, animated: true) }} |
7,上述操作完毕后会发现,表格顶着最上面不好看。我们可以在头部添加一个Navigation
Controller导航控制器。即选中storyboard中的主界面,然后从XCode的顶部菜单选择Editor->Embed
In->Navigation Controller。最后,选择主界面,将title设置为“任务列表” 


 755
755

 被折叠的 条评论
为什么被折叠?
被折叠的 条评论
为什么被折叠?
 到【灌水乐园】发言


