


 本文通过实例详细介绍了如何使用配置文件来设置WCF服务,包括服务接口定义、服务实现、服务宿主配置等内容,并展示了如何在客户端进行服务调用。
这次用纯配置文件来配置服务器端服务,使其暴露给客户端,供其调用.为什么要用配置文件呢,使用配置文件增加了我们程序的灵活性.使用配置文件,我们可以不必修
改我们的程序代码而是程序灵活应对变化.像工厂模式中的反射一样,动态创建不同的类而不必修改源程序.
既然配置文件方便灵活我们就来使用它配置我们的WCF应用程序吧.
首先 我们还是要创建一个解决方案,然后创建一个类库,两个控制台应用程序.分别命名为Calculator,Server,Client
解决方案截图如下:
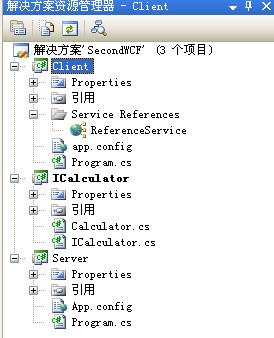
首先我们还是编写我们的服务提供类库,编写一个ICalculator接口 代码如下:
using System;
using System.Collections.Generic;
using System.Linq;
using System.Text;
using System.ServiceModel;
namespace MyWcf.Calculator
{
[ServiceContract(Namespace="http://www.cnblogs.com/trampt")]
public interface ICalculator
{
[OperationContract]
int Add(int a, int b);
[OperationContract]
int Sub(int a, int b);
[OperationContract]
int Multiply(int a, int b);
}
}
然后我们实现这个接口 新建一个类Calculator 代码如下:
using System;
using System.Collections.Generic;
using System.Linq;
using System.Text;
namespace MyWcf.Calculator
{
public class Calculator:ICalculator
{
public int Add(int a, int b)
{
return a + b;
}
public int Sub(int a, int b)
{
return a - b;
}
public int Multiply(int a, int b)
{
return a * b;
}
}
}
编写完类库之后 我们来写我们的服务暴露程序也就是我们的Server 在这里我们完全使用配置文件,我们在控制台里的代码很简单,只要创建一个宿主就可以了
Program.cs代码如下:
using System;
using System.Collections.Generic;
using System.Linq;
using System.Text;
using System.ServiceModel;
using MyWcf.Calculator;
namespace Server
{
class Program
{
static void Main(string[] args)
{
ServiceHost host = new ServiceHost(typeof(MyWcf.Calculator.Calculator));
host.Open();
Console.ReadLine();
}
}
}
我们的配置文件如下(关于配置文件的配置方法及含义cnblogs里面有很多文章介绍,这里只做演示,以后会逐步深入)App.config:
<?xml version="1.0" encoding="utf-8" ?>
<configuration>
<system.serviceModel>
<services>
<service name="MyWcf.Calculator.Calculator" behaviorConfiguration="serviceBehavior">
<endpoint address="Calculator" binding="basicHttpBinding" contract="MyWcf.Calculator.ICalculator"></endpoint>
<endpoint address="mex" binding="mexHttpBinding" contract="IMetadataExchange"></endpoint>
<host>
<baseAddresses>
<add baseAddress="http://localhost:8080/Calculator"/>
</baseAddresses>
</host>
</service>
</services>
<behaviors>
<serviceBehaviors>
<behavior name="serviceBehavior">
<serviceMetadata httpGetEnabled="true"/>
</behavior>
</serviceBehaviors>
</behaviors>
</system.serviceModel>
</configuration>
好 我们的配置文件配置好了 生成解决方案.我们开启我们的服务,然后在客户端引用这个服务.
打开应用解决方案所在目录,找到Server下的Debug目录下的Server.exe双击打开,
回到我们的Client 我们右键添加服务引用 我们输入地址http://localhost:8000找到服务 我们点确定添加,就会在客户端生成服务的代理.截图如下:
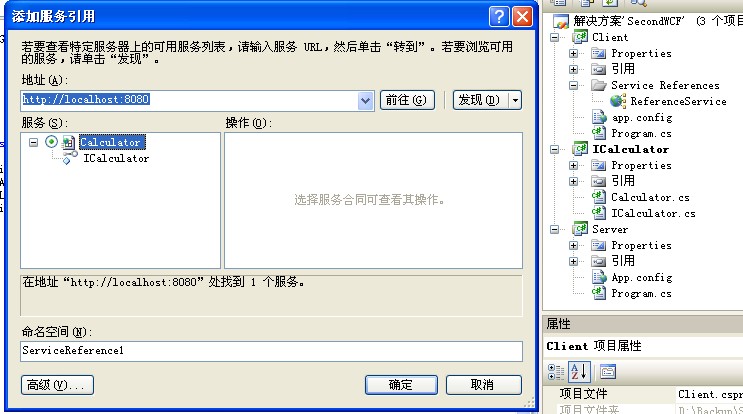 在Service Reference下 我们可以发现我们刚添加的代理(注意:我们只有启动了Server服务才能在客户端添加服务引用)
我们就可以在客户端使用了
客户端代码很简单:
using System;
using System.Collections.Generic;
using System.Linq;
using System.Text;
namespace Client
{
class Program
{
static void Main(string[] args)
{
ReferenceService.CalculatorClient client = new Client.ReferenceService.CalculatorClient();
int b=client.Add(4,6);
Console.WriteLine(b);
Console.ReadLine();
}
}
}


 被折叠的 条评论
为什么被折叠?
被折叠的 条评论
为什么被折叠?
 到【灌水乐园】发言


