实验环境
- 一台最小化安装的CentOS 7.3虚拟机
配置基本环境
1. 安装nginx
yum install -y epel-*
yum isntall -y nginx vim
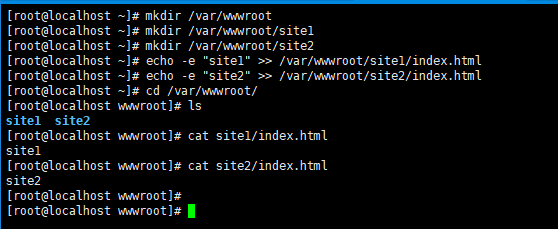
2. 建立虚机主机的站点根目录
mkdir /var/wwwroot
mkdir /var/wwwroot/site1
mkdir /var/wwwroot/site2
echo -e "site1" >> /var/wwwroot/site1/index.html
echo -e "site2" >> /var/wwwroot/site2/index.html
3. 关闭CentOS的防火墙
setenforce 0
systemctl stop firewalld
systemctl disable firewalld
配置基于端口的虚拟主机
1. 编辑nginx配置文件
vim /etc/nginx/conf.d/vhosts.conf2. 添加以下内容
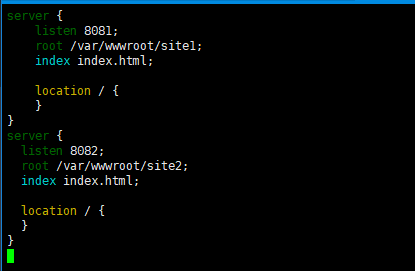
server {
    listen 8081;
    root /var/wwwroot/site1;
    index index.html;

    location / {
    }
}
server {
  listen 8082;
  root /var/wwwroot/site2;
  index index.html;

  location / {
  }
}
3. 启动nginx服务
systemctl start nginx4. 在宿主机访问两个站点
http://192.168.204.135:8081/http://192.168.204.135:8082/

配置基于域名的虚拟主机
1. 重新编辑nginx配置文件
vim /etc/nginx/conf.d/vhosts.conf2. 删除原内容,重新添加以下内容
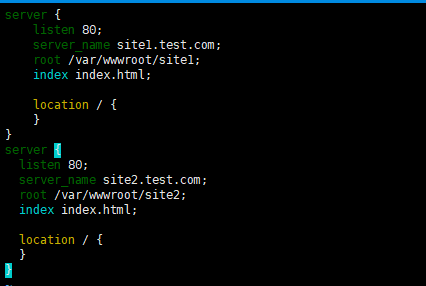
server {
    listen 80;
    server_name site1.test.com;
    root /var/wwwroot/site1;
    index index.html;

    location / {
    }
}
server {
  listen 80;
  server_name site2.test.com;
  root /var/wwwroot/site2;
  index index.html;

  location / {
  }
}
3. 重启nginx服务
systemctl restart nginx4. 在Windows上修改hosts文件
编辑C:\Windows\System32\drivers\etc\hosts文件,
添加以下内容(根据实际情况自己修改)
192.168.204.135   site1.test.com
192.168.204.135   site2.test.com
5. 在宿主机访问两个站点
http://site1.test.com/http://site2.test.com/


配置基于IP的虚拟主机
1. 在虚拟机增加两个IP地址
ifconfig ens33:1 192.168.204.151
ifconfig ens33:2 192.168.204.152
2. 重新编辑nginx配置文件
vim /etc/nginx/conf.d/vhosts.conf3. 删除原内容,重新添加以下内容
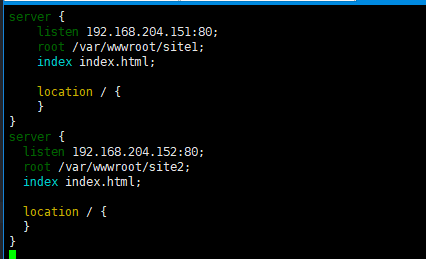
server {
    listen 192.168.204.151:80;
    root /var/wwwroot/site1;
    index index.html;

    location / {
    }
}
server {
  listen 192.168.204.152:80;
  root /var/wwwroot/site2;
  index index.html;

  location / {
  }
}
4. 重启nginx服务
systemctl restart nginx5. 在宿主机访问两个站点
http://192.168.204.151/http://192.168.204.152/


 本文详细介绍了在CentOS7.3环境下使用Nginx配置基于端口、域名和IP的虚拟主机的过程。从环境搭建到具体步骤,包括安装Nginx、创建站点目录、编辑配置文件及访问测试等,适合初学者实践。


 被折叠的 条评论
为什么被折叠?


