


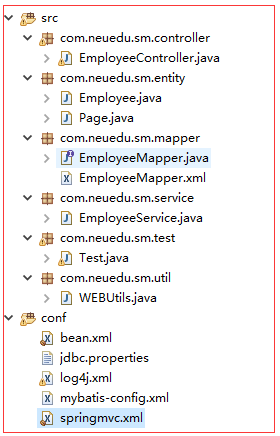
 本文介绍如何整合Spring和MyBatis框架,包括配置MyBatis的settings部分、使用Spring管理SqlSession和扫描Mapper接口,以及配置Spring MVC实现前后端交互。
先将Spring和Mybatis整合
1.加入 mybatis 的 jar 包和配置文件: 实际上需要配置的就是 settings 的部分。
<?xml version="1.0" encoding="UTF-8" ?>

<!DOCTYPE configuration  PUBLIC "-//mybatis.org//DTD Config 3.0//EN"
"http://mybatis.org/dtd/mybatis-3-config.dtd">
<configuration>
      <!-- settings标签可以设置多个属性值 -->
      <settings>
            <!-- setting标签负责每一个属性的设置 -->
            <setting name="mapUnderscoreToCamelCase" value="true"/>
      </settings>
</configuration>
2. 加入 Spring 的 jar 包和配置文件
之前是在 mybatis-config.xml 获取 sqlSessionFactory 和扫描 mapper 接口
但是现在 mybatis-config.xml 只有 settings
所以在 bean.xml 中配置获得 sqlSessionFactory 和扫描 mapper 接口
Spring具体配置参见上篇《Spring+SpringMVC的整合》
<context:component-scan base-package="com.neuedu">
      <context:exclude-filter type="annotation" expression="org.springframework.stereotype.Controller"/>
      <context:exclude-filter type="annotation" expression="org.springframework.web.bind.annotation.ControllerAdvice"/>
</context:component-scan>

<!-- 加载外部属性文件 -->
<context:property-placeholder location="classpath:jdbc.properties"/>
<!-- 配置C3P0 数据源 -->
<bean id="comboPooledDataSource" class="com.mchange.v2.c3p0.ComboPooledDataSource">
      <property name="user" value="${jdbc.username}"></property>
      <property name="password" value="${jdbc.password}"></property>
      <property name="driverClass" value="${jdbc.driver}"></property>
      <property name="jdbcUrl" value="${jdbc.url}"></property>
</bean>

<!-- 配置事务管理器 -->
<bean id="dataSourceTransactionManager" class="org.springframework.jdbc.datasource.DataSourceTransactionManager">
      <property name="dataSource" ref="comboPooledDataSource"></property>
</bean>
<!-- 开启基于注解的事务 -->
<tx:annotation-driven transaction-manager="dataSourceTransactionManager"/>

<!-- 配置sqlSessionFactory -->
<bean id="sqlSessionFactoryBean" class="org.mybatis.spring.SqlSessionFactoryBean">
      <property name="dataSource" ref="comboPooledDataSource"></property>
      <property name="configLocation" value="classpath:mybatis-config.xml"></property>
</bean>

<!-- 批量扫描mapper接口包 -->
<bean id="mapperScannerConfigurer" class="org.mybatis.spring.mapper.MapperScannerConfigurer">
      <property name="basePackage" value="com.neuedu.sm.mapper"></property>
</bean>
3.Test 测试
public class TestEmployeeMapper {
      private ApplicationContext ioc = new ClassPathXmlApplicationContext("bean.xml");
      @Test
      public void test() {
            EmployeeMapper bean = ioc.getBean(EmployeeMapper.class);
            Employee employee = bean.getEmpById(1);
            System.out.println(employee);
      }
}
以上Spring+Mybatis的配置基本完毕
将 SpringMVC整合到上面的项目中
1.配置SpringMVC 配置文件
<context:component-scan base-package="com.neuedu" use-default-filters="false">
	<context:include-filter type="annotation" expression="org.springframework.stereotype.Controller"/>
	<context:include-filter type="annotation" expression="org.springframework.web.bind.annotation.ControllerAdvice"/>
</context:component-scan>

<!-- 配置视图解析器 -->
<bean class="org.springframework.web.servlet.view.InternalResourceViewResolver">
	<property name="prefix" value="/WEB-INF/views/"></property>
	<property name="suffix" value=".jsp"></property>
</bean>

<!-- 处理静态资源 -->
<mvc:default-servlet-handler/>
<mvc:annotation-driven/>
2.创建相应的Controller、Service
3.在Controller层获取页面传来的数据,调用Service层方法【SpringMVC】
Service层调用Mapper接口,【Mybatis】
Mapper接口中有相应的方法,与sql映射文件相对应【Mybatis】


 463
463

 被折叠的 条评论
为什么被折叠?
被折叠的 条评论
为什么被折叠?
 到【灌水乐园】发言


