


Django Form表单
django中的Form一般有两种功能:
输入html
验证用户输入
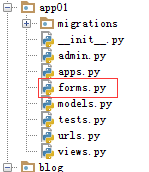
在项目中创建一个form文件
先写一个简单的forn:
|
1
2
3
4
5
6
7
|
from
django
import
forms
from
app01
import
models
class
BookForm(forms.Form):
#数据库中要有对应的字段,如title
title
=
forms.CharField(max_length
=
15
)
publication_date
=
forms.DateField()
|
再写一个对应的视图:
|
1
2
3
4
5
6
7
8
9
10
11
12
13
14
15
16
|
def
book_form(request):
form
=
forms.BookForm()
if
request.method
=
=
'POST'
:
form
=
forms.BookForm(request.POST)
if
form.is_valid():
form_data
=
form.cleaned_data
#提取前端的数据
form_data[
'publishers_id'
]
=
request.POST.get(
'publisher_id'
)
#保存数据
book_obj
=
models.Book(
*
*
form_data)
book_obj.save()
else
:
#form的错误信息
print
(form.errors)
publisher_list
=
models.Publisher.objects.
all
()
return
render(request,
'book_form.html'
,{
'book_form'
:form,
'publishers'
:publisher_list})
|
最后写一个简单的模板:
|
1
2
3
4
5
6
7
8
9
10
11
12
13
14
15
16
17
18
19
|
<!DOCTYPE html>
<html lang
=
"en"
>
<head>
<meta charset
=
"UTF-8"
>
<title>Title<
/
title>
<
/
head>
<body>
<form action
=
"
" method="
post">{
%
csrf_token
%
}
{{ book_form }}
<select name
=
"publisher_id"
>
{
%
for
publisher
in
publishers
%
}
<option value
=
"{{ publisher.id }}"
>{{ publisher.name }}<
/
option>
{
%
endfor
%
}
<
/
select>
<
input
type
=
"submit"
value
=
"创建图书"
>
<
/
form>
<
/
body>
<
/
html>
|
一个更复杂的实例:
form:
|
1
2
3
4
5
6
7
8
9
10
11
12
13
14
15
16
17
18
19
20
21
22
23
24
25
26
27
28
29
30
31
32
33
34
35
36
37
38
39
40
41
42
43
44
45
46
47
48
49
50
51
52
53
|
#!/usr/bin/env python
# -*- coding:utf-8 -*-
import
re
from
django
import
forms
from
django.core.exceptions
import
ValidationError
def
mobile_validate(value):
mobile_re
=
re.
compile
(r
'^(13[0-9]|15[012356789]|17[678]|18[0-9]|14[57])[0-9]{8}$'
)
if
not
mobile_re.match(value):
raise
ValidationError(
'手机号码格式错误'
)
class
PublishForm(forms.Form):
user_type_choice
=
(
(
0
, u
'普通用户'
),
(
1
, u
'高级用户'
),
)
user_type
=
forms.IntegerField(widget
=
forms.widgets.Select(choices
=
user_type_choice,
attrs
=
{
'class'
:
"form-control"
}))
title
=
forms.CharField(max_length
=
20
,
min_length
=
5
,
error_messages
=
{
'required'
: u
'标题不能为空'
,
'min_length'
: u
'标题最少为5个字符'
,
'max_length'
: u
'标题最多为20个字符'
},
widget
=
forms.TextInput(attrs
=
{
'class'
:
"form-control"
,
'placeholder'
: u
'标题5-20个字符'
}))
memo
=
forms.CharField(required
=
False
,
max_length
=
256
,
widget
=
forms.widgets.Textarea(attrs
=
{
'class'
:
"form-control no-radius"
,
'placeholder'
: u
'详细描述'
,
'rows'
:
3
}))
phone
=
forms.CharField(validators
=
[mobile_validate, ],
error_messages
=
{
'required'
: u
'手机不能为空'
},
widget
=
forms.TextInput(attrs
=
{
'class'
:
"form-control"
,
'placeholder'
: u
'手机号码'
}))
email
=
forms.EmailField(required
=
False
,
error_messages
=
{
'required'
: u
'邮箱不能为空'
,
'invalid'
: u
'邮箱格式错误'
},
widget
=
forms.TextInput(attrs
=
{
'class'
:
"form-control"
,
'placeholder'
: u
'邮箱'
}))
'''
def __init__(self, *args, **kwargs):
super(SampleImportForm, self).__init__(*args, **kwargs)
self.fields['idc'].widget.choices = models.IDC.objects.all().order_by('id').values_list('id','display')
self.fields['business_unit'].widget.choices = models.BusinessUnit.objects.all().order_by('id').values_list('id','name')
Forms
'''
|
视图:
|
1
2
3
4
5
6
7
8
9
10
|
def
test_form_view(request):
if
request.method
=
=
'POST'
:
request_form
=
PublishForm(request.POST)
if
request_form.is_valid():
request_dict
=
request_form.clean()
print
(request_dict)
return
render(request,
'test.html'
, {
'pub_form'
:request_form})
else
:
pub_form
=
PublishForm()
return
render(request,
'test.html'
,{
'pub_form'
:pub_form})
|
模板:
|
1
2
3
4
5
6
7
8
9
10
11
12
13
14
15
16
17
|
<
div
>
<
form
method
=
"post"
action
=
"{% url 'test_form' %}"
>{% csrf_token %}
<
div
>{{ pub_form.user_type }} {{ pub_form.errors.title }}</
div
>
<
div
>{{ pub_form.title }}</
div
>
<
div
>{{ pub_form.email }}</
div
>
<
div
>{{ pub_form.phone }}</
div
>
<
div
>{{ pub_form.memo }}</
div
>
{% if pub_form.errors %}
{{ pub_form.errors }}
{% endif %}
<
input
type
=
"submit"
value
=
"提交"
>
</
form
>
</
div
>
|
ModelForm
Form文件:
|
1
2
3
4
5
6
7
8
9
10
11
12
13
14
|
from
django
import
forms
from
app01
import
models
class
BookModelForm(forms.ModelForm):
class
Meta:
#写一个原类
model
=
models.Book
#关联的表
exclude
=
()
#什么字段都显示
#fields = ('titile') #只显示title字段
#添加样式
widgets
=
{
'title'
: forms.TextInput(attrs
=
{
'class'
:
'form-control'
}),
}
|
对应的视图文件:
|
1
2
3
4
5
6
7
8
9
10
11
12
|
from
django.shortcuts
import
render
from
app01
import
forms
from
app01
import
models
def
book_modelform(request):
form
=
forms.BookModelForm()
if
request.method
=
=
'POST'
:
form
=
forms.BookModelForm(request.POST)
#表单验证
if
form.is_valid():
#最牛逼的保存
form.save()
return
render(request,
'book_modelform.html'
,{
'book_form'
:form,})
|
最后前端模板文件:
|
1
2
3
4
5
6
7
8
9
10
11
12
13
14
15
16
17
18
19
20
|
<!DOCTYPE html>
<
html
lang
=
"en"
>
<
head
>
<
meta
charset
=
"UTF-8"
>
<
title
>Title</
title
>
<
link
href
=
"/static/css/bootstrap.css"
rel
=
"stylesheet"
>
</
head
>
<
body
>
<
form
action
=
""
method
=
"post"
class
=
"form-control"
> {% csrf_token %}
{# <
div
>#} 分开写
{# {% for ele in book_form %}#}
{# <
div
>{{ ele.name }}{{ ele }}{{ ele.errors }}</
div
>#}
{# {% endfor %}#}
{# </
div
>#}
{{ book_form }}
<
input
type
=
"submit"
value
=
"创建图书"
>
</
form
>
<
script
src
=
"/static/js/jquery-2.2.3.js"
></
script
>
</
body
>
</
html
>
|
Django Admin
django amdin是django提供的一个后台管理页面,改管理页面提供完善的html和css,使得你在通过Model创建完数据库表之后,就可以对数据进行增删改查,而使用django admin 则需要以下步骤:
创建后台管理员
配置url
注册和配置django admin后台管理页面
1、创建后台管理员
|
1
|
python manage.py createsuperuser
|
2、配置后台管理url
|
1
|
url(r
'^admin/'
, include(admin.site.urls))
|
3、注册和配置django admin 后台管理页面
a、在admin中执行如下配置
|
1
2
3
4
5
6
7
8
9
10
11
12
13
14
15
16
17
18
19
20
21
22
23
24
25
|
from
django.contrib
import
admin
# Register your models here.
from
app01
import
models
def
make_forbidden(modelAdmin,request,queryset):
queryset.update(status
=
'forbidden'
)
make_forbidden.short_description
=
'set to forbidden'
class
BookAdmin(admin.ModelAdmin):
#自定制admin
list_display
=
(
'id'
,
'title'
,
'publishers'
,
'publication_date'
,
'colored_status'
)
#搜索
search_fields
=
(
'title'
,
'publishers__name'
)
#publishers__name可以关联到另一个表
#过滤
list_filter
=
(
'publishers'
,
'publication_date'
)
#可编辑
list_editable
=
(
'title'
,
'publishers'
,
'publication_date'
)
#分页
list_per_page
=
10
filter_horizontal
=
(
'authors'
,)
raw_id_fields
=
(
'publishers'
,)
#动作
actions
=
[make_forbidden,]
admin.site.register(models.Author)
admin.site.register(models.Publisher)
admin.site.register(models.Book,BookAdmin)
#将上述类添加到这里
|
b、设置数据表名称
|
1
2
3
4
5
6
7
8
|
#models.py
class
UserType(models.Model):
name
=
models.CharField(max_length
=
50
)
class
Meta:
#修改前端显示名字
verbose_name
=
'用户类型'
verbose_name_plural
=
'用户类型'
|
Admin 定制Action:
|
1
2
3
4
5
6
7
|
from
django.contrib
import
admin
# Register your models here.
from
app01
import
models
def
make_forbidden(modelAdmin,request,queryset):
queryset.update(status
=
'forbidden'
)
make_forbidden.short_description
=
'set to forbidden'
|
其中queryset就是在前端选中的对象,在这个函数中可以对这个对象做操作。
|
1
2
3
|
class
BookAdmin(admin.ModelAdmin):
actions
=
[make_forbidden,]
admin.site.register(models.Book,BookAdmin)
#将上述类添加到这里
|
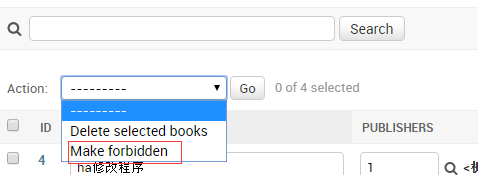
在类中添加action动作后就可以在前端找到set to forbidden动作,就可以将状态变成forbidden
将前端显示的状态加一个样式:
models中加入:
|
1
2
3
4
5
6
7
8
9
10
11
12
13
14
15
16
17
18
19
20
21
22
23
24
25
|
from
django.utils.html
import
format_html
class
Book(models.Model):
title
=
models.CharField(max_length
=
100
)
authors
=
models.ManyToManyField(Author)
publishers
=
models.ForeignKey(Publisher)
publication_date
=
models.DateField()
status_choices
=
((
'published'
,u
'已出版'
),
(
'producing'
,u
'待出版'
),
(
'forbidden'
,u
'禁书'
),
)
status
=
models.CharField(choices
=
status_choices,max_length
=
32
,default
=
'producing'
)
def
__str__(
self
):
return
'<%s>'
%
(
self
.title)
#给前端添加样式
def
colored_status(
self
):
if
self
.status
=
=
"published"
:
format_td
=
format_html(
'<span style="padding:2px;background-color:yellowgreen;color:white">已出版</span>'
)
elif
self
.status
=
=
"producing"
:
format_td
=
format_html(
'<span style="padding:2px;background-color:pink;color:white">待出版</span>'
)
elif
self
.status
=
=
"forbidden"
:
format_td
=
format_html(
'<span style="padding:2px;background-color:orange;color:white">禁书</span>'
)
return
format_td
#将前端显示的名字变成status
colored_status.short_description
=
'status'
|
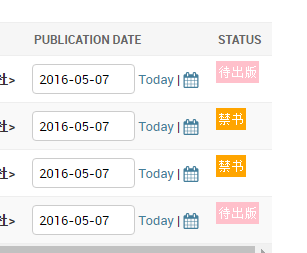
在admin中添加一个status的字段:

前端显示效果如下:
常用ORM操作
一、一对多操作
models.py文件:
|
1
2
3
4
5
6
7
8
9
10
11
12
13
14
15
16
17
18
|
from
django.db
import
models
# Create your models here.
class
UserType(models.Model):
caption
=
models.CharField(max_length
=
64
)
def
__str__(
self
):
return
self
.caption
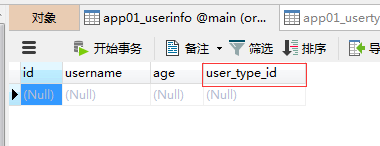
class
UserInfo(models.Model):
user_type
=
models.ForeignKey(UserType)
username
=
models.CharField(max_length
=
64
)
age
=
models.IntegerField()
def
__str__(
self
):
return
self
.username
|
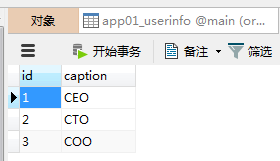
增加操作:
view中对user_type添加三条数据
|
1
2
3
4
5
6
7
8
9
10
11
12
|
from
django.shortcuts
import
render,HttpResponse
from
app01
import
models
# Create your views here.
def
user_type(request):
dic
=
{
'caption'
:
'COO'
}
models.UserType.objects.create(
*
*
dic)
return
HttpResponse(
'ok'
)
def
user_info(request):
return
HttpResponse(
'ok'
)
|
数据库中是外键的字段的字段名称是这样的:xxx_id
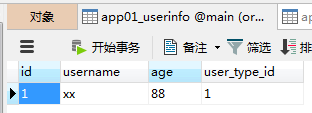
所以添加user_info的数据方式一如下:
|
1
2
3
4
|
def
user_info(request):
dic
=
{
'username'
:
'xx'
,
'age'
:
'88'
,
'user_type_id'
:
'1'
}
models.UserInfo.objects.create(
*
*
dic)
return
HttpResponse(
'ok'
)
|
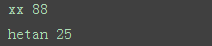
方式二,通过对象添加:
|
1
2
3
4
5
|
dic
=
{
'username'
:
'hetan'
,
'age'
:
'25'
,
'user_type'
:models.UserType.objects.get(
id
=
1
)}
models.UserInfo.objects.create(
*
*
dic)
result
=
models.UserInfo.objects.
all
()
for
item
in
result:
print
(item.username,item.age,item.user_type.caption)
|
其中item.user_type就代指了user_type表的对象,在通过.就可以调用caption属性了
其效果为

删除和修改同增加
查询操作:
正向查询:ForeignKey在哪个表中通过这个表查询两个表的关联数据就是正向查询
反向查询:和正向相反,通过没有ForeignKey那个表查询就是反向查询
实例1,需求:UserType为CEO的所有数据
通过UserInfo正向查询:
|
1
2
3
|
result
=
models.UserInfo.objects.
filter
(user_type__caption
=
'CEO'
)
for
item
in
result:
print
(item.username,item.age)
|
django的orm中的跨表查询要用到双下划线,例如上述代码中的user_type__caption,caption是另一张usertype表中的字段,从userinfo中
跨到usertype表中所以要写成user_type__caption。
通过UserType反向查询:
|
1
2
|
line
=
models.UserType.objects.get(
id
=
1
)
print
(line.userinfo_set.
all
())
|

反向查询对象会有一个方法为另一张表名_set,这个方法就可以查询到另一张表的对象
还可以像这样:
|
1
2
|
line
=
models.UserType.objects.get(
id
=
1
)
print
(line.userinfo_set.
filter
(username
=
'hetan'
))
|

可以这样理解:
line.userinfo_set = model.UserInfo.objects.filter(user_type=line)
|
1
2
|
line
=
models.UserType.objects.get(userinfo__username
=
'hetan'
)
print
(line.userinfo_set.
all
().count())
|

二、多对多操作
表结构如下
|
1
2
3
4
5
6
7
8
9
10
11
12
13
14
|
class
Host(models.Model):
hostname
=
models.CharField(max_length
=
64
)
port
=
models.IntegerField()
def
__str__(
self
):
return
self
.hostname
class
HostAdmin(models.Model):
username
=
models.CharField(max_length
=
32
)
email
=
models.CharField(max_length
=
32
)
host
=
models.ManyToManyField(Host)
def
__str__(
self
):
return
self
.username
|
正向添加
|
1
2
3
4
5
6
7
8
|
models.Host.objects.create(hostname
=
'c1'
,port
=
80
)
models.Host.objects.create(hostname
=
'c2'
,port
=
80
)
models.Host.objects.create(hostname
=
'c3'
,port
=
80
)
models.HostAdmin.objects.create(username
=
'root'
,email
=
'1@163.com'
)
models.HostAdmin.objects.create(username
=
'mysql'
,email
=
'1@163.com'
)
models.HostAdmin.objects.create(username
=
'nginx'
,email
=
'1@163.com'
)
models.HostAdmin.objects.create(username
=
'ssh'
,email
=
'1@163.com'
)
|
|
1
2
3
|
admin_obj
=
models.HostAdmin.objects.get(username
=
'root'
)
host_list
=
models.Host.objects.filter(id__lt
=
3
)
admin_obj.host.
add
(
*
host_list)
|
反向添加
|
1
2
3
|
host_obj
=
models.Host.objects.get(
id
=
3
)
admin_list
=
models.HostAdmin.objects.
filter
(id__gt
=
1
)
host_obj.hostadmin_set.add(
*
admin_list)
|
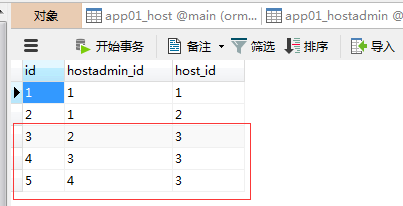
自定义第三张表
表结构
|
1
2
3
4
5
6
7
8
9
10
11
12
13
14
15
16
17
|
class
Host1(models.Model):
hostname
=
models.CharField(max_length
=
64
)
port
=
models.IntegerField()
def
__str__(
self
):
return
self
.hostname
class
HostAdmin1(models.Model):
username
=
models.CharField(max_length
=
32
)
email
=
models.CharField(max_length
=
32
)
host
=
models.ManyToManyField(Host,through
=
'HostRelation'
)
def
__str__(
self
):
return
self
.username
class
HostRelation(models.Model):
c1
=
models.ForeignKey(Host1)
c2
=
models.ForeignKey(HostAdmin1)
|
through='HostRelation'表示要自己定义第三张表,并且可以自定义添加字段
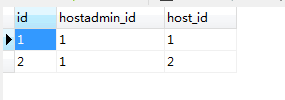
|
1
2
3
4
|
models.HostRelation.objects.create(
c1_id
=
2
,
c2_id
=
1
)
|
正向查询
|
1
2
|
admin_obj
=
models.HostAdmin.objects.get(
id
=
1
)
print
(admin_obj.host.
all
())
|
反向查询
|
1
2
|
host_obj
=
models.Host.objects.get(
id
=
1
)
host_obj.hostadmin_set.
all
()
|
自定义方式查询
|
1
2
3
4
|
realtion_list
=
models.HostRelation.objects.
all
()
for
item
in
realtion_list:
print
(item.c1.hostname)
print
(item.c2.username)
|
三、select_related
用于优化查询,一次将Forigkey全部加载到内存
四、F
需求:tb表中的age字段自加1
|
1
2
3
|
from
django.db.models
import
F
models.tb.objects.
all
.update(age
=
F(
'age'
)
+
1
)
sql语句 update tb
set
age
=
age
+
1
;
|
五、Q
作用:条件查询
from django.db.models import Q
Q是可以嵌套的
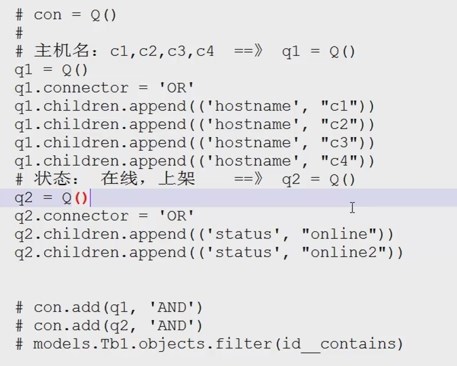
其中 hostname这个地方可以跨表操作或__gt/__contins等,和filter中的操作是一样的。
 这里应该是con
|
1
|
models.Tb1.objects.
filter
(con)
|


 4万+
4万+

 被折叠的 条评论
为什么被折叠?
被折叠的 条评论
为什么被折叠?
 到【灌水乐园】发言


