


 本文详细介绍如何使用注解配置Spring MVC,包括web.xml配置、控制器编写、spring配置文件设置及视图解析器配置等关键步骤,并通过示例演示整个过程。
之前一篇文章讲的的是基于xml配置spring mvc,这种方式基本被遗弃,现在主流都是使用基于注解配置的。
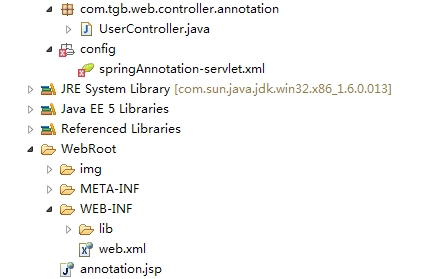
1.先看看文件目录结构
2.配置web.xml
 1 <?xml version="1.0" encoding="UTF-8"?>
 2 <web-app version="2.5"
 3     xmlns="http://java.sun.com/xml/ns/javaee"
 4     xmlns:xsi="http://www.w3.org/2001/XMLSchema-instance"
 5     xsi:schemaLocation="http://java.sun.com/xml/ns/javaee
 6     http://java.sun.com/xml/ns/javaee/web-app_2_5.xsd">
 7   <welcome-file-list>
 8     <welcome-file>index.jsp</welcome-file>
 9   </welcome-file-list>
10   <!--springmvc 入口配置 start -->
11 <servlet>
12
13           <servlet-name>springMVC</servlet-name>
14
15           <servlet-class>org.springframework.web.servlet.DispatcherServlet</servlet-class>
16                 <init-param>
17                     <param-name>contextConfigLocation</param-name>
18                     <param-value>classpath*:config/springAnnotation-servlet.xml</param-value>
19                 </init-param>
20           <load-on-startup>1</load-on-startup>
21
22       </servlet>
23
24       <servlet-mapping>
25
26           <servlet-name>springMVC</servlet-name>
27
28           <url-pattern>/</url-pattern>
29
30       </servlet-mapping>
31 </web-app>
3.编写控制器.
 1 package com.tgb.web.controller.annotation;
 2
 3 import org.springframework.stereotype.Controller;
 4 import org.springframework.web.bind.annotation.RequestMapping;
 5 import org.springframework.web.bind.annotation.RequestMethod;
 6 import org.springframework.web.servlet.ModelAndView;
 7
 8 @Controller
 9 @RequestMapping("/user")
10 public class UserController {
11
12         @RequestMapping(value="/addUser",method=RequestMethod.GET)
13         public ModelAndView addUser(){
14             String result="addUser";
15             return new ModelAndView("/annotation","result",result);
16         }
17
18         @RequestMapping(value="/delUser",method=RequestMethod.GET)
19         public ModelAndView delUser(){
20             String result="delUser";
21             return new ModelAndView("/annotation","result",result);
22         }
23 }
4.配置springAnnotaion-servlet-xml
 1 <?xml version="1.0" encoding="UTF-8"?>
 2  <beans xmlns="http://www.springframework.org/schema/beans"
 3          xmlns:context="http://www.springframework.org/schema/context"
 4         xmlns:xsi="http://www.w3.org/2001/XMLSchema-instance"
 5         xmlns:mvc="http://www.springframework.org/schema/mvc"
 6         xsi:schemaLocation="http://www.springframework.org/schema/mvc
 7         http://www.springframework.org/schema/mvc/spring-mvc-3.0.xsd
 8         http://www.springframework.org/schema/context
 9         http://www.springframework.org/schema/context/spring-context.xsd
10         http://www.springframework.org/schema/beans
11         http://www.springframework.org/schema/beans/spring-beans-3.0.xsd">
12
13      <!-- 配置扫描包,spring启动的时候会在这个包里面扫描 -->
14      <context:component-scan base-package="com.tgb.web.controller.annotation"></context:component-scan>
15      <!-- 开启注解 -->
16      <mvc:annotation-driven/>
17      <!--
18      <bean class="org.springframework.web.servlet.mvc.annotation.AnnotationMethodHandlerAdapter"/>
19      <bean class="org.springframework.web.servlet.mvc.annotation.DefaultAnnotationHandlerMapping"/>
20      -->
21
22      <bean id="viewResolver" class="org.springframework.web.servlet.view.InternalResourceViewResolver">
23             <property name="prefix" value="/"/>
24             <property name="suffix" value=".jsp"/>
25         </bean>
26     <!-- 静态资源访问 -->
27
28      <mvc:resources location="/img/" mapping="/img/**"/>
29      <mvc:resources location="/js/"  mapping="/js/**"/>
30      <mvc:resources location="/css/" mapping="/css/**"/>
31
32  </beans>
5.配置annotation.jsp
<%@ page language="java" import="java.util.*" pageEncoding="ISO-8859-1"%>
<%
String path = request.getContextPath();
String basePath = request.getScheme()+"://"+request.getServerName()+":"+request.getServerPort()+path+"/";
%>

<!DOCTYPE HTML PUBLIC "-//W3C//DTD HTML 4.01 Transitional//EN">
<html>
  <head>
    <base href="<%=basePath%>">

    <title>My JSP 'annotation.jsp' starting page</title>

    <meta http-equiv="pragma" content="no-cache">
    <meta http-equiv="cache-control" content="no-cache">
    <meta http-equiv="expires" content="0">
    <meta http-equiv="keywords" content="keyword1,keyword2,keyword3">
    <meta http-equiv="description" content="This is my page">
    <!--
    <link rel="stylesheet" type="text/css" href="styles.css">
    -->

  </head>

  <body>
    ${result}
  </body>
</html>
6.访问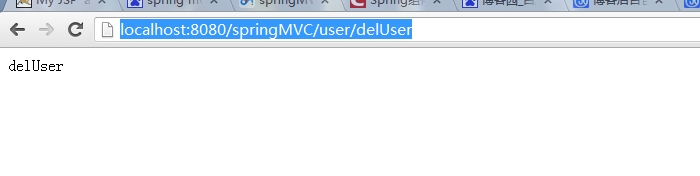
配置成功。


 被折叠的 条评论
为什么被折叠?
被折叠的 条评论
为什么被折叠?
 到【灌水乐园】发言


