1、查看服务器环境
uname -a

2、下载安装包
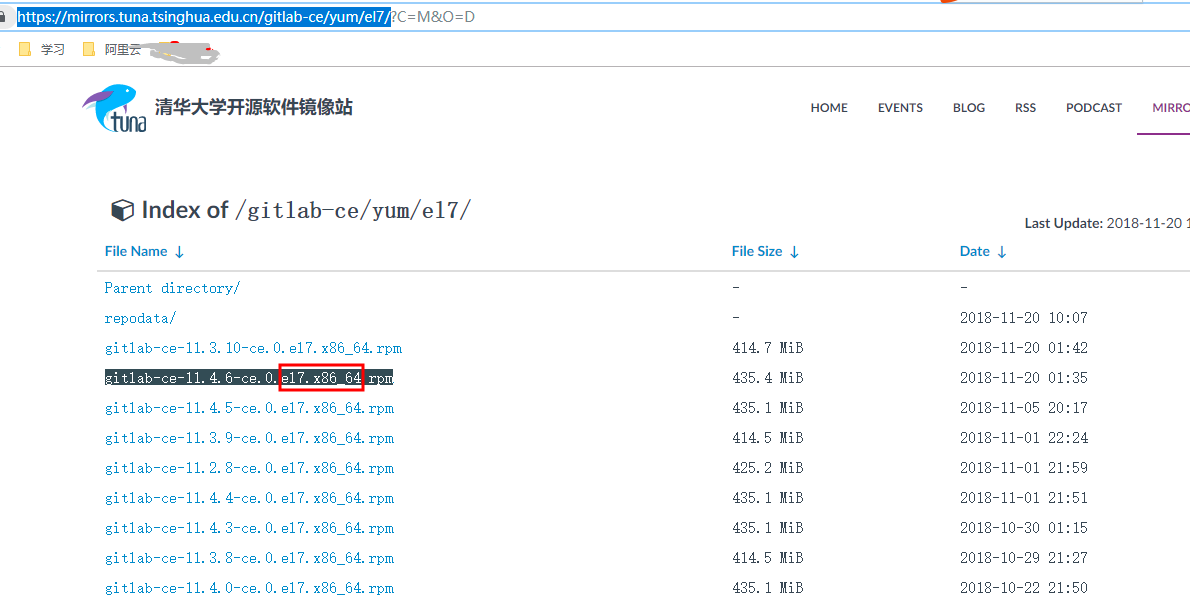
【1】找到相应的最新版本的下载路径
网址:https://mirrors.tuna.tsinghua.edu.cn/gitlab-ce/yum/el7/?C=M&O=D

我们得到下载路径:https://mirrors.tuna.tsinghua.edu.cn/gitlab-ce/yum/el7/gitlab-ce-11.4.6-ce.0.el7.x86_64.rpm
【2】准备文件夹
mkdir /home/soft/gitlab
cd /home/soft/gitlab

【3】下载安装包
wget https://mirrors.tuna.tsinghua.edu.cn/gitlab-ce/yum/el7/gitlab-ce-11.4.6-ce.0.el7.x86_64.rpm

3、安装GitLab
【1】安装遇到报错
发现报错:
warning: gitlab-ce-11.4.6-ce.0.el7.x86_64.rpm: Header V4 RSA/SHA1 Signature, key ID f27eab47: NOKEY
error: Failed dependencies:
policycoreutils-python is needed by gitlab-ce-11.4.6-ce.0.el7.x86_64

【2】检查postfix
rpm -qa|grep postfix
ps -e|grep postfix

发现postfix有安装包,如果没有去安装:
yum install postfix
这里有,但是没有启动,那我们就需要去启动
systemctl enable postfix
systemctl start postfix
这里enable成功,但是start 报错:
Job for postfix.service failed. See 'systemctl status postfix.service' and 'journalctl -xn' for deta


【3】解决postfix启动报错
vi /etc/postfix/main.cf


#取消这句的注释
inet_interfaces = all
#这句all改为ipv4
inet_protocols = ipv4

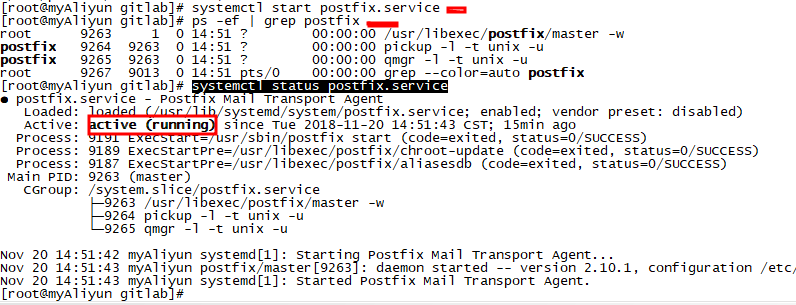
【4】启动postfix
#启动
systemctl start postfix.service
#查看状态
ps -ef | grep postfix
systemctl status postfix.service

【5】安装policycoreutils-python
yum install -y policycoreutils-python
【6】再次安装GitLab
rpm -i gitlab-ce-11.4.6-ce.0.el7.x86_64.rpm

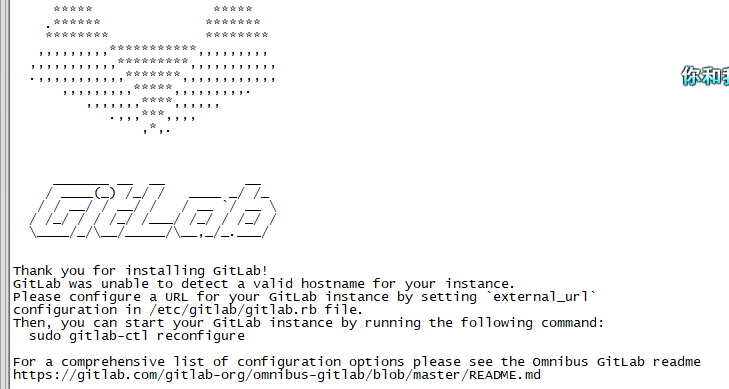
到这里,安装就算完成了。
4、配置GitLab

vim /etc/gitlab/gitlab.rb
修改external_url
执行
gitlab-ctl reconfigure


 本文详细介绍了在服务器上安装GitLab的过程,包括环境检查、下载安装包、解决依赖问题、配置外部URL等关键步骤,适合初次部署GitLab的用户参考。


 953
953

 被折叠的 条评论
为什么被折叠?


