 弱引用与强引用宏详解


前言
相信大部分见过 @weakify 和 @strongify 的开发者都会喜欢上这两个宏。但是很多人只知道它的强大威力,却没有意识到在特定环境下的危险性。
本文将通过代码测试的方式告诉读者,如何正确地使用这两个的宏。
@weakify 和 @strongify
本文意在说明其危险性,所以不会全面的讲解这两个宏。
如果您对其该兴趣,请参考其它作者的文章或者自行查看源码。
这两个宏的定义如下:
EXTScope.h
#define weakify(...) \
rac_keywordify \
metamacro_foreach_cxt(rac_weakify_,, __weak, __VA_ARGS__)
EXTScope.h
#define strongify(...) \
rac_keywordify \
_Pragma("clang diagnostic push") \
_Pragma("clang diagnostic ignored \"-Wshadow\"") \
metamacro_foreach(rac_strongify_,, __VA_ARGS__) \
_Pragma("clang diagnostic pop")
其中 rac_keywordify 的定义如下:
EXTScope.h
#if DEBUG
#define rac_keywordify autoreleasepool {}
#else
#define rac_keywordify try {} <a href='http://www.jobbole.com/members/wx895846013'>@catch</a> (...) {}
#endif
测试
下面是官方提供了一个示例代码。
示例代码中定义了一个 block,该 block 用于判断入参 obj 是否和 foo、far 其中的任何一个对象相等并返回 YES 或 NO 。
id foo = [[NSObject alloc] init];
id bar = [[NSObject alloc] init];
@weakify(foo, bar);
// this block will not keep 'foo' or 'bar' alive
BOOL (^matchesFooOrBar)(id) = ^ BOOL (id obj){
// but now, upon entry, 'foo' and 'bar' will stay alive until the block has
// finished executing
@strongify(foo, bar);
return [foo isEqual:obj] || [bar isEqual:obj];
};
测试代码一
为了方便测试,这里重写了
rac_keywordify的定义。
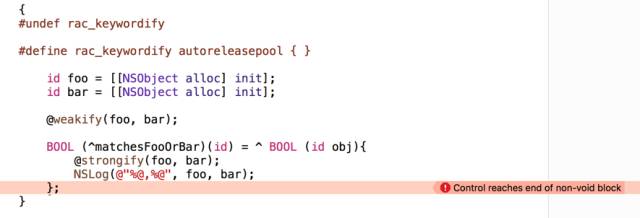
{
#undef rac_keywordify
#define rac_keywordify autoreleasepool { }
id foo = [[NSObject alloc] init];
id bar = [[NSObject alloc] init];
@weakify(foo, bar);
BOOL (^matchesFooOrBar)(id) = ^ BOOL (id obj){
@strongify(foo, bar);
NSLog(@"%@,%@", foo, bar);
};
}
相信眼尖的读者一眼就能看出与上面代码的不同。
block缺少返回值
下面是 Xcode 的截图。Xcode 产生一个 Control reaches end of non-void block 的❗️错误提示。
错误提示.png
测试代码二
为了方便测试,这里重写了 rac_keywordify 的定义。
{
#undef rac_keywordify
#define rac_keywordify try { } @catch(...) {}
id foo = [[NSObject alloc] init];
id bar = [[NSObject alloc] init];
@weakify(foo, bar);
BOOL (^matchesFooOrBar)(id) = ^ BOOL (id obj){
@strongify(foo, bar);
NSLog(@"%@,%@", foo, bar);
};
}
这份代码除了将 #define rac_keywordify autoreleasepool { } 修改为 #define rac_keywordify try { } @catch(...) {}以外,与上面的代码并没有不同。
理想的情况当然时,Xcode 依然有❗️错误提示。但是,现实往往是残酷的,Xcode 只提供了一个未使用变量的⚠️。

无错误提示.png
由上图可知,Xcode 丢失了错误提示的能力。
问题分析
在 Release 模式下,rac_keywordify 被定义为 #define rac_keywordify try { } @catch(...) {},经预处理器处理后,会转换为下面的代码
id foo = [[NSObject alloc] init];
id bar = [[NSObject alloc] init];
<a href='http://www.jobbole.com/members/xyz937134366'>@try</a> { } @catch(...) {} __attribute__((objc_ownership(weak))) __typeof__(foo) foo_weak_ = (foo); __attribute__((objc_ownership(weak))) __typeof__(bar) bar_weak_ = (bar);;
BOOL (^matchesFooOrBar)(id) = ^ BOOL (id obj){
<a href='http://www.jobbole.com/members/xyz937134366'>@try</a> { } @catch(...) {}
# 99 "/Users/L/Documents/workspace/.../AppDelegate.m"
#pragma clang diagnostic push
# 99 "/Users/L/Documents/workspace/.../AppDelegate.m"
#pragma clang diagnostic ignored "-Wshadow"
# 99 "/Users/L/Documents/workspace/.../AppDelegate.m"
__attribute__((objc_ownership(strong))) __typeof__(foo) foo = foo_weak_; __attribute__((objc_ownership(strong))) __typeof__(bar) bar = bar_weak_;
# 99 "/Users/L/Documents/workspace/.../AppDelegate.m"
#pragma clang diagnostic pop
# 99 "/Users/L/Documents/workspace/.../AppDelegate.m"
;
NSLog(@"%@,%@", foo, bar);
};
@try { } @catch(...) {}被添加到了等式的前面。
在这种情况下,Xcode 本身的错误提示能力能被抑制了,就如同源码的注释中提到的那样。
// Details about the choice of backing keyword:
//
// The use of @try/@catch/@finally can cause the compiler to suppress
// return-type warnings.
// The use of @autoreleasepool {} is not optimized away by the compiler,
// resulting in superfluous creation of autorelease pools.
//
// Since neither option is perfect, and with no other alternatives, the
// compromise is to use @autorelease in DEBUG builds to maintain compiler
// analysis, and to use @try/@catch otherwise to avoid insertion of unnecessary
// autorelease pools.
#if DEBUG
#define rac_keywordify autoreleasepool {}
#else
#define rac_keywordify try {} <a href='http://www.jobbole.com/members/wx895846013'>@catch</a> (...) {}
#endif
很多人都研究过这部分代码,但是大部分的人都得出类似于这样的结论。
这段宏定义中的代码开头都少了个@,使得weakify、strongify前面必须加上@,当然也只有这作用。 然后这里为什么要判断DEBUG呢?我也不知道,我觉得这里没必要这样判断。
判断DEBUG的作用在于,正常的开发模式都是在DEBUG模式下面进行的。这样可以保留 Xcode 提示错误的能力。
结论
请读者回想一下,你是否可以快速的判断出自己是否在 DEBUG模式下开发?如果回答是NO,请谨慎使用 @weakify 和 @strongify。
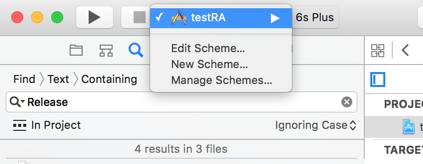
修改开发模式
点击项目名称,在弹出框中,点击 Edit Scheme...
Paste_Image.png
在模态视图中,点击 Build Configuration 单选框
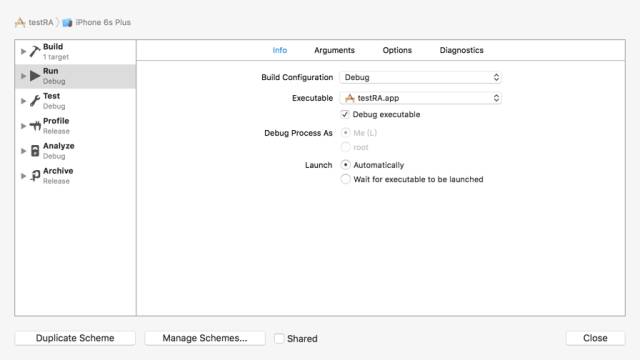
Paste_Image.png


 2375
2375

 被折叠的 条评论
为什么被折叠?
被折叠的 条评论
为什么被折叠?
 到【灌水乐园】发言


