


UIRect,一个继承 MonoBehaviour 的抽象类,主要实现了锚点功能。
2.1 UIRect 简单介绍
    /// UIRect.cs
    /// <summary>
    /// Helper function that returns the distance to the camera's directional vector hitting the panel's plane.
    /// </summary>

    protected float cameraRayDistance
    {
        get
        {
            if (anchorCamera == null) return 0f;

#if UNITY_4_3 || UNITY_4_5 || UNITY_4_6 || UNITY_4_7
            if (!mCam.isOrthoGraphic)
#else
            if (!mCam.orthographic)
#endif
            {
                Transform t = cachedTransform;
                Transform ct = mCam.transform;
                Plane p = new Plane(t.rotation * Vector3.back, t.position);
                Ray ray = new Ray(ct.position, ct.rotation * Vector3.forward);
                float dist;
                if (p.Raycast(ray, out dist)) return dist;
            }
            return Mathf.Lerp(mCam.nearClipPlane, mCam.farClipPlane, 0.5f);
        }
    }
代码一,cameraRayDistance属性
创建一个和自己平行的面,我们只需要一条法线和一个点。点比较容易,自己的位置就行了,那么为什么 t.rotation * Vector3.back 就是自己的法线呢?其实对于 NGUI 来说 Vector3.back 或者 Vector3.forward 就是默认情况下面板的法线(面板没有做任何的旋转操作),如果面板经历过一系列旋转操作,只需要让 Vector3.back 或者 Vector3.forward 经历同样的旋转操作就能获取到此时自己的法线向量(t.rotation * Vector3.back就是这个意思)。
代码二展示了计算上下左右四个边位置的锚点值的一个相对比较复杂的情况,代码有点多,原理还是比较简单的,就是先计算出上下左右四个边的世界坐标,再转换成相对参照物 relativeTo 的局部坐标。
    /// NGUITools.cs
    /// <summary>
    /// Get sides relative to the specified camera. The order is left, top, right, bottom.
    /// </summary>

    static public Vector3[] GetSides (this Camera cam, float depth, Transform relativeTo)
    {
#if UNITY_4_3 || UNITY_4_5 || UNITY_4_6 || UNITY_4_7
        if (cam.isOrthoGraphic)
#else
        if (cam.orthographic)
#endif
        {
            float os = cam.orthographicSize;
            //摄像机可视区域左边位置
            float x0 = -os;
            //摄像机可视区域右边位置
            float x1 = os;
            //摄像机可视区域顶部位置
            float y0 = -os;
            //摄像机可视区域底部位置
            float y1 = os;

            Rect rect = cam.rect;
            Vector2 size = screenSize;

            float aspect = size.x / size.y;
            aspect *= rect.width / rect.height;
            //通过设备真实分辨率和摄像机视口区域大小来矫正摄像机可视区域左边和右边的位置
            x0 *= aspect;
            x1 *= aspect;

            // We want to ignore the scale, as scale doesn't affect the camera's view region in Unity
            Transform t = cam.transform;
            Quaternion rot = t.rotation;
            Vector3 pos = t.position;

            int w = Mathf.RoundToInt(size.x);
            int h = Mathf.RoundToInt(size.y);

            if ((w & 1) == 1) pos.x -= 1f / size.x;
            if ((h & 1) == 1) pos.y += 1f / size.y;

            //计算上下左右四个边的世界坐标
            mSides[0] = rot * (new Vector3(x0, 0f, depth)) + pos;
            mSides[1] = rot * (new Vector3(0f, y1, depth)) + pos;
            mSides[2] = rot * (new Vector3(x1, 0f, depth)) + pos;
            mSides[3] = rot * (new Vector3(0f, y0, depth)) + pos;
        }
        else
        {
            //暂时不研究这段代码
            mSides[0] = cam.ViewportToWorldPoint(new Vector3(0f, 0.5f, depth));
            mSides[1] = cam.ViewportToWorldPoint(new Vector3(0.5f, 1f, depth));
            mSides[2] = cam.ViewportToWorldPoint(new Vector3(1f, 0.5f, depth));
            mSides[3] = cam.ViewportToWorldPoint(new Vector3(0.5f, 0f, depth));
        }

        //有参照物的话,计算上下左右四个边相对参照物的的局部坐标
        if (relativeTo != null)
        {
            for (int i = 0; i < 4; ++i)
                mSides[i] = relativeTo.InverseTransformPoint(mSides[i]);
        }
        return mSides;
    }
代码二,获取锚点上下左右四个边的具体位置
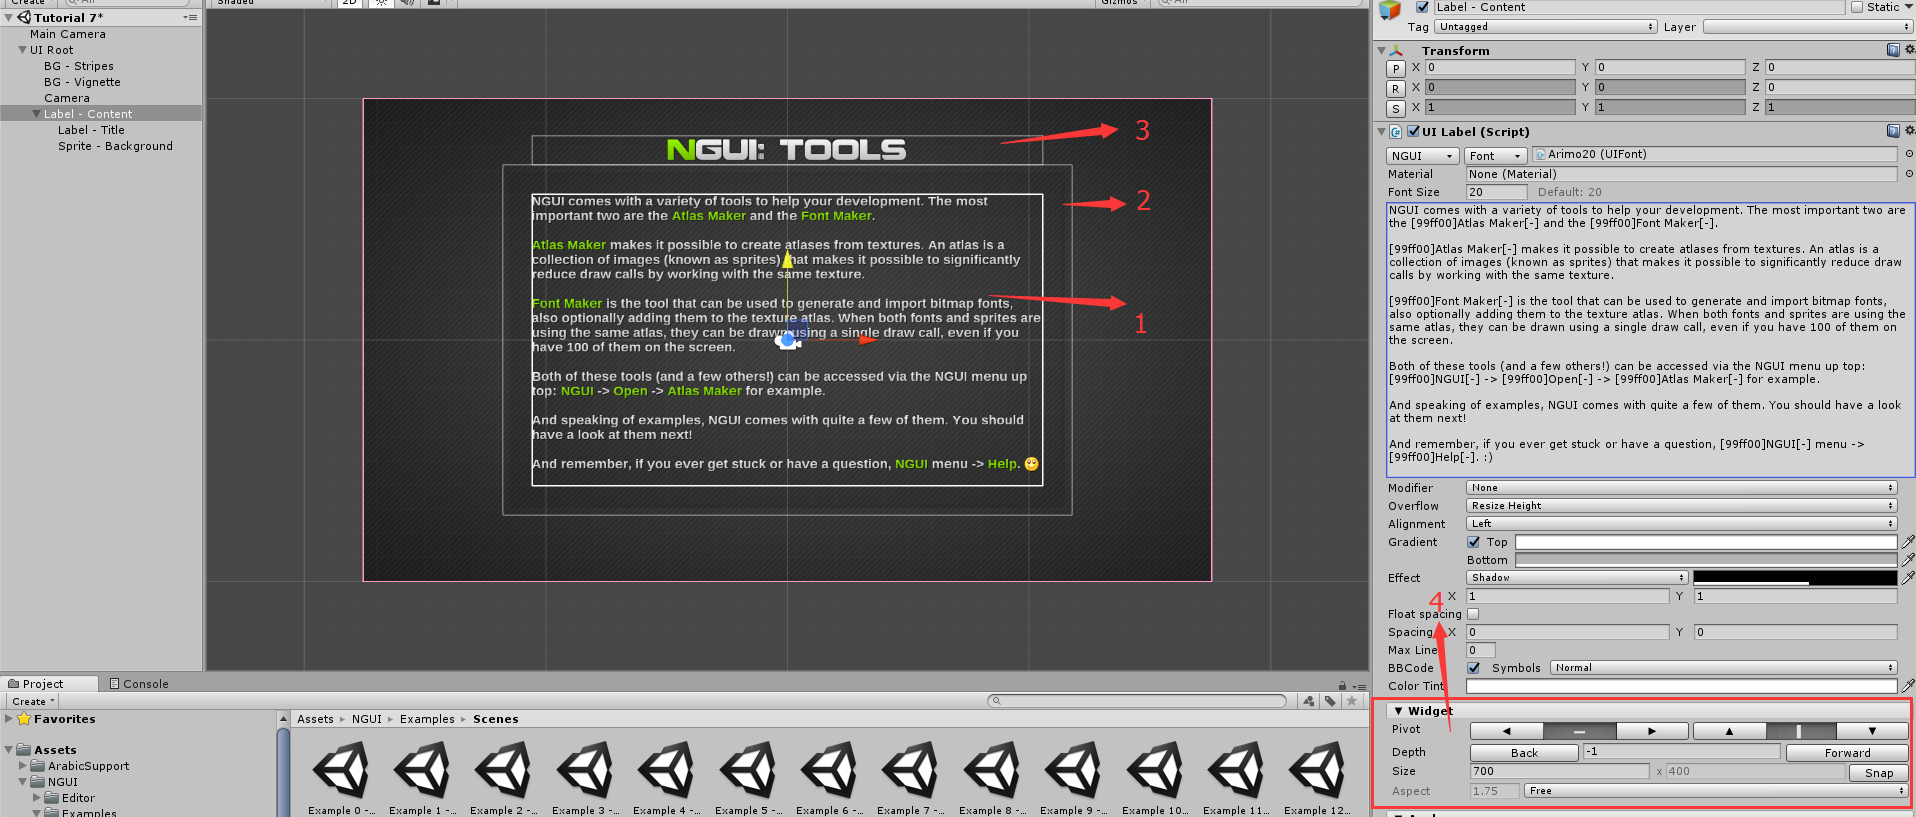
图一,NGUI 官方示例 Tutorial 7
图二展示了 Label - Title 的组件设置,Widget 栏有对齐方式,高度宽度信息,Anchors 栏有锚点信息,NGUI 的锚点是设置节点上下左右四个边相对于父节点的位置,譬如 Label - Title 就设置了它的底边距离 Label - Content 的顶边 40px,它的顶边距离 Label - Content 的顶边 80px(40px + 自己的高度),若是 Label - Content 的内容变化导致了高度变化, 自动向上下两边放缩,Label - Content 顶部位置产生变化,Label - Title 也就跟着调整自己的位置了。
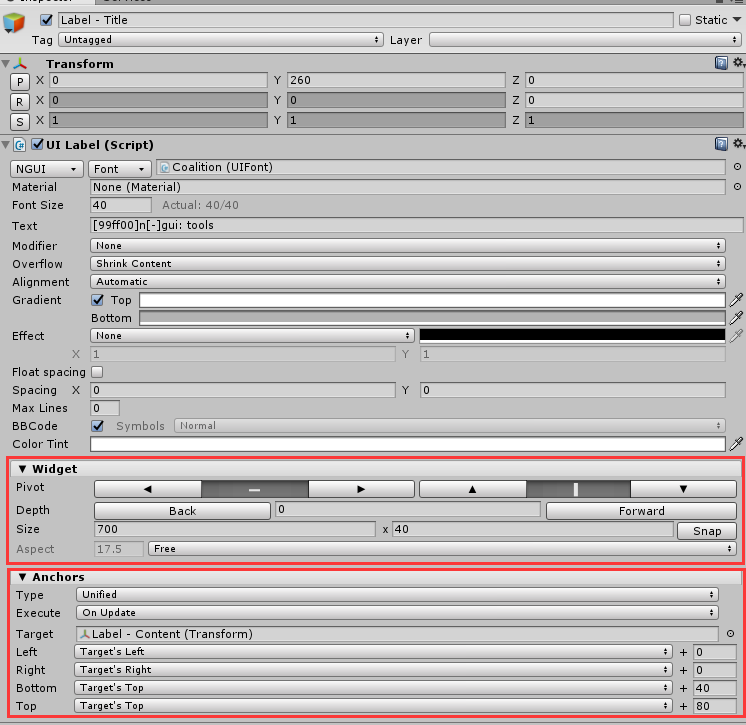
图二,Label - Title 组件设置
图二展示了 Sprite - Background 的组件设置,可以看出它设置了自己的上下左右四个边分别距离 Label - Title 上下左右四个边 40px。
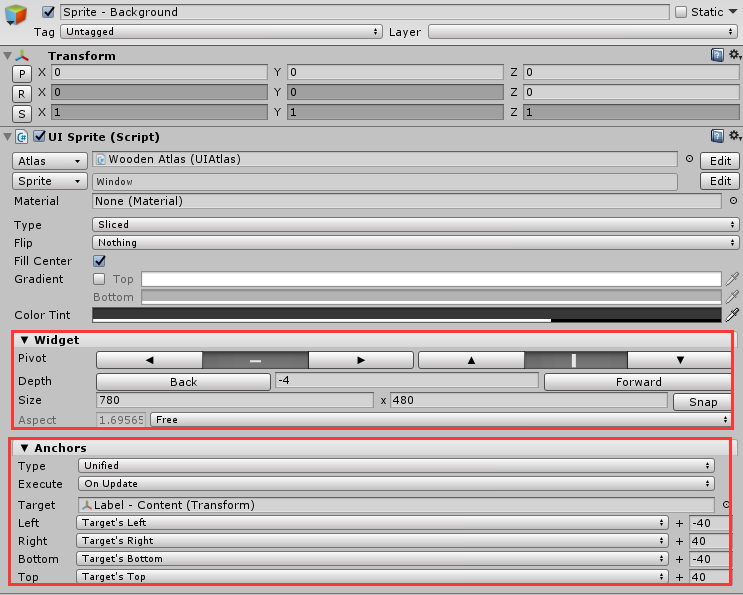
图三,Sprite - Background的组件设置
其实我一度认为锚点只是一个点而已,按照对齐方式它可以是中心点,左侧中点,左上角等等,设置也只是设置它相对父节点的局部位置。当然我也认为 NGUI 的锚点写的有些繁杂,不过 NGUI 这样实现自然有它的理由(不然也没法实现上面说的类似功能了),我们就不谈优点了,来谈下这样实现有什么问题,其实是有一个不可避免的小问题的,那就是锚点设置的是节点四个边的位置,它们的值会与节点高度值和宽度值互相影响,虽然这是实现自适应必须的,却也不是所有情况都需要。譬如 Label - Title,如果我设置它的底部距离 Label - Content 的顶部 40px,它的顶部距离 Label - Content 的顶部 70px,这样 Label - Title 的高度就自动变成 30px;如果我直接修改了 Label - Title 的高度为 50px,对齐方式是居中对齐,那么它会向上下两边各延伸 5px,那么它的底部距离 Label - Content 的顶部就自动变成了 35px,它的顶部距离 Label - Content 的顶部就自动变成了 85px。


 796
796

 被折叠的 条评论
为什么被折叠?
被折叠的 条评论
为什么被折叠?
 到【灌水乐园】发言


