


 本文介绍了如何在Window环境下使用批处理文件(.bat)来启动MySQL服务,并导入数据文件(.sql),包括创建数据库、用户权限设置及表创建等关键步骤。
在window下,通过批处理文件(.bat),进行开启MYSQL服务,导入数据文件(.sql)
1)新建一个txt文件,写入以下内容
rem 启动mysql56服务 mysql56是我的mysql服务名称 若该服务已启动,则下面2行代码可省略
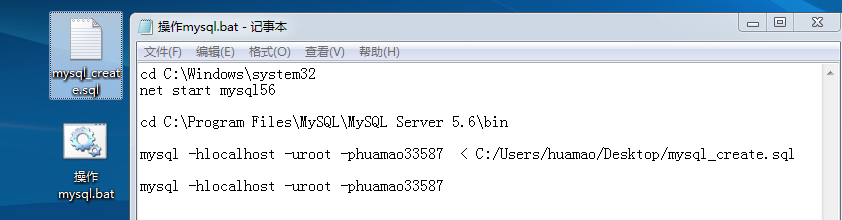
cd C:\Windows\system32
net start mysql56
rem 进入安装目录的路径下 C:\Program Files\MySQL\MySQL Server 5.6\bin 执行以下代码 数据库文件mysql_create.sql 位置在 C:/Users/huamao/Desktop
cd C:\Program Files\MySQL\MySQL Server 5.6\bin
mysql -hlocalhost -uroot -phuamao33587 < C:/Users/huamao/Desktop/mysql_create.sql
mysql -hlocalhost -uroot -phuamao33587
2)另存为后缀名为 .bat 的文件 点击即可自动执行
顺便附上我的mysql_create.sql中的内容,(mysql_create.sql也是由.txt 另存为.sql生成的)
--创建用户密码并授权,最后建了2张表
create database pumberrinfo;
create user wuyun11 identified by '123456';
grant all privileges on pumberrinfo6.* to wuyun11 identified by '123456';
flush privileges;
use pumberrinfo;
create table hisRunInfo
(NumID bigint not null auto_increment primary key,
IP varchar(15),
CANID int unsigned not null,
MType char(4),
OperMode char(6),
OperState char(6),
Out1_Mode char(6),
Out1_State char(6),
Out2_Mode char(6),
Out2_State char(6),
Out3_Mode char(6),
Out3_State char(6),
Freq_IValue float unsigned,
QFlow float(13,2) unsigned,
Accum float(13,2) unsigned,
Total double (20,2)unsigned,
Time char(20)
)default charset=utf8 auto_increment=1;
create table errinfo
(NumID bigint not null auto_increment primary key,
IP varchar(15),
CANID int unsigned not null,
errType char(15) not null,
errRank char(4),
errTime char(20),
errDescribe varchar(30) default "null")default charset=utf8 auto_increment=1;


 562
562

 被折叠的 条评论
为什么被折叠?
被折叠的 条评论
为什么被折叠?
 到【灌水乐园】发言


