


在我们开发小程序的时候,都是利用微信开发者工具来开发(这是一句废话,凑字数用的).
因此,一般我们创建好项目,默认为下图:
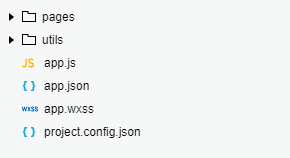
至于每个文件夹和文件的功能我就不废话了,相信大家看看文档都知道...(下面是文档传送地址)
https://mp.weixin.qq.com/debug/wxadoc/dev/api/
现在我就讲讲我的小程序实战开发中文件夹存放那些内容:
utils
这个文件夹我会存放一些比如qrCode.js,sha1.js,utils.js...
具体功能:
- qrCode是做啥的,相信大家都很熟悉,是做二维码用的,不过小程序有规定,所以慎用...
- sha1.js应该也有很多人知道,其实就是一种加密算法,详情百度,这个还算是很安全的...
- utils.js我会在里面封装自己的请求方式,和一些给后台传输数据的方法,类似于诸葛追踪插件(但是我写的很粗糙,勿喷)
utils.js具体代码如下:
const formatDay = date => {
    const year = date.getFullYear()
    const month = date.getMonth() + 1
    const day = date.getDate()

    return [year, month, day].map(formatNumber).join('-')
}
const formatNumber = n => {
    n = n.toString()
    return n[1] ? n : '0' + n
}
const formatTime = date => {
    const year = date.getFullYear()
    const month = date.getMonth() + 1
    const day = date.getDate()
    const hour = date.getHours()
    const minute = date.getMinutes()
    const second = date.getSeconds()

    return [year, month, day].map(formatNumber).join('/') + ' ' + [hour, minute, second].map(formatNumber).join(':')
}
/**
 * url 请求地址
 * success 成功的回调
 * fail 失败的回调
 */
function _get(url, success, fail) {
    wx.request({
        url: url,
        header: {
            // 'Content-Type': 'application/json'
        },
        success: function (res) {
            success(res);
        },
        fail: function (res) {
            fail(res);
        }
    });
}

/**
 * url 请求地址
 * success 成功的回调
 * fail 失败的回调
 */
function _post_from(url, data, success, fail) {
    wx.request({
        url: url,
        header: {
            'content-type': 'application/x-www-form-urlencoded',
        },
        method: 'POST',
        data: data,
        success: function (res) {
            success(res);
        },
        fail: function (res) {
            fail(res);
        }
    });
}

/**
 * url 请求地址
 * success 成功的回调
 * fail 失败的回调
 */
function _post_json(url, data, success, fail) {
    wx.request({
        url: url,
        header: {
            'content-type': 'application/json',
        },
        method: 'POST',
        data: data,
        success: function (res) {
            success(res);
        },
        fail: function (res) {
            fail(res);
        }
    });
}

function _post_urlencoded(url, data, success, fail) {
    wx.request({
        url: url,
        header: {
            'content-type': 'application/x-www-form-urlencoded',
        },
        method: 'POST',
        data: data,
        success: function (res) {
            success(res);
        },
        fail: function (res) {
            fail(res);
        }
    });
}


function getXcxId(fun, callback) {
    wx.getStorage({
        key: 'xcxId',
        success: function (res) {
            return fun(callback)
        },
        fail: function (res) {
            wx.getUserInfo({
                success: function (res) {
                    let newCode = res
                    wx.login({
                        success: res => {
                            if (newCode.encryptedData == "" || newCode.encryptedData == undefined || newCode.encryptedData == null) {
                                getXcxId(fun, callback)
                            } else {
                                if (res.code) {
                                    _post_from('请求的链接',
                                        {
                                            code: res.code,
                                            platform: 0,
                                            wechatChild: 2,
                                            iv: newCode.iv,
                                            encryptedData: newCode.encryptedData
                                        }, res => {
                                            wx.setStorageSync('xcxId', res.data.xcxID);
                                            wx.setStorageSync('token', res.data.token);
                                            wx.setStorageSync('timestamp', res.data.timestamp);
                                            console.log("登录完成")
                                            return fun(callback)
                                        })
                                } else {
                                    return fun(callback)
                                }
                            }
                        }
                    })
                }
            })
        }
    })
}
function getStorageXcxId(callback) {
    console.log("有ID了?")
    let xcxId, token, timestamp;
    wx.getStorage({
        key: 'xcxId',
        success: function (res) {
            ttxId = res.data;
            wx.getStorage({
                key: 'token',
                success: function (res) {
                    token = res.data;
                    wx.getStorage({
                        key: 'timestamp',
                        success: function (res) {
                            timestamp = res.data;
                            if (xcxId!= "") {
                                console.log("ok")
                                callback(xcxId, token, timestamp)
                            } else {
                                console.log("无ID")
                                getXcxId(getStorageXcxId, callback)
                            }
                        }
                    })
                }
            })
        },
        fail: function () {
            getTTXID(getStorageXcxId, callback)
        }
    })
}
function track(where) {
    wx.getSetting({
        success(res) {
            if (!res.authSetting['scope.userInfo']) {
                wx.authorize({
                    scope: 'scope.userInfo',
                    success() {
                        wx.getUserInfo({
                            success: function (res) {
                                wx.reportAnalytics(where, {
                                    city: res.userInfo.city,
                                    sex: res.userInfo.gender,
                                });
                            }
                        })
                    }
                })
            } else {
                wx.getUserInfo({
                    success: function (res) {
                        wx.reportAnalytics(where, {
                            city: res.userInfo.city,
                            sex: res.userInfo.gender,
                        });
                    }
                })
            }
        }
    })
}
module.exports = {
    _get: _get,
    _post_from: _post_from,
    _post_json: _post_json,
    _post_urlencoded: _post_urlencoded,
    getXcxId: getXcxId,
    getStorageXcxId: getStorageXcxId,
    track: track,
    formatDay: formatDay,
    formatTime: formatTime
}
请求方式是采用的网上大神们总结的请求方式
track方法就是追踪方法,比如说追踪用户从那个小程序点击进入,以及携带用户信息传给后台...相信大家做过前后交互的都知道如何使用
接下来我们就开始对app.js进行详细讲述
//app.js
const myRequest = require("utils/util.js");//引入自己封装的请求方式
App({
    data: {
        xcxId: "",
        token: "",
        timestamp: ""
    },
    onLaunch: function () {
        //调用API从本地缓存中获取数据
        wx.showLoading({
            title: '加载中',
        });
        this.getUserInfo()
    },
    getUserInfo: function () {
        let that = this;
        active()
        function active() {
            wx.getSetting({
                success(res) {
                    if (!res.authSetting['scope.userInfo']) {//用户信息
                        wx.authorize({
                            scope: 'scope.userInfo',
                            success() {
                                wx.getUserInfo({
                                    success: function (res) {
                                        let newCode = res
                                        wx.login({
                                            success: res => {
                                                let code = res.code;
                                                wx.getStorage({
                                                    key: 'xcxId',
                                                    success: function (res) {
                                                        that.data.xcxId= res.data;
                                                        wx.getStorage({
                                                            key: 'token',
                                                            success: function (res) {
                                                                that.data.token = res.data;
                                                                wx.getStorage({
                                                                    key: 'timestamp',
                                                                    success: function (res) {
                                                                        that.data.timestamp = res.data
                                                                        if (that.data.timestamp == "" || that.data.xcxId== "" || that.data.token == "" || that.data.timestamp == undefined || that.data.xcxId== undefined || that.data.token == undefined || that.data.timestamp == null || that.data.xcxId== null || that.data.token == null) {
                                                                            fail(code, newCode)
                                                                        }
                                                                    },fail:function () {
                                                                        fail(code, newCode)
                                                                    }
                                                                })
                                                            },fail:function () {
                                                                fail(code, newCode)
                                                            }
                                                        })
                                                    },fail:function () {
                                                        fail(code, newCode)
                                                    }
                                                })
                                            }
                                        })
                                    }
                                })
                            }
                        })
                    } else {
                        wx.getUserInfo({
                            success: function (res) {
                                let newCode = res
                                wx.login({
                                    success: res => {
                                        let code = res.code;
                                        wx.getStorage({
                                            key: 'xcxId',
                                            success: function (res) {
                                                that.data.xcxId= res.data;
                                                wx.getStorage({
                                                    key: 'token',
                                                    success: function (res) {
                                                        that.data.token = res.data;
                                                        wx.getStorage({
                                                            key: 'timestamp',
                                                            success: function (res) {
                                                                that.data.timestamp = res.data
                                                                if (that.data.timestamp == "" || that.data.xcxId== "" || that.data.token == "" || that.data.timestamp == undefined || that.data.xcxId== undefined || that.data.token == undefined || that.data.timestamp == null || that.data.xcxId== null || that.data.token == null) {
                                                                    fail(code, newCode)
                                                                }
                                                            },fail:function () {
                                                                fail(code, newCode)
                                                            }
                                                        })
                                                    },fail:function () {
                                                        fail(code, newCode)
                                                    }
                                                })
                                            },fail:function () {
                                                fail(code, newCode)
                                            }
                                        })
                                    }
                                })
                            }
                        })
                    }
                }
            })
        }

        function fail(code, newCode) {
            if (code != "" && code != undefined && newCode != "" && newCode != undefined) {
                getXcxId(code, newCode)
            } else {
                that.getUserInfo()
            }
        }

        function getXcxId(code, newCode) {
            myRequest._post_from('请求的链接',
                {
                    code: code,
                    platform: 0,
                    wechatChild: 2,
                    iv: newCode.iv,
                    encryptedData: newCode.encryptedData
                }, res => {
                    if (res.data.xcxId != "") {
                        wx.setStorageSync('xcxId', res.data.xcxId);
                        wx.setStorageSync('token', res.data.token);
                        wx.setStorageSync('timestamp', res.data.timestamp);
                        that.data.xcxId= res.data.xcxId;
                        that.data.token = res.data.token;
                        that.data.timestamp = res.data.timestamp;
                    }
                })
        }
    }
});
具体思路就是先从本地获取用户信息,获取到之后返回给后台,毕竟每个公司都有自己的用户信息库,这样就是资源...
(未完待续....)


 1万+
1万+

 被折叠的 条评论
为什么被折叠?
被折叠的 条评论
为什么被折叠?
 到【灌水乐园】发言


