参考:http://www.withdata.com/blog/tips/how-to-install-and-configure-db2-odbc-driver.html
驱动下载地址:https://www-933.ibm.com/support/fixcentral/swg/selectFixes?parent=ibm%2FInformation%2BManagement&product=ibm/Information+Management/IBM+Data+Server+Client+Packages&release=10.5.*&platform=Windows+32-bit,+x86&function=fixId&fixids=*odbc_cli*&includeSupersedes=0
How to Install and Configure DB2 ODBC Driver
by Shiji Pan
1 Download and Install
Download DB2 CLI ODBC Driver:
for x86 (32bit):
https://delivery04.dhe.ibm.com/sdfdl/v2/sar/CM/IM/04qs9/0/Xa.2/Xb.jusyLTSp44S03o2gwPADMzlDcfeJnsfCE8Y8a4irGv6duELOADVNn04YxvA/Xc.CM/IM/04qs9/0/v10.5fp4_nt32_odbc_cli.zip/Xd./Xf.LPR.D1vk/Xg.7844487/Xi.habanero/XY.habanero/XZ.jdm2CccvOKn3Ld3nwm-Pj62vpeA/v10.5fp4_nt32_odbc_cli.zip
https://www-933.ibm.com/support/fixcentral/swg/selectFixes?parent=ibm%2FInformation%2BManagement&product=ibm/Information+Management/IBM+Data+Server+Client+Packages&release=10.5.*&platform=Windows+32-bit,+x86&function=fixId&fixids=*odbc_cli*&includeSupersedes=0
for x64 (64bit):
https://delivery04.dhe.ibm.com/sdfdl/v2/sar/CM/IM/04qs7/0/Xa.2/Xb.jusyLTSp44S03o2gwLvv_gehwZO_FuEKqSjmFO6RZHWDmK3FXWGSKLzrKXQ/Xc.CM/IM/04qs7/0/v10.5fp4_ntx64_odbc_cli.zip/Xd./Xf.LPR.D1vk/Xg.7844482/Xi.habanero/XY.habanero/XZ.tXV1ZzgNXYn-0zygvQ8Qb8WK01k/v10.5fp4_ntx64_odbc_cli.zip
https://www-933.ibm.com/support/fixcentral/swg/selectFixes?parent=ibm%2FInformation%2BManagement&product=ibm/Information+Management/IBM+Data+Server+Client+Packages&release=10.5.*&platform=Windows+64-bit,+x86&function=fixId&fixids=*odbc_cli*&includeSupersedes=0
Uncompress the zip file to a folder, for example: F:\work\clidriver .
In folder F:\work\clidriver\bin, right click on file db2.ini -> “Properties” -> uncheck the “read only” attribute.
update: in recent version, you need create a “db2dsdriver.cfg” file in path “F:\work\clidriver\cfg”, content like this:
<configuration>
<databases>
<database name=”sample” host=”192.168.1.102″ port=”50000″>
<parameter name=”CurrentSchema” value=”sample”/>
<wlb>
<parameter name=”enableWLB” value=”true”/>
<parameter name=”maxTransports” value=”50″/>
</wlb>
<acr>
<parameter name=”enableACR” value=”true”/>
</acr>
</database>
</databases>
<parameters>
<parameter name=”GlobalParam” value=”Value”/>
</parameters>
</configuration>
2 Register ODBC driver
Run “CMD”, if win7, run as Administrator (http://www.withdata.com/ad/tips/how-to-open-elevated-command-prompt-with-administrators-rights-in-windows-7.html)
F:\work\clidriver\bin>db2oreg1.exe -i
Add “F:\work\clidriver\bin\” to your system PATH .
3 Create a new ODBC Data Source Name (DSN) using the ODBC Driver Manager.
The ODBC Driver Manager is in the Windows Control panel -> Administrative tools.
Add a “User DSN”
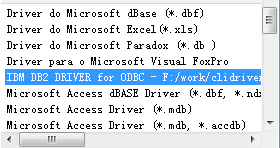
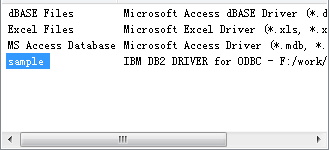
select “IBM DB2 DRIVER for ODBC – F:/work/clidriver” as driver.
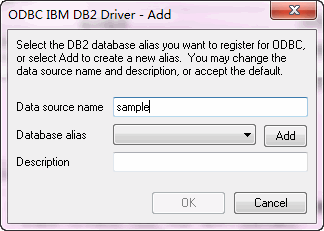
next, set “Data source name”
In “Database alias” row, click “Add”.
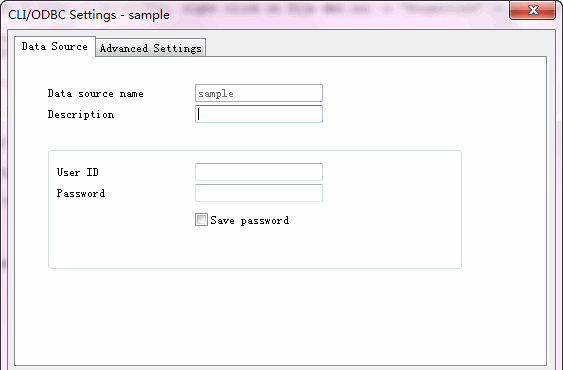
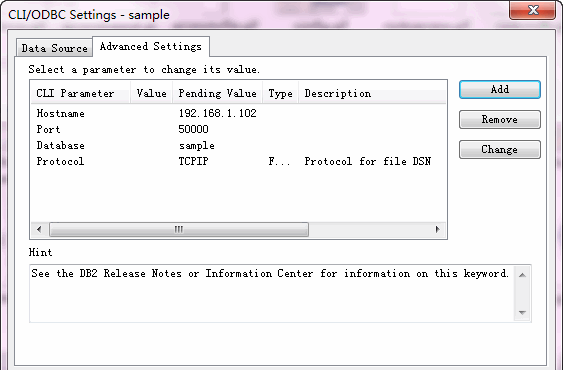
To “Advanced settings” tab, click “Add”.
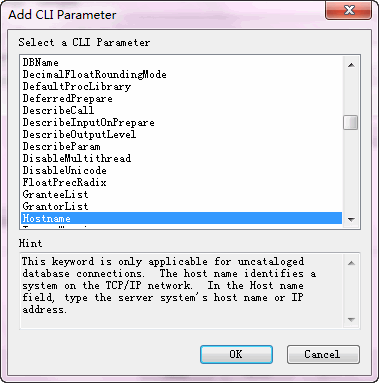
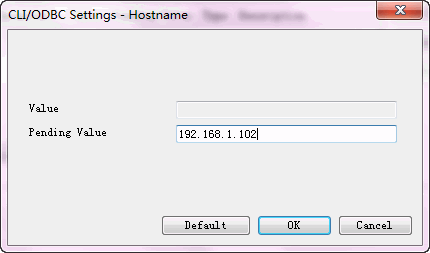
add “Hostname”.
add “Port”, “Database”, and “Protocol”.
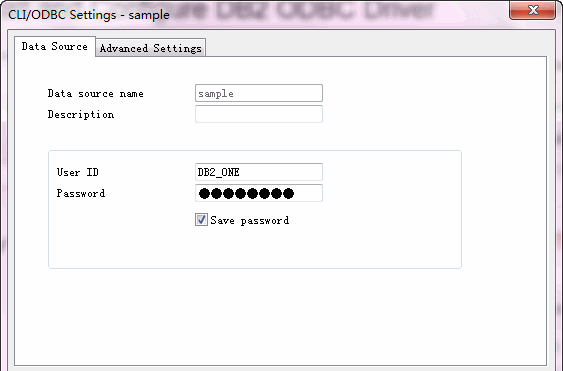
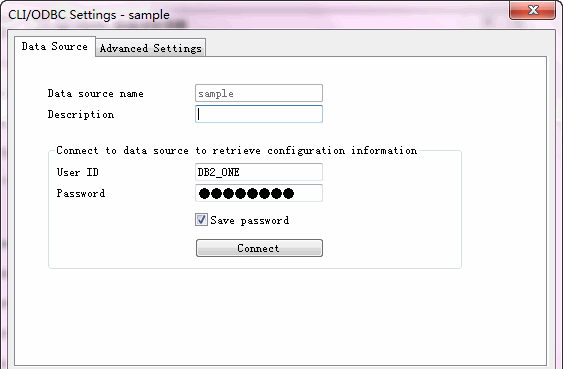
To “Data Source” tab, input “User ID” and “Password”.
Click “OK”.
4 Test DSN
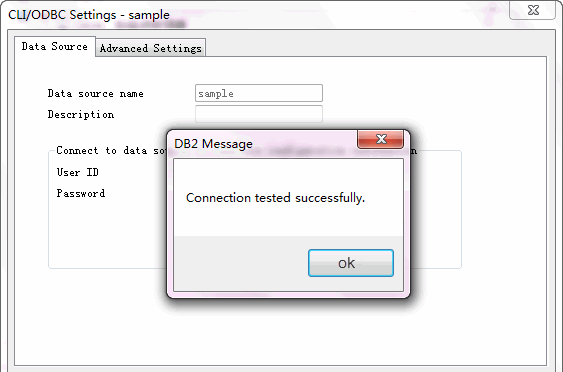
Select saved “DSN”, click “Configure”.
Click “Connect” to test.




 1317
1317

 被折叠的 条评论
为什么被折叠?


