


 本文介绍了iOS中的手势识别器(UIGestureRecognizer)及其子类,包括UITapGestureRecognizer(拍击)、UIPinchGestureRecognizer(捏合)、UIPanGestureRecognizer(拖拽)、UISwipeGestureRecognizer(擦碰)、UIRotationGestureRecognizer(旋转)和UILongPressGestureRecognizer(长按),并提供了详细的使用示例。
UIGestureRecognizer(手势识别)在iOS 中非常重要,他极大地提高了移动设备的使用便捷性;
在3.2之前是主要使用的是由UIResponder而来的如下4种方式:
- (void)touchesBegan:(NSSet *)touches withEvent:(UIEvent *)event
- (void)touchesCancelled:(NSSet *)touches withEvent:(UIEvent *)event
- (void)touchesEnded:(NSSet *)touches withEvent:(UIEvent *)event
- (void)touchesMoved:(NSSet *)touches withEvent:(UIEvent *)event
但是由于这种方式需要自己计算做不同的手势分辨,实在麻烦。
在3.2 以后,提供了一些常用的手势(UIGestureRecognizer 的子类),开发者可以直接使用他们进行手势操作。
1、拍击——UITapGestureRecognizer
2、向里或向外捏——UIPinchGestureRecognizer
3、摇动或者拖拽——UIPanGestureRecognizer
4、擦碰——UISwipeGestureRecognizer
5、旋转——UIRotationGestureRecognizer
6、长按——UILongPressGestureRecognizer
每个手势识别器的用法都差不多,以UITapGestureRecognizer为例:
1     //创建手势识别器对象并监听手势的触发
2     UITapGestureRecognizer *tap = [[UITapGestureRecognizer alloc] initWithTarget:self action:@selector(tapAction:)];
3     //连续敲击次数
4     tap.numberOfTapsRequired = 2;
5     //需要两根手指一起敲击
6     tap.numberOfTouchesRequired = 2;
7     //添加手势到指定的view上
8     [self.view addGestureRecognizer:tap];
敲击实例:
1、UITapGestureRecognizer 拍击
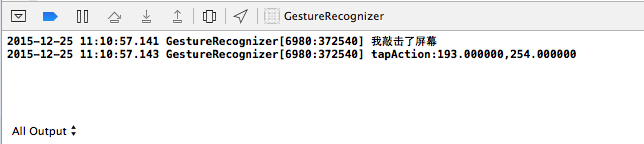
 1 //创建手势识别器对象并监听手势的触发
 2     UITapGestureRecognizer *tap = [[UITapGestureRecognizer alloc] initWithTarget:self action:@selector(tapAction:)];
 3     //连续敲击次数
 4     tap.numberOfTapsRequired = 2;
 5     //需要两根手指一起敲击
 6     tap.numberOfTouchesRequired = 2;
 7     //添加手势到指定的view上
 8     [self.view addGestureRecognizer:tap];
 9
10 - (void)tapAction:(UITapGestureRecognizer*)tapGesture{
11
12     NSLog(@"我敲击了屏幕");
13
14     CGPoint point = [tapGesture locationInView:self.view];
15     NSLog(@"tapAction:%f,%f",point.x,point.y);
16 }
输出:
2、UIPinchGestureRecognizer 向里或向外捏
1     UIPinchGestureRecognizer *Pinch =[[UIPinchGestureRecognizer alloc] initWithTarget:self action:@selector(PinchAction:)];
2     Pinch.delegate = self;
3     [imageView addGestureRecognizer:Pinch];
4
5 - (void)PinchAction:(UIPinchGestureRecognizer*)pinchGesture{
6         pinchGesture.view.transform = CGAffineTransformScale(pinchGesture.view.transform, pinchGesture.scale, pinchGesture.scale);
7         pinchGesture.scale = 1;
8 }
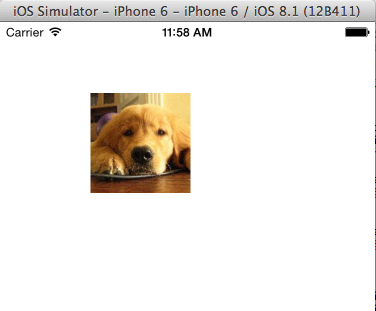
3、UIPanGestureRecognizer 摇动或者拖拽
//先放置一张图片实施拖拽
imageView = [[UIImageView alloc] initWithImage:[UIImage imageNamed:@"u=3971024035,4095552302&fm=21&gp=0"]];
[imageView setFrame:(CGRect){50,50,100,100}];
[self.view addSubview:imageView];
    UIPanGestureRecognizer *pan = [[UIPanGestureRecognizer alloc] initWithTarget:self action:@selector(panAction:)];
    pan.delegate = self;
    [self.view addGestureRecognizer:pan];

    //设置触发拖拽的最少触摸点,默认为1
    pan.minimumNumberOfTouches = 1;
    //设置触发拖拽的最多触摸点
    pan.maximumNumberOfTouches = 1;


- (void)panAction:(UIPanGestureRecognizer *)panGesture{
    CGPoint point = [panGesture locationInView:self.view];

    NSLog(@"panAction:(%f, %f)",point.x, point.y);
    imageView.center = point;

    if (panGesture.state==UIGestureRecognizerStateBegan) {
        NSLog(@"panAction StateBegan:(%f,%f)", point.x, point.y);
    }

    if (panGesture.state==UIGestureRecognizerStateChanged) {
        NSLog(@"panAction StateChanged:(%f,%f)", point.x, point.y);
    }

    if (panGesture.state==UIGestureRecognizerStateEnded) {
        NSLog(@"panAction StateEnded:(%f,%f)", point.x, point.y);
    }

}
输出:

4、UISwipeGestureRecognizer 擦碰
 1     UISwipeGestureRecognizer *leftSwipeGesture = [[UISwipeGestureRecognizer alloc] initWithTarget:self action:@selector(SwipeAction:)];
 2     [self.view addGestureRecognizer:leftSwipeGesture];
 3     leftSwipeGesture.direction = UISwipeGestureRecognizerDirectionLeft;
 4
 5     UISwipeGestureRecognizer *rightSwipeGesture = [[UISwipeGestureRecognizer alloc] initWithTarget:self action:@selector(SwipeAction:)];
 6     [self.view addGestureRecognizer:rightSwipeGesture];
 7     rightSwipeGesture.direction = UISwipeGestureRecognizerDirectionRight;
 8
 9 - (void)SwipeAction:(UISwipeGestureRecognizer*)swipeGesture{
10     if (swipeGesture.direction==UISwipeGestureRecognizerDirectionLeft) {
11         NSLog(@"swipeGesture:Left");
12     }
13     if (swipeGesture.direction==UISwipeGestureRecognizerDirectionRight) {
14         NSLog(@"swipeGesture:Right");
15     }
16 }
输出:

5、UIRotationGestureRecognizer 旋转
 1 UIRotationGestureRecognizer *rotations = [[UIRotationGestureRecognizer alloc] initWithTarget:self action:@selector(rotationAction:)];
 2     rotations.delegate = self;
 3     rotation = 0;
 4     [self.view addGestureRecognizer:rotations];
 5
 6 - (void)rotationAction:(UIRotationGestureRecognizer*)rotationGesture{
 7     imageView.transform = CGAffineTransformMakeRotation(rotation+rotationGesture.rotation);
 8
 9     if (rotationGesture.state==UIGestureRecognizerStateEnded) {
10         rotation += rotationGesture.rotation;
11     }
12
13 }
6、UILongPressGestureRecognizer 长按
 1     UILongPressGestureRecognizer *longp = [[UILongPressGestureRecognizer alloc] initWithTarget:self action:@selector(longAction:)];
 2     [self.view addGestureRecognizer:longp];
 3
 4     longp.numberOfTouchesRequired = 1;
 5     //长按时间为2秒
 6     longp.minimumPressDuration = 2;
 7     //允许15秒中运动
 8     longp.allowableMovement = 15;
 9
10 - (void)longAction:(UILongPressGestureRecognizer *)longPress{
11     CGPoint point = [longPress locationInView:self.view];
12     imageView.center = point;
13
14     if(longPress.state == UIGestureRecognizerStateBegan){
15         NSLog(@"longAction StateBegan: (%f, %f)", point.x, point.y);
16     }
17
18     if(longPress.state == UIGestureRecognizerStateEnded){
19         NSLog(@"longAction StateEnded: (%f, %f)", point.x, point.y);
20     }
21 }
输出:


 被折叠的 条评论
为什么被折叠?
被折叠的 条评论
为什么被折叠?
 到【灌水乐园】发言


