


 本文介绍了如何使用2D渲染引擎PixiJs来实现一个简单的在线抓娃娃机H5应用。详细讲解了页面布局、图片资源的层级关系设置、元素移动动画以及抓杆和爪子的形态变化逻辑,最后展示了完整效果。
本文的实现主要用PixiJs实现。PixiJS是比较著名的2D渲染引擎。可以参照教程做事前学习了解。
准备工作
第一步是图片资源。这些都是从现有的抓娃娃h5中找到的一些png资源。具体可以查看资源目录。都是F5查看资源下载下来的。
页面布局
在页面布局中,需要确定好图片资源的层级关系,可以理解为z-index,确定好图片添加的先后顺序。另外也要计算好,按照页面窗口大小,算出容器的大小,根据比例调整里面所有的图片。可以看到下面的娃娃图片已经被加了2份,这是为了从视觉上循环的时候总可以看到3个娃娃。至于为什么这么做,可以看下面的动画的解析。
setup() {
var resource = this.loader.resources["p2_top.png"]
var img = new PIXI.Sprite(resource.texture);
var ratio = this.app.view.width / img.width
// 背景
var resourceBg = this.loader.resources["bg.png"]
var imgBg = new PIXI.Sprite(resourceBg.texture)
imgBg.width = this.app.view.width
imgBg.height = this.app.view.height
imgBg.x = 0
imgBg.y = 0
this.app.stage.addChild(imgBg)
// 移动杆
var resourceHead = this.loader.resources["p2_wood_1.png"]
var imgHead = new PIXI.Sprite(resourceHead.texture)
imgHead.width = imgHead.width * ratio
imgHead.height = imgHead.height * ratio
imgHead.y = this.uplimit
imgHead.x = (this.app.view.width - imgHead.width) / 2
this.app.stage.addChild(imgHead)
this.imgHead = imgHead
//爪子
// 抓住
var resourcdPawCatch = this.loader.resources["p2_claw_0.png"]
var imgPawCatch = new PIXI.Sprite(resourcdPawCatch.texture)
imgPawCatch.width = imgPawCatch.width * ratio
imgPawCatch.height = imgPawCatch.height * ratio
imgPawCatch.x = (this.app.view.width - imgPawCatch.width) / 2
imgPawCatch.y = imgHead.height + imgHead.y
this.app.stage.addChild(imgPawCatch)
this.imgPawCatch = imgPawCatch
// 没抓住
var resourcdPawRelease = this.loader.resources["p2_claw_1.png"]
var imgPawRelease = new PIXI.Sprite(resourcdPawRelease.texture)
imgPawRelease.width = imgPawRelease.width * ratio
imgPawRelease.height = imgPawRelease.height * ratio
imgPawRelease.x = (this.app.view.width - imgPawRelease.width) / 2
imgPawRelease.y = imgHead.height + imgHead.y
imgPawRelease.visible = false
this.app.stage.addChild(imgPawRelease)
this.imgPawRelease = imgPawRelease
//移动娃娃
var resourceBaby = this.loader.resources["baby_0.png"]
var imgBaby = new PIXI.Sprite(resourceBaby.texture)
imgBaby.width = imgBaby.width * ratio
imgBaby.height = imgBaby.height * ratio
this.inter = (this.app.view.width - imgBaby.width * 3) / 2
this.babyWidth = imgBaby.width
imgBaby.x = 0
imgBaby.y = (829 - 267) * ratio
this.app.stage.addChild(imgBaby)
this.babies.push(imgBaby)
resourceBaby = this.loader.resources["baby_1.png"]
imgBaby = new PIXI.Sprite(resourceBaby.texture)
imgBaby.width = imgBaby.width * ratio
imgBaby.height = imgBaby.height * ratio
imgBaby.x = this.babyWidth + this.inter + (this.babyWidth - imgBaby.width) / 2
imgBaby.y = (829 - 267) * ratio
this.app.stage.addChild(imgBaby)
this.babies.push(imgBaby)
resourceBaby = this.loader.resources["baby_2.png"]
imgBaby = new PIXI.Sprite(resourceBaby.texture)
imgBaby.width = imgBaby.width * ratio
imgBaby.height = imgBaby.height * ratio
imgBaby.x = (this.babyWidth+ this.inter) * 2 + (this.babyWidth - imgBaby.width) / 2
imgBaby.y = (829 - 267) * ratio
this.app.stage.addChild(imgBaby)
this.babies.push(imgBaby)
resourceBaby = this.loader.resources["baby_0.png"]
imgBaby = new PIXI.Sprite(resourceBaby.texture)
imgBaby.width = imgBaby.width * ratio
imgBaby.height = imgBaby.height * ratio
imgBaby.x = (this.babyWidth + this.inter) * 3 + (this.babyWidth - imgBaby.width) / 2
imgBaby.y = (829 - 267) * ratio
this.app.stage.addChild(imgBaby)
this.babies.push(imgBaby)
resourceBaby = this.loader.resources["baby_1.png"]
imgBaby = new PIXI.Sprite(resourceBaby.texture)
imgBaby.width = imgBaby.width * ratio
imgBaby.height = imgBaby.height * ratio
imgBaby.x = (this.babyWidth + this.inter) * 4 + (this.babyWidth - imgBaby.width) / 2
imgBaby.y = (829 - 267) * ratio
this.app.stage.addChild(imgBaby)
this.babies.push(imgBaby)
resourceBaby = this.loader.resources["baby_2.png"]
imgBaby = new PIXI.Sprite(resourceBaby.texture)
imgBaby.width = imgBaby.width * ratio
imgBaby.height = imgBaby.height * ratio
imgBaby.x = (this.babyWidth + this.inter) * 5 + (this.babyWidth - imgBaby.width) / 2
imgBaby.y = (829 - 267) * ratio
this.app.stage.addChild(imgBaby)
this.babies.push(imgBaby)
// 背景图
img.width = this.app.view.width
img.height = this.app.view.height
this.app.stage.addChild(img)
// 顶部固定
resource = this.loader.resources["p2_woodhead.png"]
img = new PIXI.Sprite(resource.texture)
img.width = img.width * ratio
img.height = img.height * ratio
img.x = (this.app.view.width - img.width) / 2
img.y = 140 * ratio
this.app.stage.addChild(img)
}
复制代码
由此得到以下的效果图。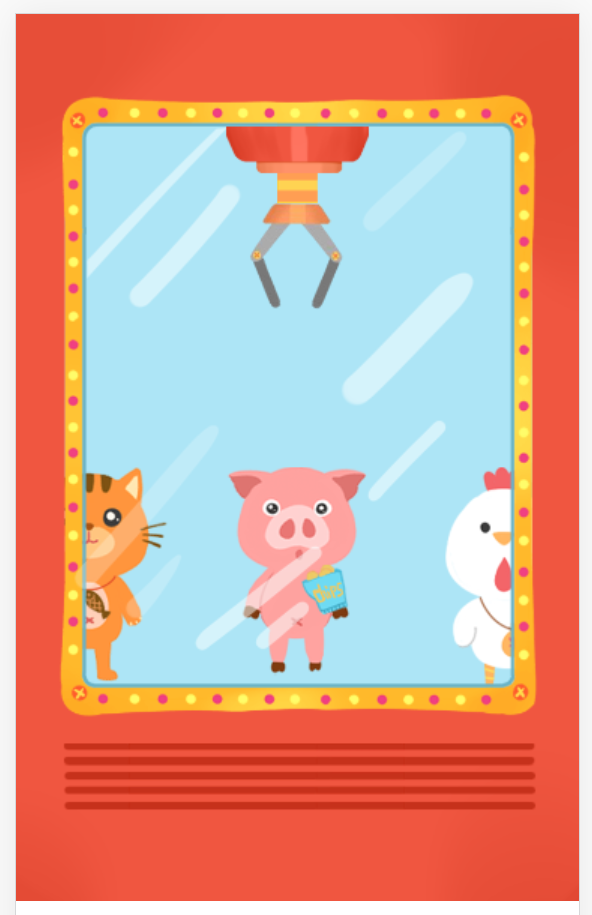
元素移动
娃娃移动
好了现在就要移动,以下是完成一个循环步骤中的状态变化,移动的变化以一个间隔为准。这个间隔的计算以最大的元素宽度作为基准,然后屏幕放下3个,因此间隔大小是(容器宽度 - 3 * 元素宽度)/ 2。由此可以看到一共需要6个元素才能完成循环。另外由于每个块的宽度不一致,因此计算块的x的时候要考虑居中问题。重置元素放到循环第一位的时候也要考虑居中问题来计算x。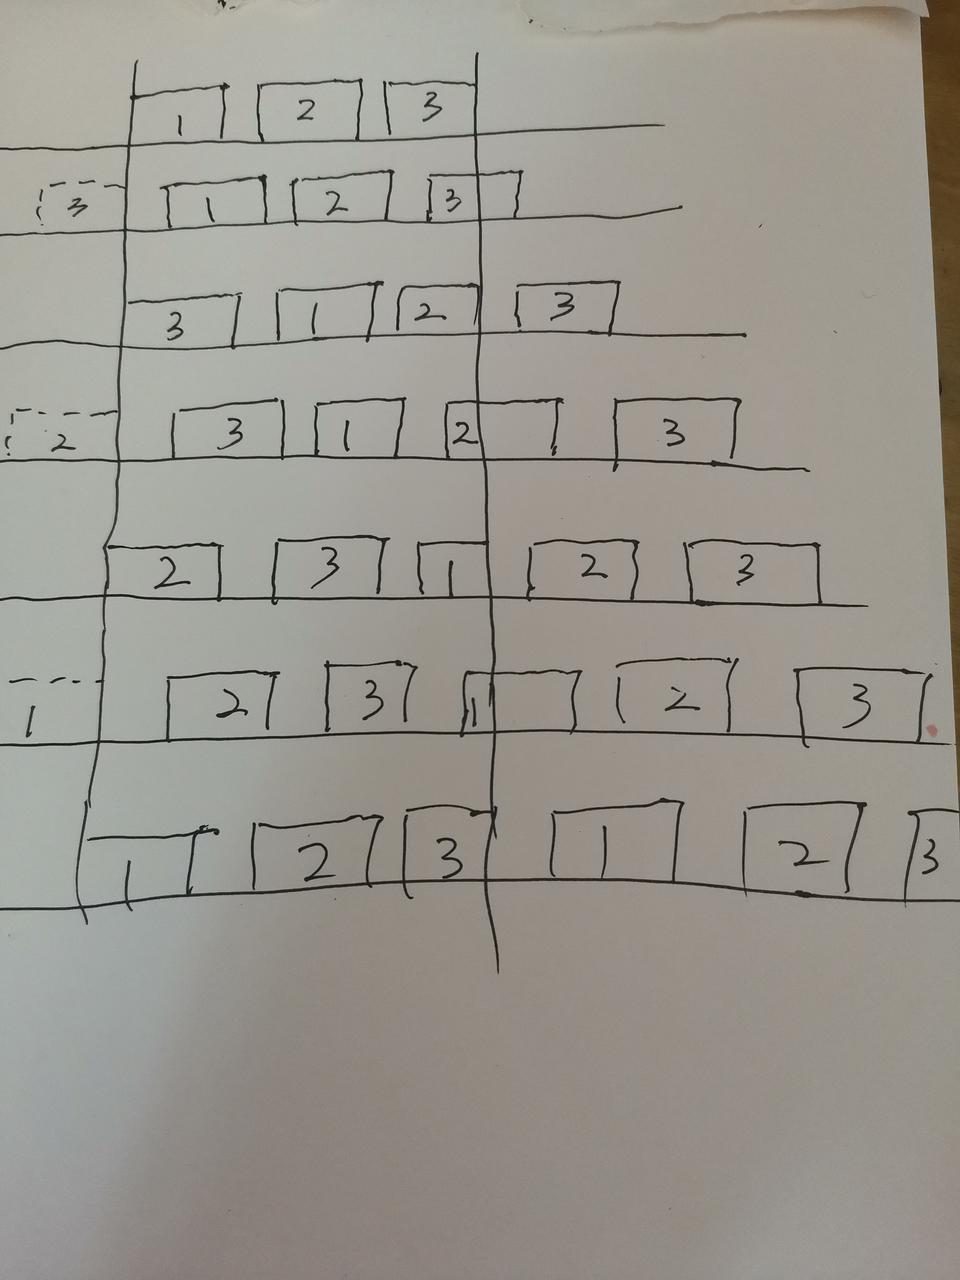
由此得到的娃娃循环动画计算方法如下
// 添加循环处理
this.app.ticker.add((delta) => this.gameLoop(delta))
...
gameLoop(...args: any[]){
for (var inx = 0; inx < this.babies.length; ++inx){
//假定没有被抓取
if (!this.babiesTaken[inx]){
this.babies[inx].x = this.babies[inx].x + 1
if (this.babies[inx].x >= (this.babyWidth + this.inter) * 5 + this.inter + (this.babyWidth - this.babies[inx].width) / 2){
this.babies[inx].x = -this.babyWidth + (this.babyWidth - this.babies[inx].width) / 2
}
}
}
}
复制代码
得到效果图如下
抓杆移动
移动杆的效果除了向下移动外,还要改变爪子的形态,在快要到达下面的时候要展开爪子,到底部又要收起爪子。具体的算法如下
if (this.catching){
if (this.movingDown){
this.imgHead.y = this.imgHead.y + 1
if (this.imgHead.y >= this.downlimit){
// 开始抓娃娃
this.imgPawRelease.visible = false
this.imgPawCatch.visible = true
this.imgPawCatch.y = this.imgHead.height + this.imgHead.y
this.imgPawRelease.y = this.imgHead.height + this.imgHead.y
this.movingDown = false
}
else if (this.imgHead.y >= this.switchPaw){
// 开始展开爪子
this.imgPawRelease.visible = true
this.imgPawCatch.visible = false
this.imgPawCatch.y = this.imgHead.height + this.imgHead.y
this.imgPawRelease.y = this.imgHead.height + this.imgHead.y
}
else{
this.imgPawCatch.y = this.imgHead.height + this.imgHead.y
this.imgPawRelease.y = this.imgHead.height + this.imgHead.y
}
}
else {
this.imgHead.y = this.imgHead.y - 1
if (this.imgHead.y >= this.uplimit){
this.imgPawCatch.y = this.imgHead.height + this.imgHead.y
this.imgPawRelease.y = this.imgHead.height + this.imgHead.y
this.movingDown = false
}
else{
this.imgPawRelease.visible = false
this.imgPawCatch.visible = true
this.movingDown = true
}
}
}
复制代码
由此得到的循环效果如下,
如果我们判断娃娃被抓住了,那么就可以修改娃娃的y值。
以中间的娃娃为例,
if (this.catching){
if (this.movingDown){
this.imgHead.y = this.imgHead.y + 1
if (this.imgHead.y >= this.downlimit){
// 开始抓娃娃
this.imgPawRelease.visible = false
this.imgPawCatch.visible = true
this.imgPawCatch.y = this.imgHead.height + this.imgHead.y
this.imgPawRelease.y = this.imgHead.height + this.imgHead.y
this.babies[1].y = this.imgPawCatch.y + this.imgPawCatch.height - 20
this.movingDown = false
}
else if (this.imgHead.y >= this.switchPaw){
// 开始展开爪子
this.imgPawRelease.visible = true
this.imgPawCatch.visible = false
this.imgPawCatch.y = this.imgHead.height + this.imgHead.y
this.imgPawRelease.y = this.imgHead.height + this.imgHead.y
}
else{
this.imgPawCatch.y = this.imgHead.height + this.imgHead.y
this.imgPawRelease.y = this.imgHead.height + this.imgHead.y
}
}
else {
this.imgHead.y = this.imgHead.y - 1
if (this.imgHead.y >= this.uplimit){
this.imgPawCatch.y = this.imgHead.height + this.imgHead.y
this.babies[1].y = this.imgPawCatch.y + this.imgPawCatch.height - 20
this.imgPawRelease.y = this.imgHead.height + this.imgHead.y
this.movingDown = false
}
else{
this.imgPawRelease.visible = false
this.imgPawCatch.visible = true
this.movingDown = true
this.babies[1].y = (829 - 267) * this.ratio
}
}
}
复制代码
效果如下,
碰撞集成
目前每个元素都有了,我们需要把抓捕的条件判断加进去。这里面主要是依据爪子的位置和娃娃的位置判定的,可以再具体调整,为了降低难度,放宽了条件
catch() {
for (var inx = 0; inx < this.babies.length; ++inx){
if (Math.abs(this.babies[inx].y - this.imgPawCatch.y) < 100
&& Math.abs((this.babies[inx].x + this.babies[inx].width / 2) - (this.imgPawCatch.x + this.imgPawCatch.width / 2)) < 100 ) {
this.babiesTaken[inx] = true
this.catchedBaby = this.babies[inx]
break;
}
}
}
复制代码
最终效果和代码
由于素材资源有限,简单用按钮来操作。得到最终效果图如下:
代码请戳github


 1409
1409

 被折叠的 条评论
为什么被折叠?
被折叠的 条评论
为什么被折叠?
 到【灌水乐园】发言


