


You can find the code of this tutorial here, and follow the guide, step by step, in this PR.You can take a look at a demo here.
您可以在此处找到本教程的代码,并在此PR中逐步按照指南进行操作。您可以在此处查看演示。
使用Create React App初始化项目 (Initialize project using Create React App)
Execute the following commands:
执行以下命令:
npx create-react-app cra-with-module-alias --template typescript
cd cra-with-module-alias
设置环境并安装依赖项 (Setup the environment and install dependencies)
Execute:
执行:
npm run ejectTo the below question, answer with yes:
对以下问题,回答yes :
? Are you sure you want to eject? This action is permanent.You will have the following structure:
您将具有以下结构:
cra-with-module-alias
├── README.md
├── node_modules
├── package.json
├── package-lock.json
├── .gitignore
├── config
│   ├── webpack.config.js
│   ├── ...
│   └── Other folder and files
├── scripts
│   ├── build.js
│   ├── start.js
│   └── test.js
├── public
│   ├── favicon.ico
│   ├── index.html
│   ├── logo192.png
│   ├── logo512.png
│   ├── manifest.json
│   └── robots.txt
└── src
    ├── App.css
    ├── App.tsx
    ├── App.test.tsx
    ├── index.css
    ├── index.tsx
    ├── logo.svg
    ├── react-app-env.d.ts
    ├── serviceWorker.ts
    └── setupTests.ts
Install the dependencies:
安装依赖项:
npm i创建架构文件夹 (Create the architecture folders)
Create the following folders inside the src one:
在src中创建以下文件夹之一:
assets;
资产 ;
components;
组件 ;
pages;
页面 ;
services.
服务 。
and inside of all of these folders, create an index.ts file. Inside of every index.ts file, we are going to export the contained subfolders. The syntax that we are going to use will be something like:
在所有这些文件夹中,创建一个index.ts文件。 在每个index.ts文件中,我们将导出包含的子文件夹。 我们将使用的语法将类似于:
export { default as ComponentName } from "./ComponentName/ComponentName";更新Webpack配置以使用别名而不是相对路径 (Update Webpack configuration to use aliases instead of relative paths)
Add to config/webpack.config.js file — in particular in the resolve.alias variables of the return object — the following lines:
添加到配置/ webpack.config.js文件-特别是在resolve.alias返回的对象变量-下面几行:
// config/webpack.config.js
...
module.exports = {
    ...
    resolve: {
      ...
      alias: {
        ...
        'Assets': path.resolve(__dirname, '../src/assets/'),
        'Components': path.resolve(__dirname, '../src/components/'),
        'Pages': path.resolve(__dirname, '../src/pages/'),
        'Services': path.resolve(__dirname, '../src/services/'),
      },
      ...
    },
    ...
};
in this way we are able to do inside every component:
通过这种方式,我们可以在每个组件中进行操作:
import { ComponentName } from 'Components';
import { ServiceName } from 'Services';
...
更新Typescript配置以使用别名而不是相对路径 (Update Typescript configuration to use aliases instead of relative paths)
The second step, to use aliasing, is to update the Typescript configuration. Add to tsconfig.json file the following lines:
使用别名的第二步是更新Typescript配置。 将以下行添加到tsconfig.json文件:
// tsconfig.json
{
  "compilerOptions": {
    ...
    "baseUrl": "./",
    "paths": {
      "Assets": [ "src/assets"],
      "Components": [ "src/components"],
      "Pages": [ "src/pages"],
      "Services": [ "src/services"],
    }
  },
  ...
}
in this way, the Typescript compiler will be able to resolve paths.
这样,Typescript编译器将能够解析路径。
重新整理档案 (Reorganize the files)
Now we are going to re-organize the file generated by the npm run eject command.
现在,我们将重新组织npm run eject命令生成的文件。
Starting from the assets folder, we move logo.svg inside a new images folder. And inside the index file, we export the file:
从资产文件夹开始,我们将logo.svg移到新的图像文件夹中。 在索引文件中,我们导出文件:
export { default as Logo } from './images/logo.svg';Now, for components, we move the App.css, App.tsx and App.test.ts inside a new folder called App. Inside App/App.tsx file we update the import line import logo from './logo.svg'; in import { Logo as logo } from 'Assets';.
现在,对于组件,我们将App.css,App.tsx和App.test.ts移到名为App的新文件夹中。 在App / App.tsx文件中,我们import logo from './logo.svg';更新了导入行import logo from './logo.svg'; import { Logo as logo } from 'Assets'; 。
And inside the index file, we export the file:
在索引文件中,我们导出文件:
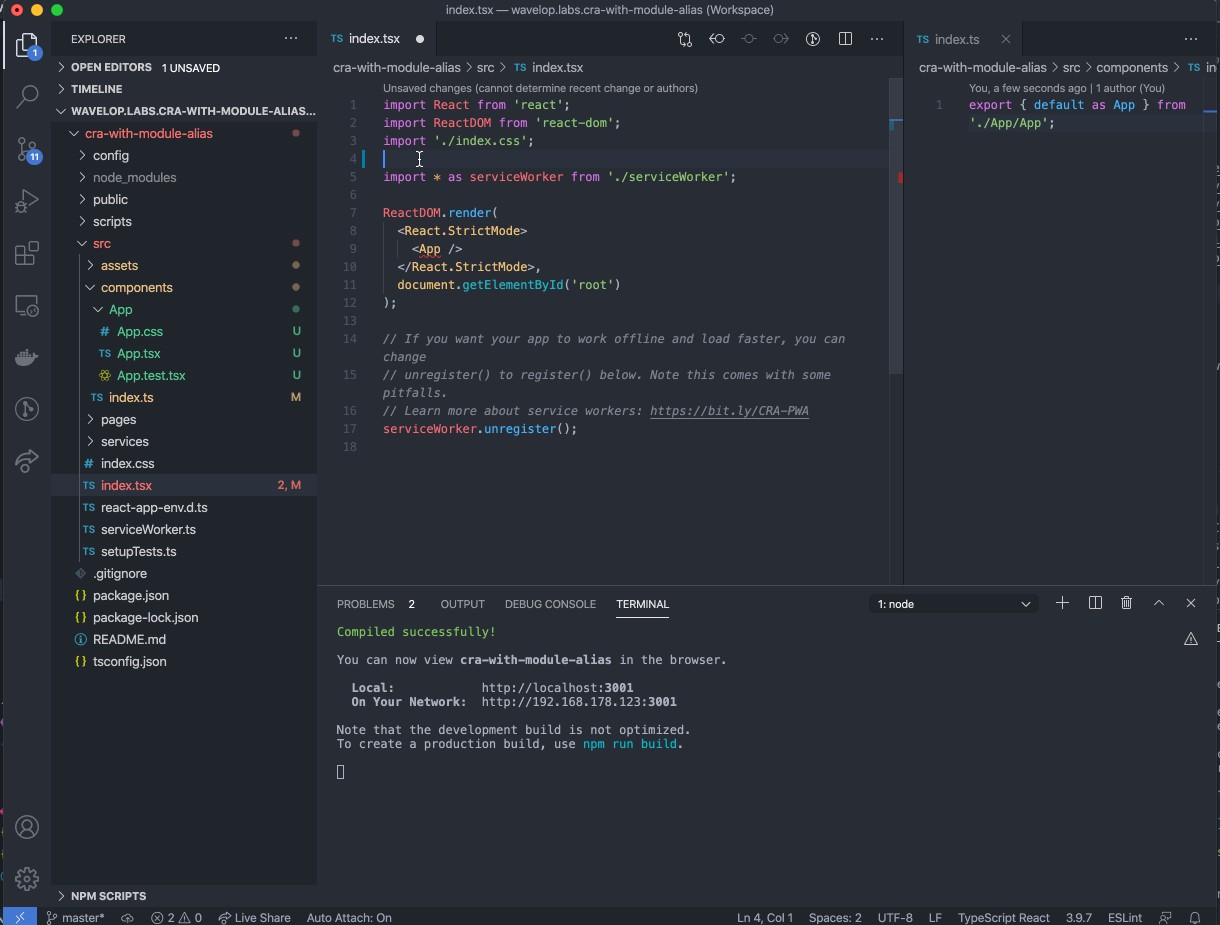
export { default as Logo } from './images/logo.svg';In the end, we need to update src/index.tsx as the following:
最后,我们需要将src/index.tsx更新为以下内容:
// src/index.js
import React from 'react';
import ReactDOM from 'react-dom';
import './index.css';
import { App } from 'Components'; // <-- New way to import Components
import * as serviceWorker from './serviceWorker';ReactDOM.render(
  <React.StrictMode>
    <App />
  </React.StrictMode>,
  document.getElementById('root')
);// If you want your app to work offline and load faster, you can change
// unregister() to register() below. Note this comes with some pitfalls.
// Learn more about service workers: https://bit.ly/CRA-PWA
serviceWorker.unregister();
更新package.json中的配置以通过Jest运行测试 (Update config in package.json for running test via Jest)
To execute the test with modules as aliases, we need to update the jest configuration in package.json as follow:
要使用模块作为别名执行测试,我们需要更新package.json的jest配置,如下所示:
// package.json
{
  ...
  "jest": {
    ...
    "moduleDirectories": [
      ".",
      "src",
      "node_modules"
    ],
    "moduleNameMapper": {
      ...
      "^Assets(.*)$": "<rootDir>/src/assets/$1",
      "^Components(.*)$": "<rootDir>/src/components/$1",
      "^Pages(.*)$": "<rootDir>/src/pages/$1",
      "^Services(.*)$": "<rootDir>/src/services/$1"
    },
  }
}
Visual Studio代码提示 (Visual Studio Code Tips)
Using Visual Studio Code as editor, you can get component names via autocomplete using CTRL+Space (or using your combinations).
使用Visual Studio Code作为编辑器,您可以使用CTRL+Space (或使用您的组合)通过自动完成功能来获取组件名称。


 615
615

 被折叠的 条评论
为什么被折叠?
被折叠的 条评论
为什么被折叠?
 到【灌水乐园】发言


