


 本文反驳了关于wordclouds过时的看法,指出其在文本分析和展示中的优雅与创意。文章强调,通过Python,创建wordclouds其实非常简单。
Wordclouds are often mislabeled as being clunky and old-fashioned. In reality, they can be elegant and creative communication methods of text, both as exploratory analysis but also in presentation. Additionally, they’re very easy to create in Python —so let’s get into it!
Wordcloud通常被错误地标记为笨拙且过时的。 实际上,它们既可以作为探索性分析,也可以作为表示形式的优雅,创造性的文本交流方式。 此外,它们很容易在Python中创建-因此让我们开始吧!
Let’s copy-paste the content from this COVID-19 article and paste it into a text file named covid_article.txt. The content of this text file will be stored into a variable named content.
让我们复制并粘贴此COVID-19文章中的内容,并将其粘贴到名为covid_article.txt的文本文件中。 该文本文件的内容将存储到名为content的变量中。
content = open("covid_article.txt").read()In order to make sure one word the same as another, we need to remove punctuation and capitalization, such that ‘hello’ is the same as ‘Hello’, which is the same as ‘hello!’. We will also need to make sure that the characters are all alphabetic — we can accomplish this with list comprehension (alternatively with regular expressions).
为了确保一个单词与另一个单词相同,我们需要删除标点符号和大写字母,以使“ hello”与“ Hello”相同,而与“ hello!”相同。 我们还需要确保所有字符都是字母-我们可以通过列表理解(或者使用正则表达式)来实现。
import string
for punc_char in string.punctuation:
    content = content.replace(punc_char,'') #remove punctuation
content = content.lower() #make lowercase
content = ''.join([char for char in content if char in ' abcdefghijklmnopqrstuvwxyz']) #only alphabetic characters
There are noticeably some small things that need to be fixed, but generally this is just a string of words and we’ll go ahead for now. We’ll need to import the wordcloud module (install using pip install wordcloud) and the matplotlib library to display the image.
显然有一些小问题需要修复,但是通常这只是一句话,我们现在继续。 我们需要导入wordcloud模块(使用pip install wordcloud )和matplotlib库来显示图像。
from wordcloud import WordCloud
import matplotlib.pyplot as plt
We can construct a wordcloud with simple parameters using WordCloud. Three parameters are used — max_font_size, which indicates the maximum size of a word; max_words, which is the maximum number of words displayed; and background_color, which sets the color of the background. Matplotlib can be used to set the figure size, to display the wordcloud, and to not display the axes.
我们可以使用WordCloud使用简单的参数构造一个wordcloud。 使用了三个参数max_font_size ,它指示单词的最大大小; max_words ,这是显示的最大单词数; 和background_color ,设置background_color的颜色。 Matplotlib可用于设置图形大小,显示文字云和不显示轴。
plt.figure(figsize=(20,9))
wordcloud = WordCloud(max_font_size=50, max_words=1000,
                      background_color="white").generate(content)
plt.imshow(wordcloud, interpolation="bilinear")
plt.axis("off")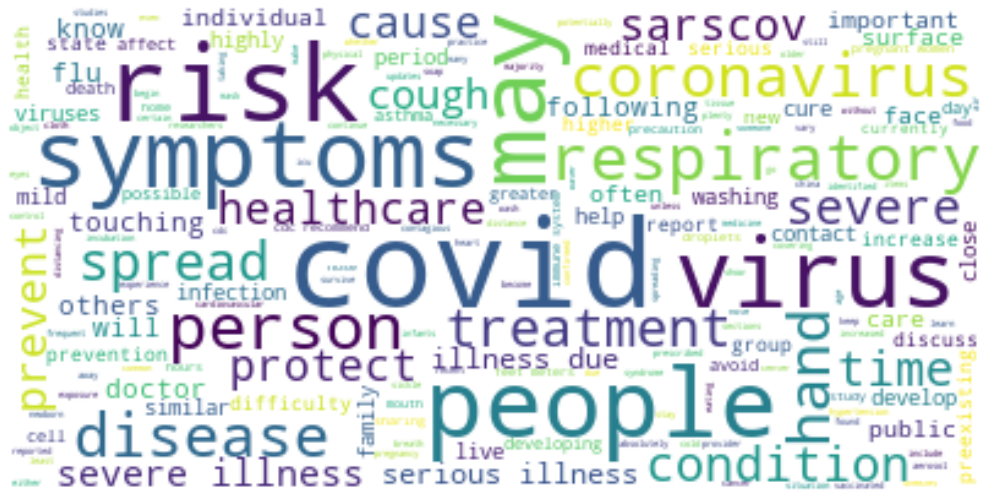
It doesn’t look great, but it has lots of information we would expect to see, with each word’s size determined by the number of times it occurs in the text. Note that so-called ‘stop-words’, or common words like ‘a’, ‘I’, or ‘and’ are excluded from the wordcloud by default. You can write additional filters to remove other words.
它看起来不太好,但是它有很多我们希望看到的信息,每个单词的大小取决于它在文本中出现的次数。 请注意,默认情况下,单词云中不包含所谓的“停用词”或常见词,例如“ a”,“ I”或“ and”。 您可以编写其他过滤器以删除其他单词。
Let’s try to change the color. We need to create a function, color_func(), which returns a HSL color, which is another method of representing a color (next to RGB). This one returns a random color somewhere between gray and red.
让我们尝试更改颜色。 我们需要创建一个函数color_func() ,该函数返回HSL颜色,这是表示颜色(RGB旁边)的另一种方法。 该颜色返回一种介于灰色和红色之间的随机颜色。
import random
def color_func(**kwargs):
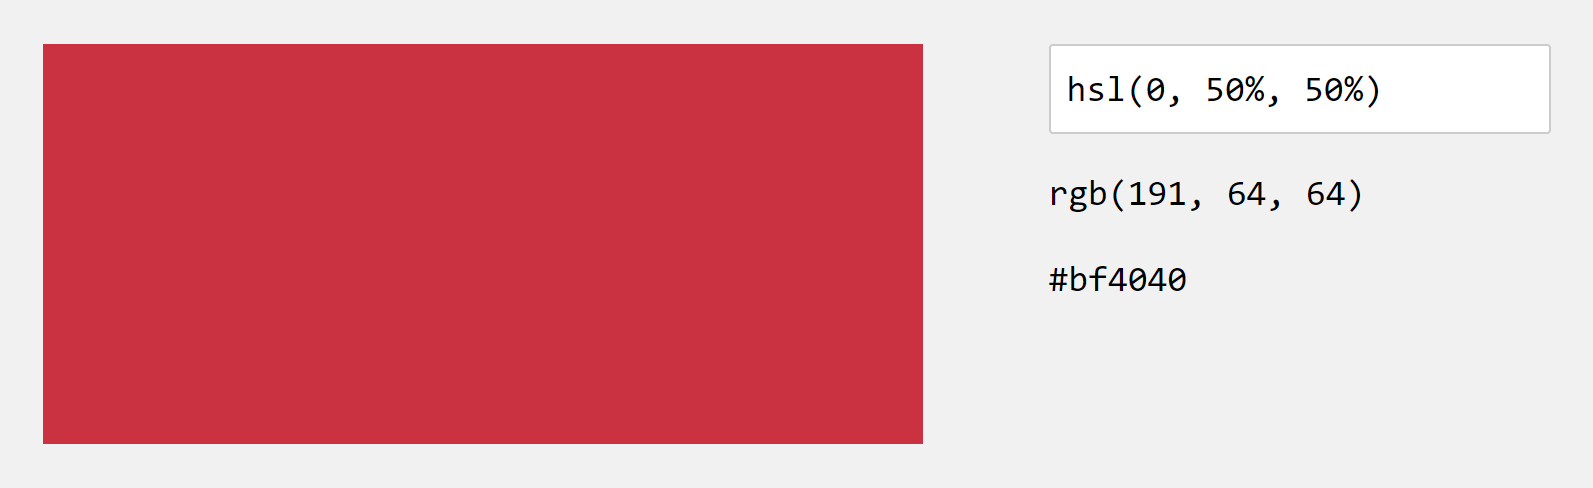
return "hsl(0, {}%, 50%)".format(random.randint(0, 50))You can get familiar with HSL (Hue, Saturation, Lightness) here. For reference, this is the value of hsl(0,50,50).
您可以在此处熟悉HSL(色调,饱和度,亮度)。 作为参考,这是hsl(0,50,50)的值。
To apply the color function, use the following code to convert the wordcloud into an array and apply the recoloring functions.
要应用颜色功能,请使用以下代码将wordcloud转换为数组并应用重新着色功能。
plt.figure(figsize=(20,9))
wordcloud = WordCloud(max_font_size=50, max_words=1000,
                      background_color="white").generate(content)
default_colors = wordcloud.to_array() #convert to array for recoloring
plt.imshow(wordcloud.recolor(color_func=color_func), #apply recoloring using color function
           interpolation="bilinear")
plt.axis("off")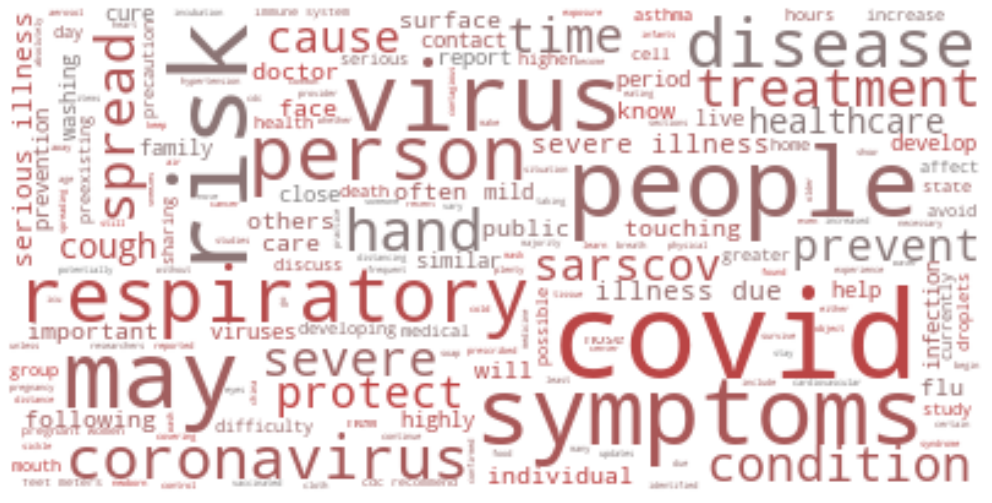
Alternatively, we can redefine the color_func function to take in a word parameter and check if it is in a list of the most common words, top_words. In this case, top_words is a collection of all words in the text that occur more than twenty times. If the word is a top word, a random red value is returned. Otherwise, the word is colored as gray-black.
或者,我们可以重新定义color_func函数以接收word参数,并检查它是否在最常见单词top_words的列表中。 在这种情况下, top_words是文本中出现二十次以上的所有单词的集合。 如果单词是最重要的单词,则返回一个随机的红色值。 否则,该单词将显示为灰黑色。
def color_func(word,**kwargs):
    if word in top_words:
        return "hsl(0, {}%, 50%)".format(random.randint(50, 100))
    else:
        return "hsl(0, 0%, {}%)".format(random.randint(0, 30))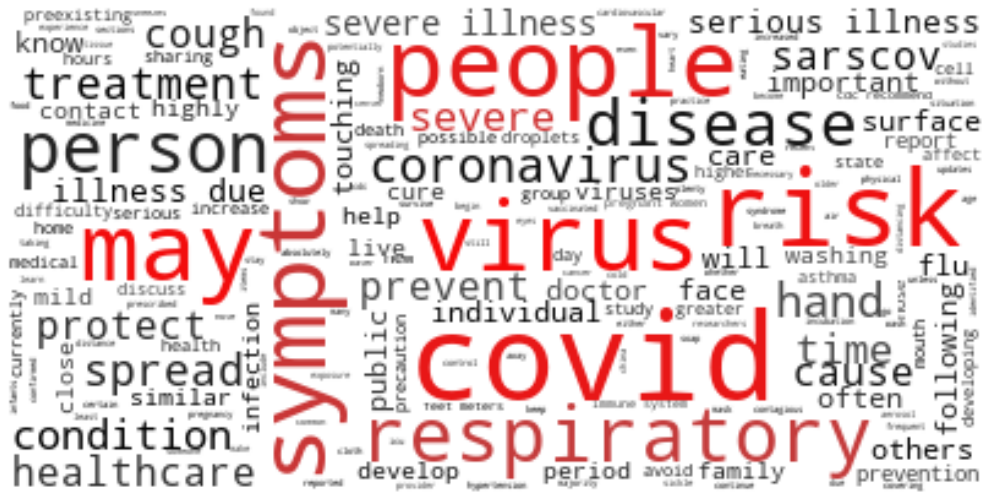
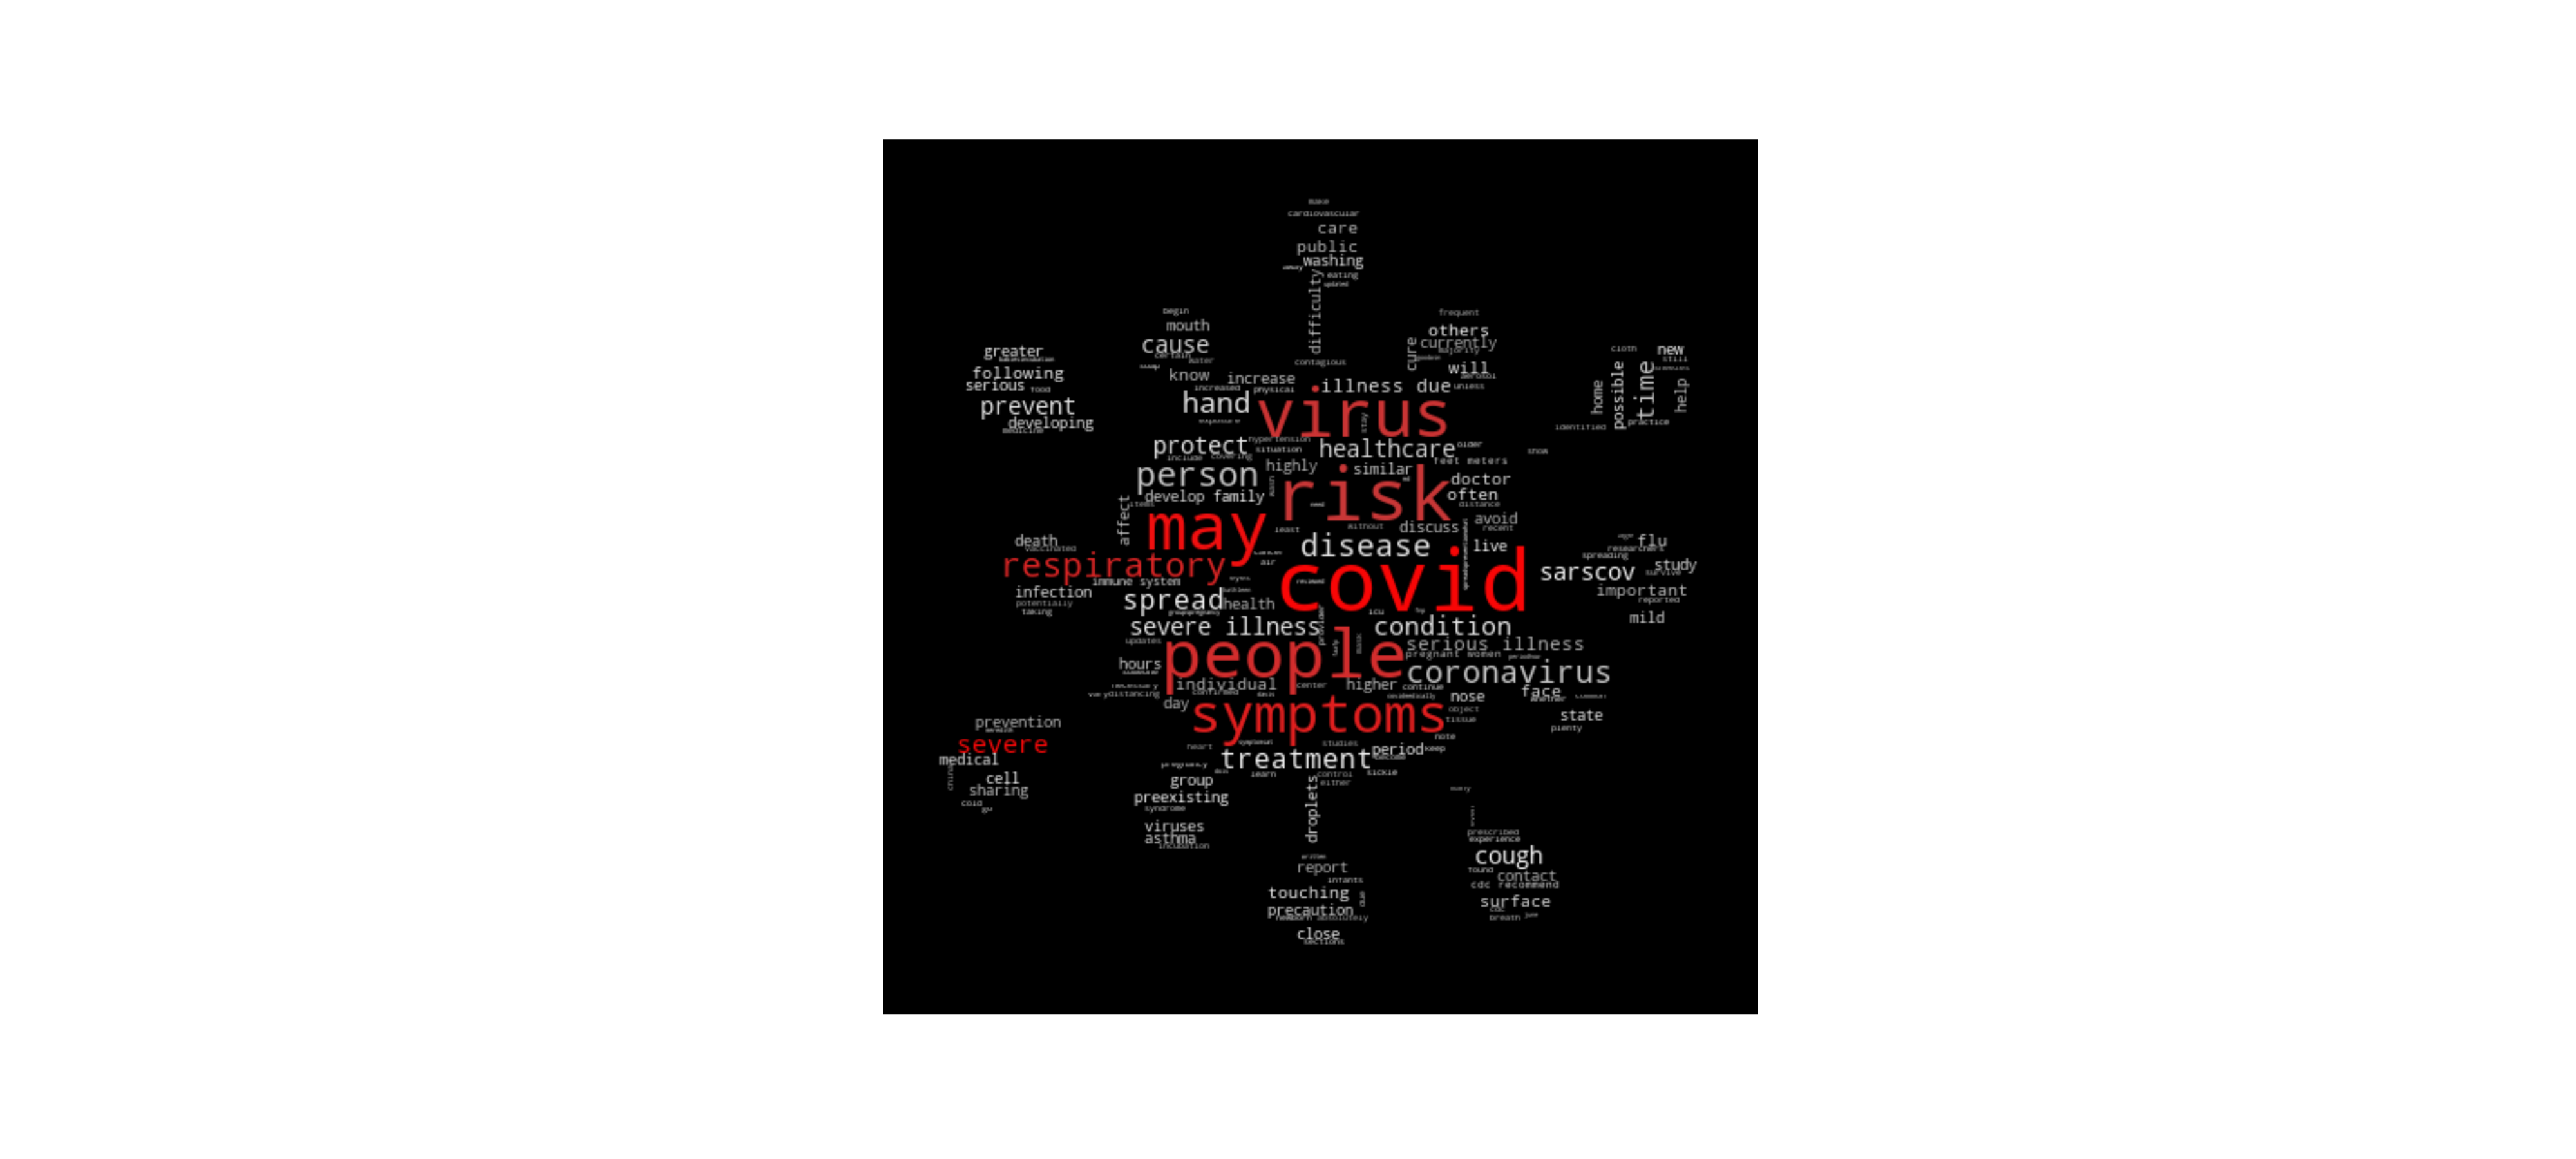
Let’s make this word cloud in the shape of a virus. First, we’ll need to find an image of the virus — you can find this on any search engine. Ideally, the image will have a white background to create a ‘mask’.
让这个词以病毒的形式覆盖。 首先,我们需要找到该病毒的图像-您可以在任何搜索引擎上找到它。 理想情况下,图像将具有白色背景以创建“蒙版”。

The mask needs to be read through PIL (Python Imaging Library) and converted into an array through NumPy. We’ll need to import these.
掩码需要通过PIL(Python图像库)读取,并通过NumPy转换为数组。 我们需要导入这些。
import numpy as np
from PIL import Image
Once the mask has been created, it can be used in the WordCloud with the inclusion of a parameter mask=mask. This example also uses coloring functions from the example above.
创建mask ,可以在WordCloud使用包含参数mask=mask 。 本示例还使用上例中的着色功能。
mask = np.array(Image.open("filepath/image.png")) #new stuff: create the mask


plt.figure(figsize=(20,9))
wordcloud = WordCloud(max_font_size=50, max_words=1000,
                      mask=mask, #use an array mask
                      background_color="white").generate(content)
default_colors = wordcloud.to_array()
plt.imshow(wordcloud.recolor(color_func=color_func),
           interpolation="bilinear")
plt.axis("off")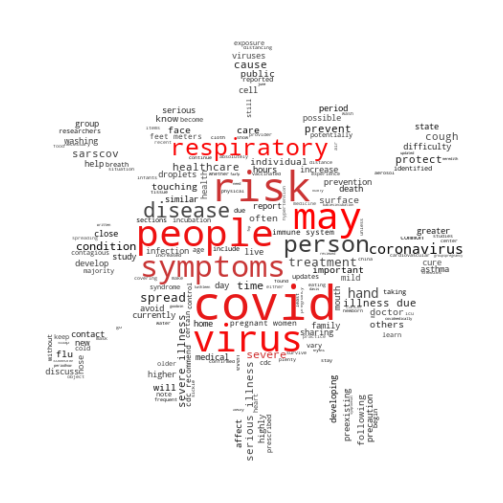
Nice! Wordcloud does most of the heavy lifting for us in adapting to the mask. With our particular image, larger words are pushed towards the center and smaller ones pushed to the outside, which provides a nice hierarchy-style visualization.
真好! Wordcloud在适应面具方面为我们完成了大部分繁重的工作。 对于我们的特定图像,较大的单词被推向中心,较小的单词被推向外部,这提供了很好的层次结构样式的可视化。
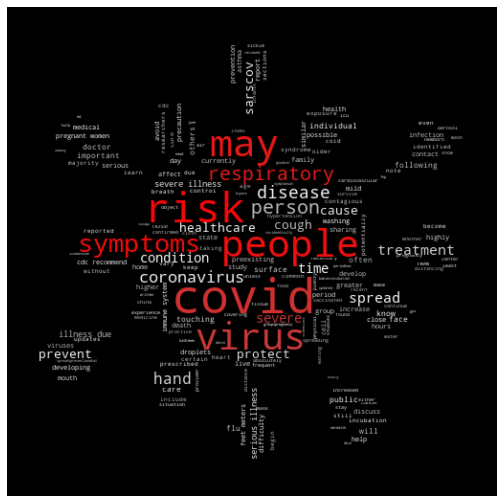
Alternatively, we can change the background to ‘black’ and the color of the text to gray-white for an alternative visualization.
另外,我们可以将背景更改为'black' ,并将文本的颜色更改为灰白色,以实现另一种可视化效果。
Some additional ideas/pointers:
一些其他想法/指标:
- Increasing the number of words can help better outline the mask. 增加单词数量可以帮助更好地勾勒出蒙版的轮廓。
The outputs of these word clouds can often be grainy. To export a high-quality image, use
plt.savefig(“filepath/name.png”, dpi=600), where DPI is ‘dots per inch’. 600 DPI is a good balance between quality and time to process.这些词云的输出通常可能是粒状的。 要导出高质量的图像,请使用
plt.savefig(“filepath/name.png”, dpi=600),其中DPI是“每英寸点数”。 600 DPI是质量和处理时间之间的良好平衡。
- With the knowledge that larger area is usually populated with larger words, try creating your own masks in photoshop/PowerPoint to express a hierarchy. 了解到较大的区域通常填充较大的单词后,请尝试在photoshop / PowerPoint中创建自己的蒙版以表示层次结构。
Using coloring functions, you can highlight important words and explore other
**kwargsoffered, likefont_size,position, andorientation. For example, words can be shaded proportionately to their size, or by their position in the image (for example to color words by their location in the image).使用着色功能,您可以突出显示重要的单词并浏览其他提供的
**kwargsfont_size,例如font_size,position和orientation。 例如,单词可以按照其大小或在图像中的位置成比例地着色(例如,通过单词在图像中的位置为单词上色)。
Thanks for reading!
谢谢阅读!


 被折叠的 条评论
为什么被折叠?
被折叠的 条评论
为什么被折叠?
 到【灌水乐园】发言


