At WWDC 2020, Apple announced a lot of new changes for the SwiftUI framework. One of the big changes was the new state management property wrapper called @StateObject. In this article, I will explain the workings of @StateObject property wrapper and how it is different from @ObservedObject.
在WWDC 2020上,Apple宣布了SwiftUI框架的许多新更改。 最大的变化之一是名为@StateObject的新状态管理属性包装器。 在本文中,我将说明@StateObject属性包装器的工作原理以及它与@ObservedObject的区别。
A video version of this article is also available below:
以下还提供了本文的视频版本:
计数器与ObservedObject (Counter with ObservedObject)
The best way to learn any new feature is to build the simplest example. For that reason we are going to create a simple Counter app, where a counter value can be incremented by pressing a button.
学习任何新功能的最佳方法是构建最简单的示例。 因此,我们将创建一个简单的Counter应用程序,在其中可以通过按下按钮来增加计数器值。
We implement the Counter class as an ObservableObject, which consists of a simple property called value. The value property is also marked with @Published property wrapper, indicating that when the property changes it will notify the observers.
我们将Counter类实现为ObservableObject,它由一个名为value的简单属性组成。 value属性也用@Published属性包装器标记,指示该属性更改时将通知观察者。
The Counter object is initialised inside the CounterView using the @ObservedObject property wrapper. This means it is listening to the changes to the Counter object. This is shown in the implementation below:
使用@ObservedObject属性包装器在CounterView内部初始化Counter对象。 这意味着它正在侦听Counter对象的更改。 这在下面的实现中显示:
Next, we use the CounterView inside our main view, ContentView.
接下来,我们在主视图ContentView中使用CounterView。
If you press the “Increment Counter” button the counter will simply increments and displays the new value on the screen. Nothing special about it.
如果按下“递增计数器”按钮,计数器将简单地递增并在屏幕上显示新值。 没什么特别的。
To make things interesting, let’s add a local state counter inside the ContentView as shown below:
为了使事情变得有趣,让我们在ContentView内部添加一个本地状态计数器,如下所示:
The count property inside ContentView is decorated with @State property wrapper, indicating that this is a local state of this view. Once, we change the local state the view is rendered again.
ContentView内部的count属性由@State属性包装器装饰,指示这是此视图的本地状态。 一次,我们更改视图的局部状态。
One thing I have observed is that just by changing the state value does not cause the view to be rendered. You have to use the state property and display it on the screen for the render to be called.
我观察到的一件事是,仅通过更改状态值不会导致视图被渲染。 您必须使用state属性并将其显示在屏幕上才能调用渲染。
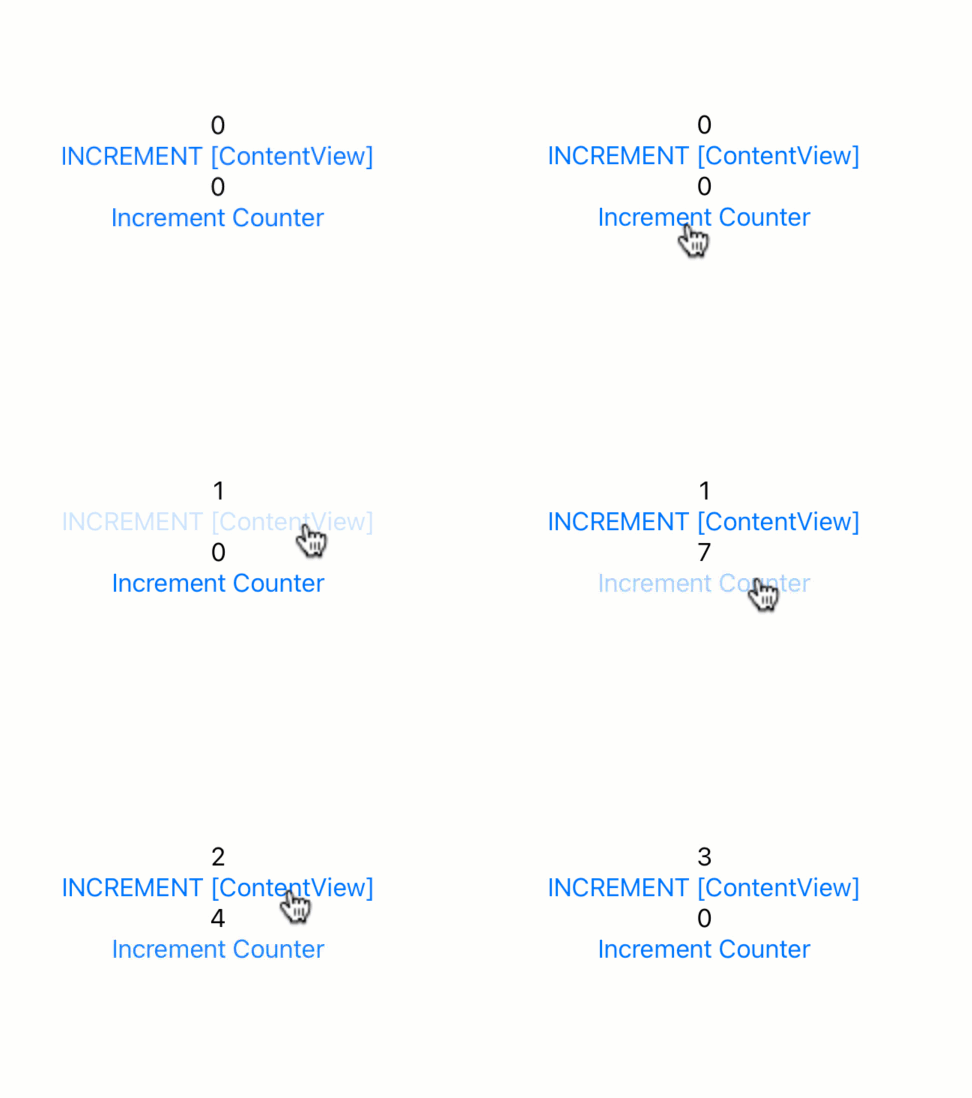
If you run the app and increment the Counter in the Counter view and then increment the count in the ContentView, you will notice that as soon as you increment the count in the ContentView, the value of the CounterView is reset.
如果运行该应用程序并在“计数器”视图中增加“计数器”,然后在ContentView中增加计数,您会注意到,一旦在ContentView中增加计数,就将重置“ CounterView”的值。

This is a problem! The reason is that every time you change or update the local count in the ContentView, it renders the view again. The rendering instantiate the CounterView, creating a new instance of Counter class.
这是个问题! 原因是每次您更改或更新ContentView中的本地计数时,它都会再次呈现该视图。 呈现实例化CounterView,创建Counter类的新实例。
To fix this issue Apple introduced a new property wrapper called @StateObject. State object wrapper will persist the value during the renders. Update your CounterView code to use @StateObject as shown below:
为了解决此问题,Apple引入了一个名为@StateObject的新属性包装器。 状态对象包装器将在渲染期间保留该值。 更新您的CounterView代码以使用@StateObject,如下所示:
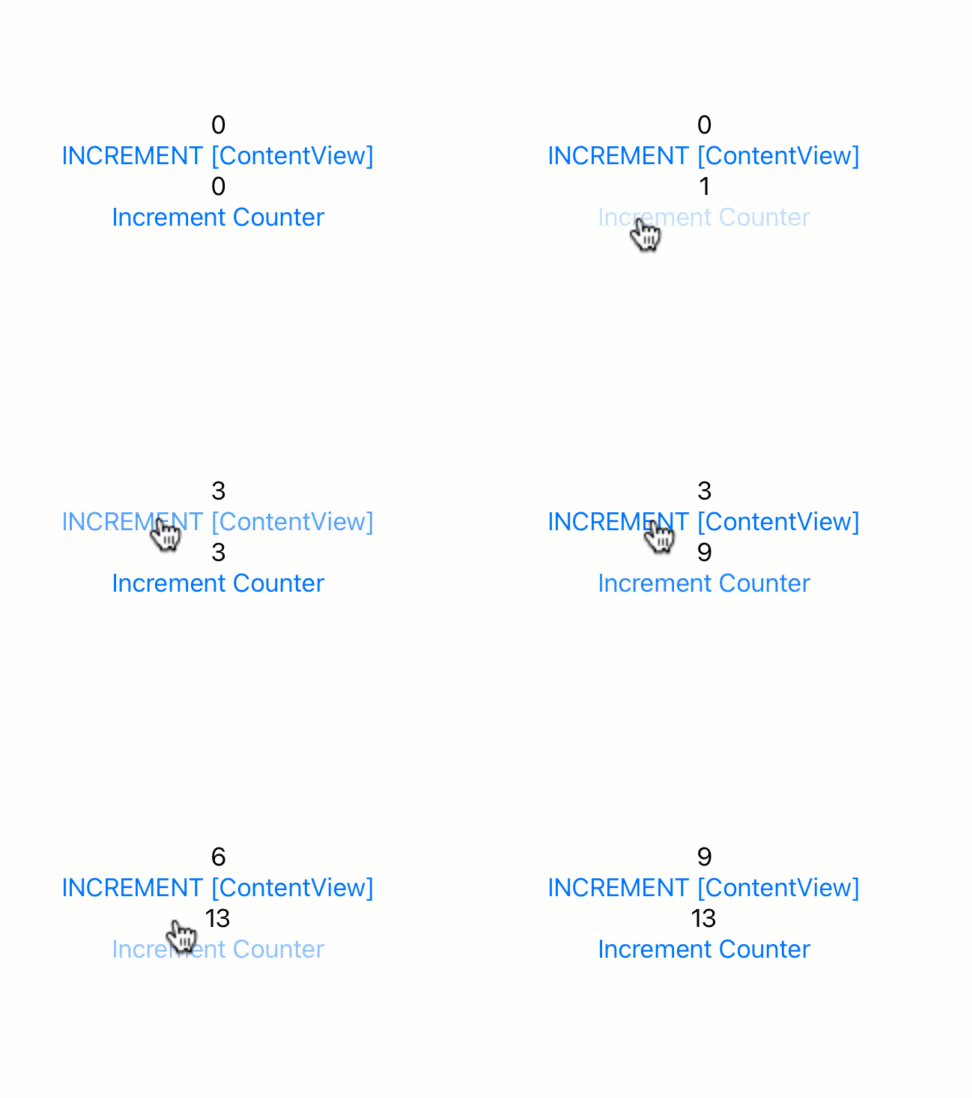
Now if you run the application and update the local count in ContentView, you will see that the @StateObject is not reset and the value persist between renders.
现在,如果您运行该应用程序并更新ContentView中的本地计数,您将看到@StateObject未被重置并且该值在渲染之间保持不变。

I am planning to write more articles on SwiftUI. If you want to support my work then check out my course on SwiftUI. The link is in the references section below.
我打算在SwiftUI上写更多文章。 如果你想支持我的工作,然后看看我当然对SwiftUI。 该链接位于下面的参考部分。
I hope you have enjoyed this article!
希望您喜欢这篇文章!
翻译自: https://medium.com/swlh/understanding-stateobject-in-swiftui-for-ios-14-98c68310154a


 921
921

 被折叠的 条评论
为什么被折叠?


